Hello, here you can find out all about how to continuous join Sunburst (or starburst) granny squares together also known as Continuous Join As You Go (CJAYG).
Continuous Join as you go or CJAYG for Sunburst Granny Squares or crochet circles
What does this actually mean?
Well, exactly what it says.
If you’ve sat and made a lot of Sunburst/ Starburst Granny squares, and you want to join them together with one colour, this is a great way to do it – continuously………So only 2 ends to sew in!
If you need to make the Circles to begin with – you are in luck – I have a handy tutorial.
Learn how to make a Starburst/ Sunburst Granny Square here>>>
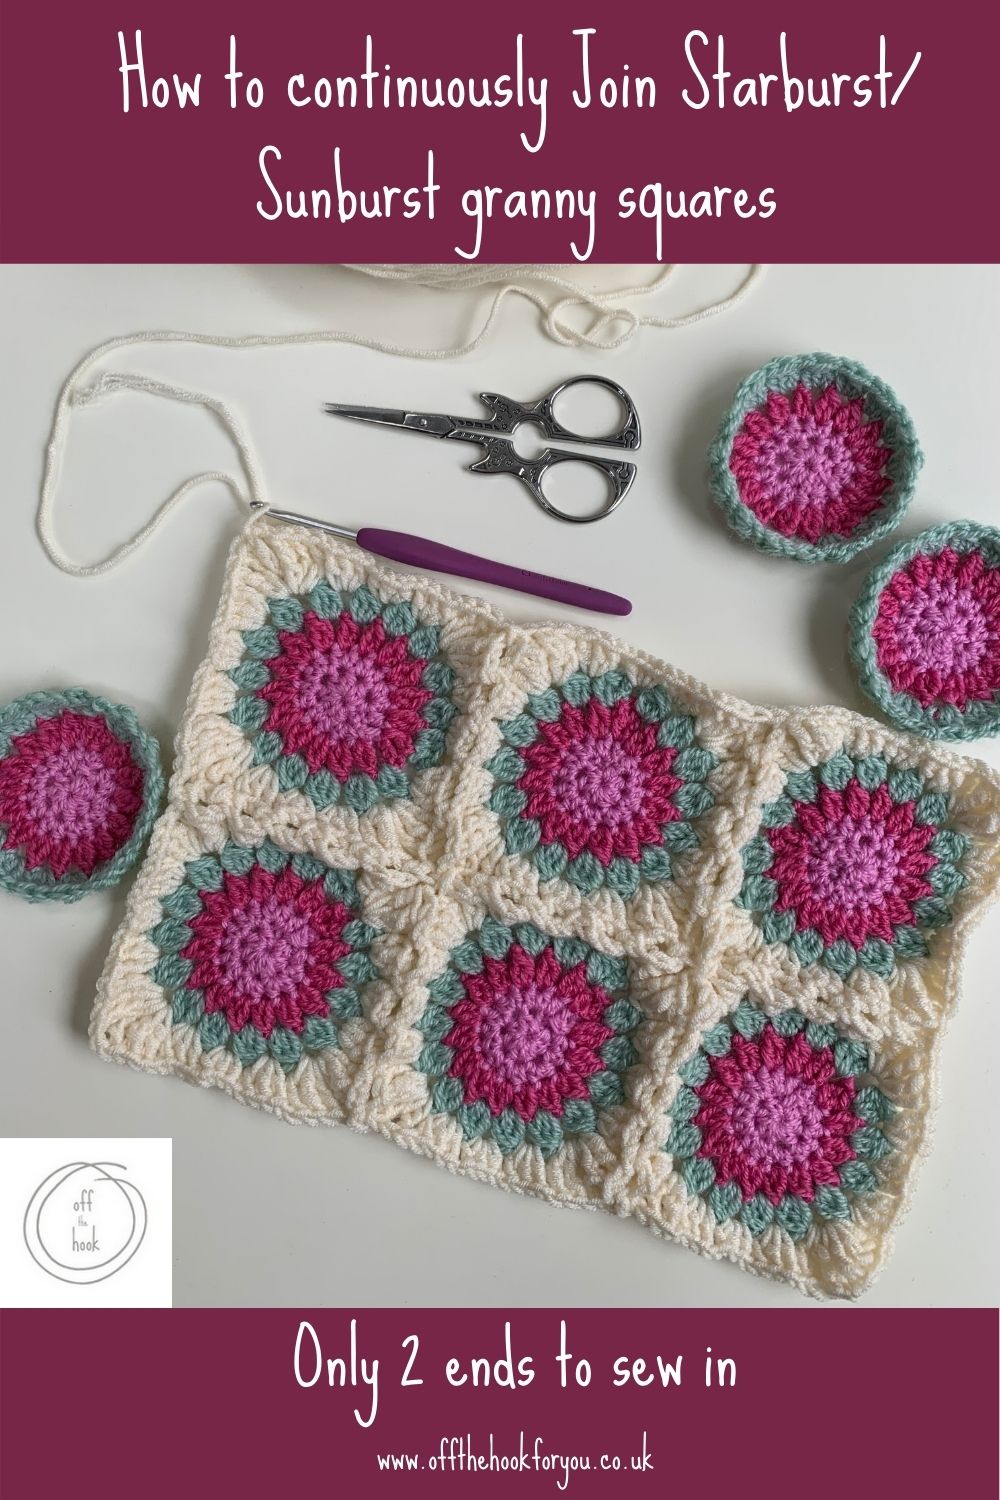
If you want to save this post for later – pin it using the picture below
Why use the Continuous Join As You Go for granny squares crochet method
- Joining granny squares together by crocheting
- Only 2 ends per project to sew in at the joining stage!
- When you are doing the outside “round” of every square in one colour.
- Quick and methodical method.
- Can be done using “granny” technique or Solid join for circles, squares and more.
- Once you learn the Continuous joining method, you can apply this to anything!
>>>Find about Continuously joining Hexagons here
>>>Find out about Continuously Joining Squares here
The Starburst Granny blanket I made, I crocheted together, using single crochet as I didn’t know about continuously joining with crochet, and boy do I wish now I’d joined them continuously now after learning this way! There were so many ends to sew in……

The starburst blanket took ages, and although I adore the blanket I made, I could have saved myself so much time crocheting and sewing, by doing CJAYG or Continuous Join for granny squares.
These blankets however, I’d learnt CJAYG, and crocheted them together saving hours of time.


When can’t you use Continuous Joining for Granny Squares
- When you don’t know the order of your circles /squares/ hexagons/ triangles decided before you start joining (You’ll need them laid out first)
- You want to join with multiple colours.

How to Join Granny Squares Continuously – (the writing bit)
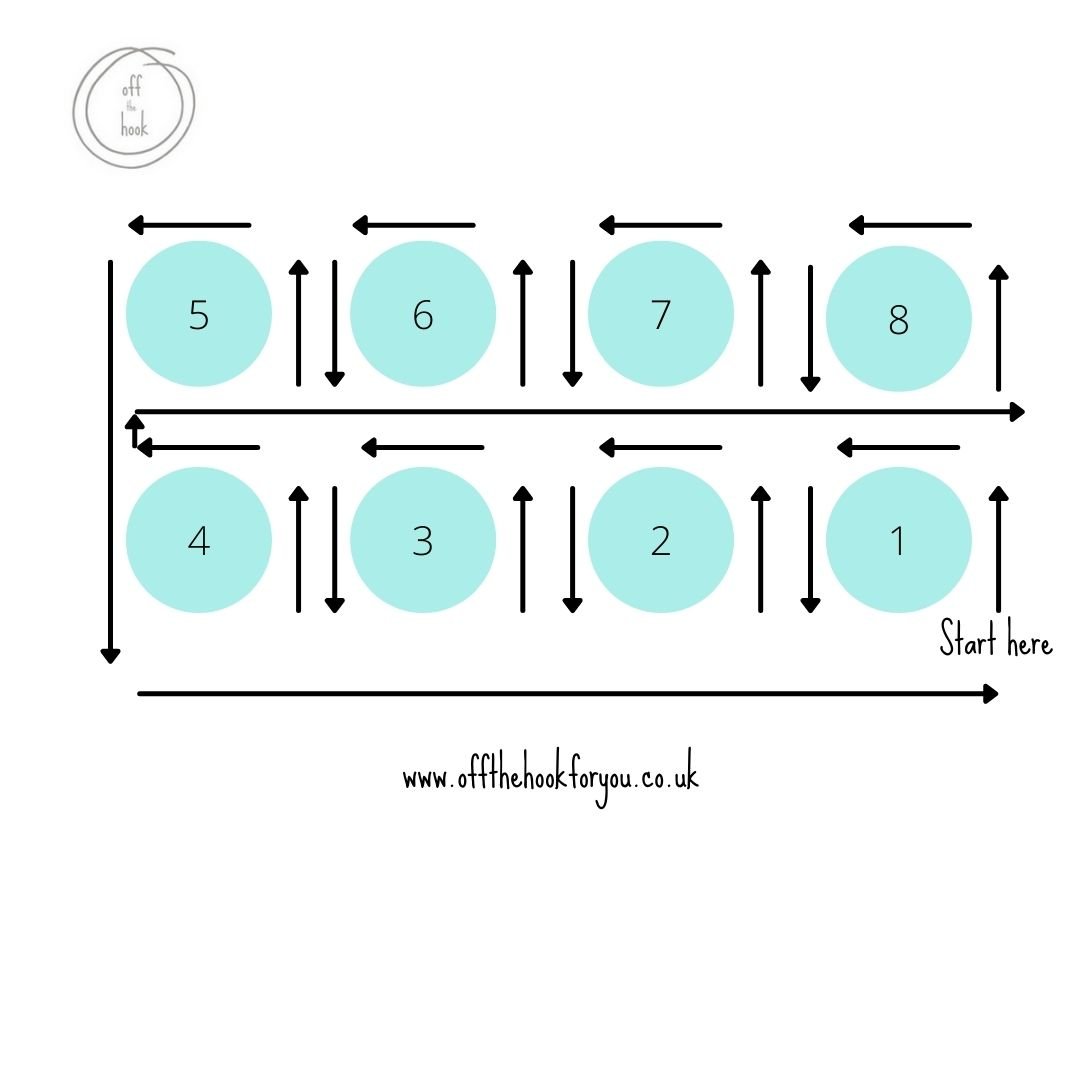
You start in one corner, and work all the way around in up and downs to the next corner.
The above picture describes where you are going to crochet, but i’ll explain it below too.
Or you can jump to the video here.
To understand how to continuously join circles, it’s a bit more complicated than joining squares together. First you must understand how a circle becomes a square.
How to turn a crochet circle into a square
For my Starburst/ Sunburst granny squares, they have 16 groups of stitches as the final “round” of the circle (Round 4).

This means that every “side” needs to be a repeat of 4 (16 divided by 4 – as a square has 4 sides).
Unlike a “Traditional Granny Square” its not as easy as 3DC ch 1, then 3 dc ch 2 3DC in the corners.
This is because we use the “height” of the stitches (the number of Yarn Overs), so give us the square.
Put simply, the wider bits of the circle need smaller stitches, and the corners need longer stitches. This is the same for any circle regardless of whether you are continuously joining!
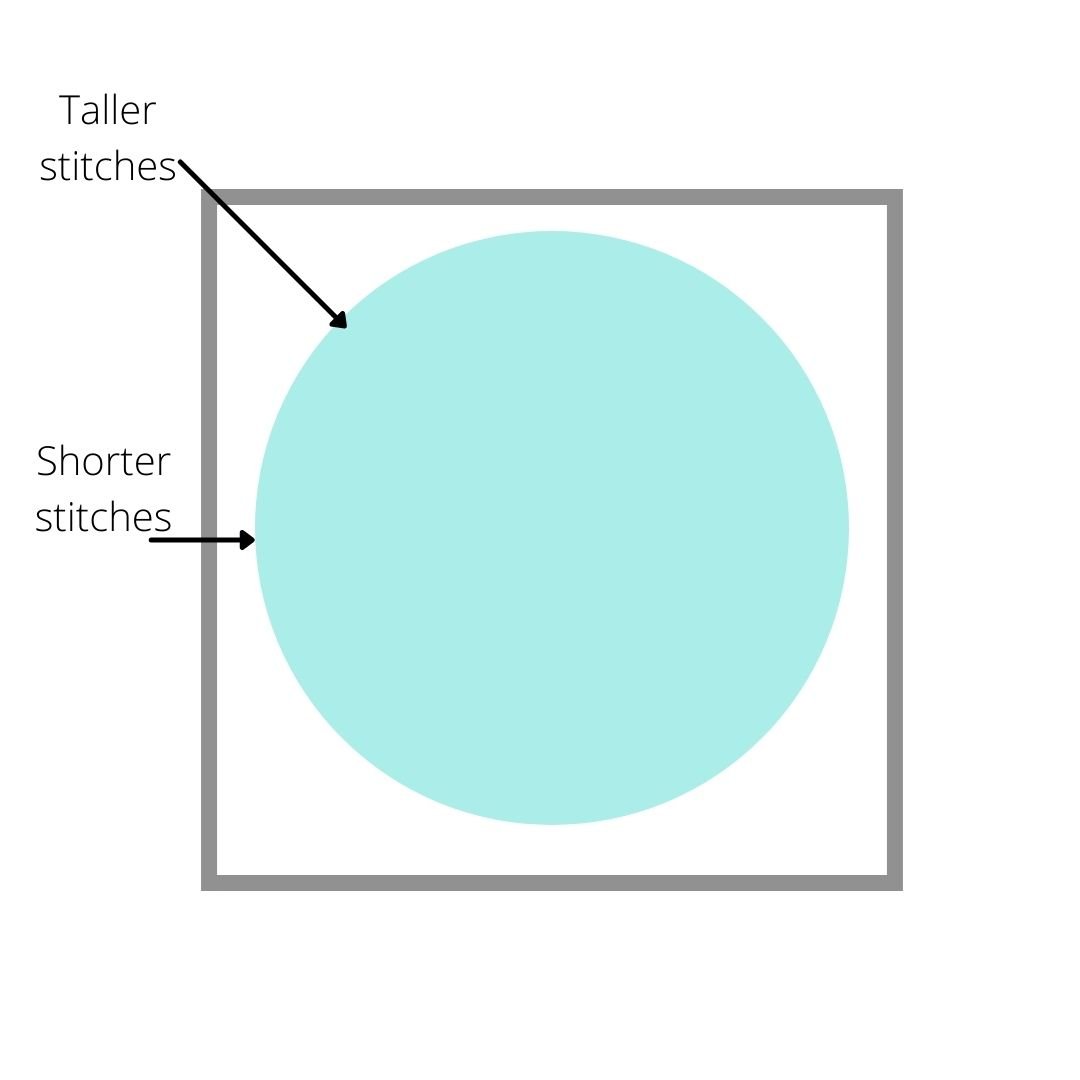
To turn any circle into a square.

Each side needs this repeat of stitches to turn the circle into a square.
So on this case (getting smaller), the corners use Treble Crochet, then Double Crochet, then Half Double Crochet, (getting bigger) Double crochet, Treble Crochet in the corners again.
Start in a corner (Groups of 3 separated by chain 1):
- Treble crochet
- Double crochet
- Half Double crochet
- Double crochet
- Treble crochet
Equals one side complete. Then chain 2 as a corner (same a normal granny square)
But for continuous join, you’ll only be doing these on certain sides in a specific order.
How to Continuous Join Crochet Circles
Jump to the video tutorial here.

- You need to complete 3 sides of square 1. But, only do 1 set trebles (US) in each of the bottom corners where you are leaving the edge.
i.e. ch4, 2Tr, ch1, 3DC, ch1, 3HDC, ch1, 3DC, ch1, 3Tr ch2 3tr, ch1, 3DC, ch1, 3HDC, ch1, 3DC, ch1, 3Tr ch2 3tr, ch1, 3DC, ch1, 3HDC, ch1, 3DC, ch1, 3Tr ch2. Now to join square 2
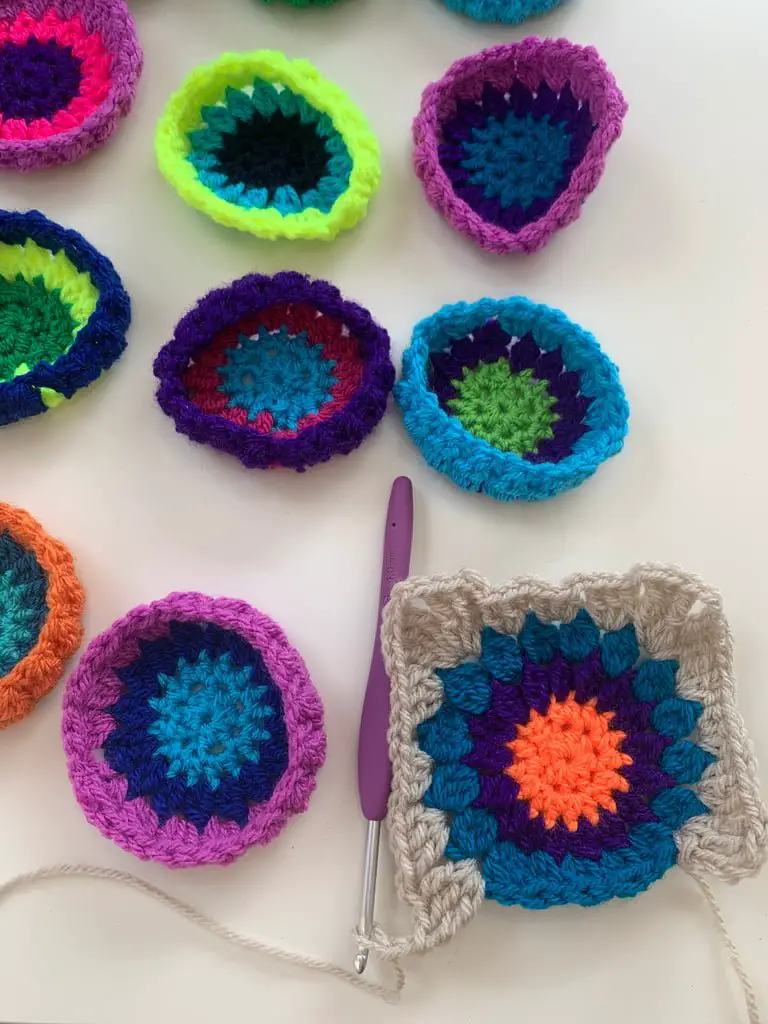
2. At this point pick up square 2. This will be joined to the 3rd side you’ve just finished for square 1.
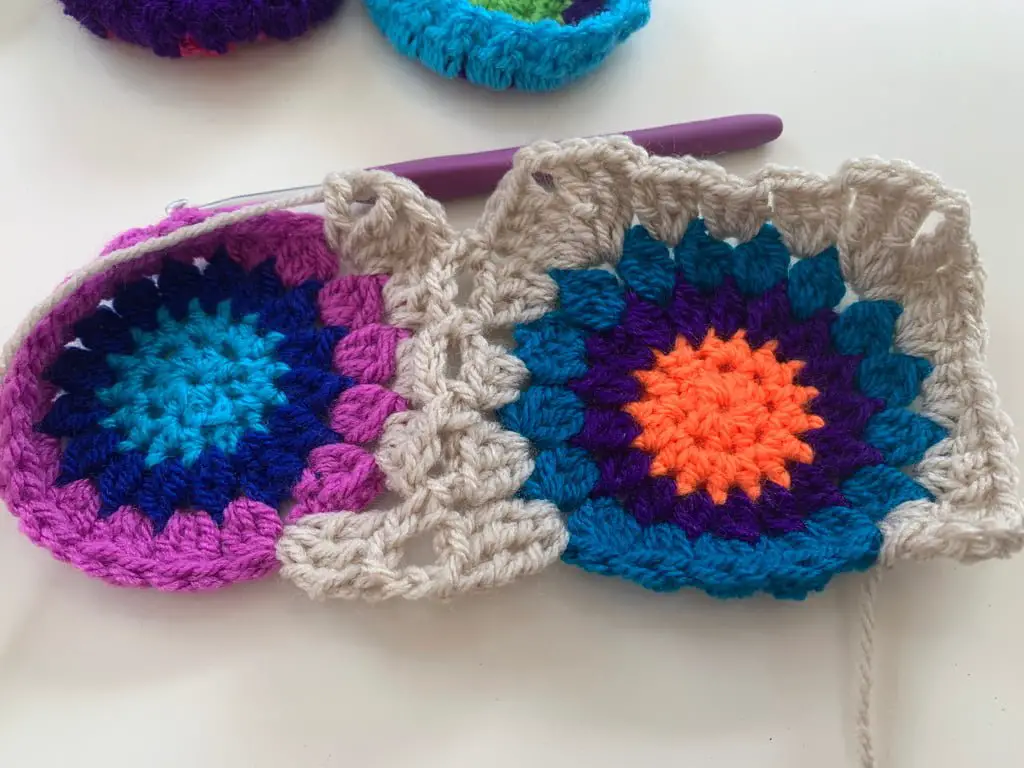
For granny squares, Slip stitch into the next chain space – do not do the chains in between the groups. Remember to do the stitches in the following order: Tr, DC, HDC, DC, Tr
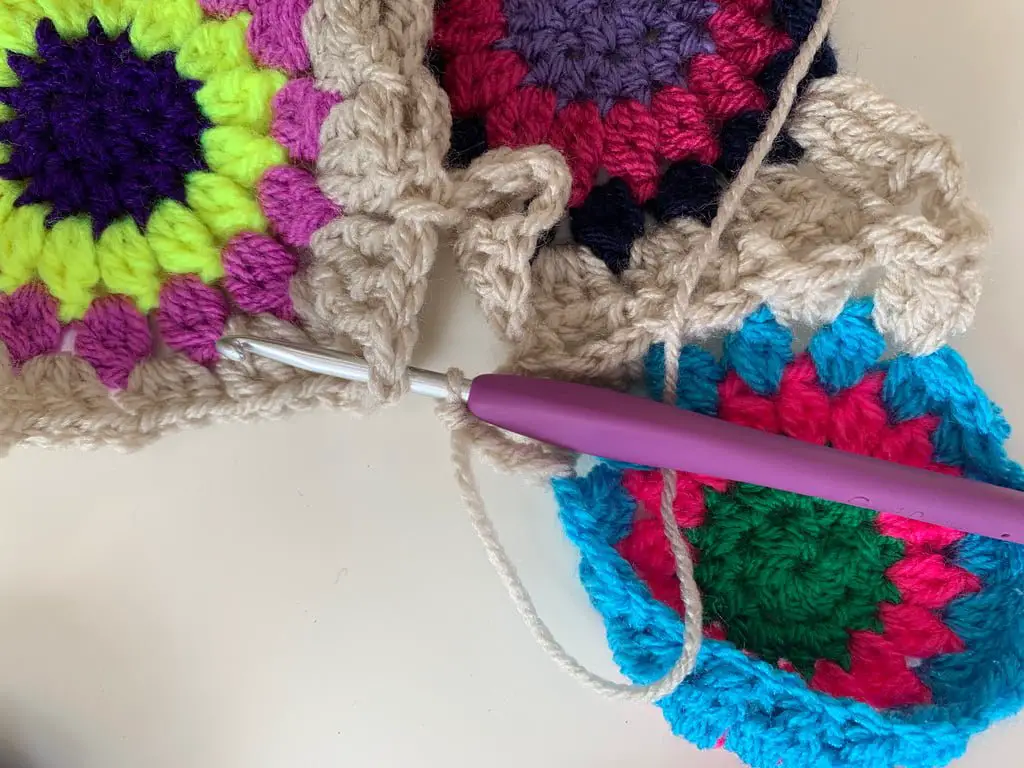
3. When you reach the top corner, where squares 2 and 1 join, work around circle 2 as normal until 3 sides are complete. DO NOT slip stitch the corners together (This is picked up later). Continue working the order, Tr, DC, HDC, DC, Tr.
Work around 3 sides for each square you are joining in the row as above until the last square in joined. For the last square (circle) stop at side 2 (see picture below).
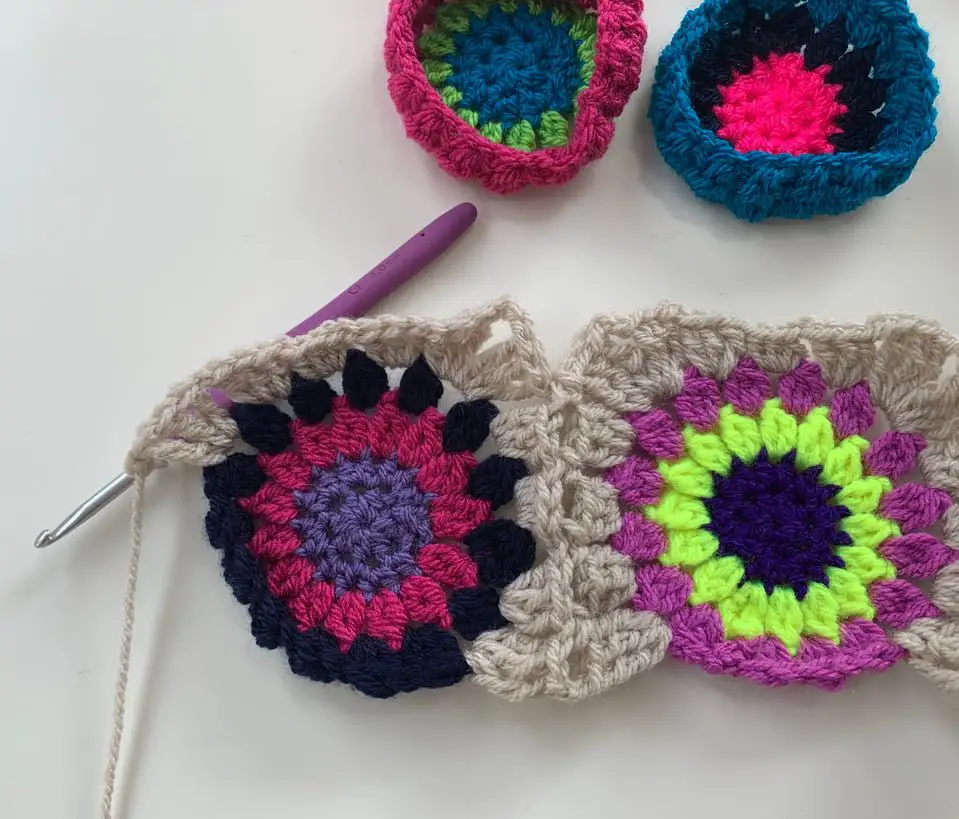
Now you are going to join the bottoms of all the circles in the next row- only the bottoms.
NOTE: These are worked backwards in order, so row 1 you work left to right, Row 2 (and any other row) you’ll be joining the circles Right to Left. (Jump to the Diagram here)
Same stitch order, Tr, DC, HDC, DC, TR, but at this point you’ll need to join one of the corners (see below), with a slip stitch, before adding the next circle, and doing the same stitch order.
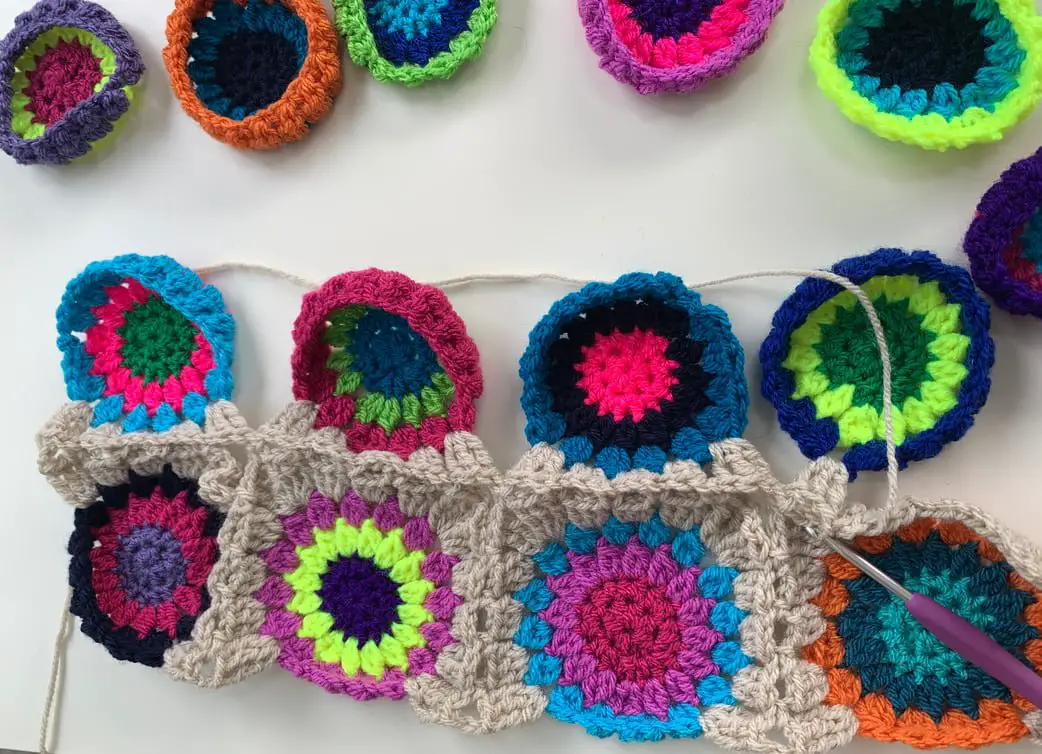
Only the bottoms are joined, each one with only 1 set of trebles per corner (see above).
When adding the final circle of the round, 3Tr, ss into the corner of the square from the previous round, then 3Tr to complete the corner.
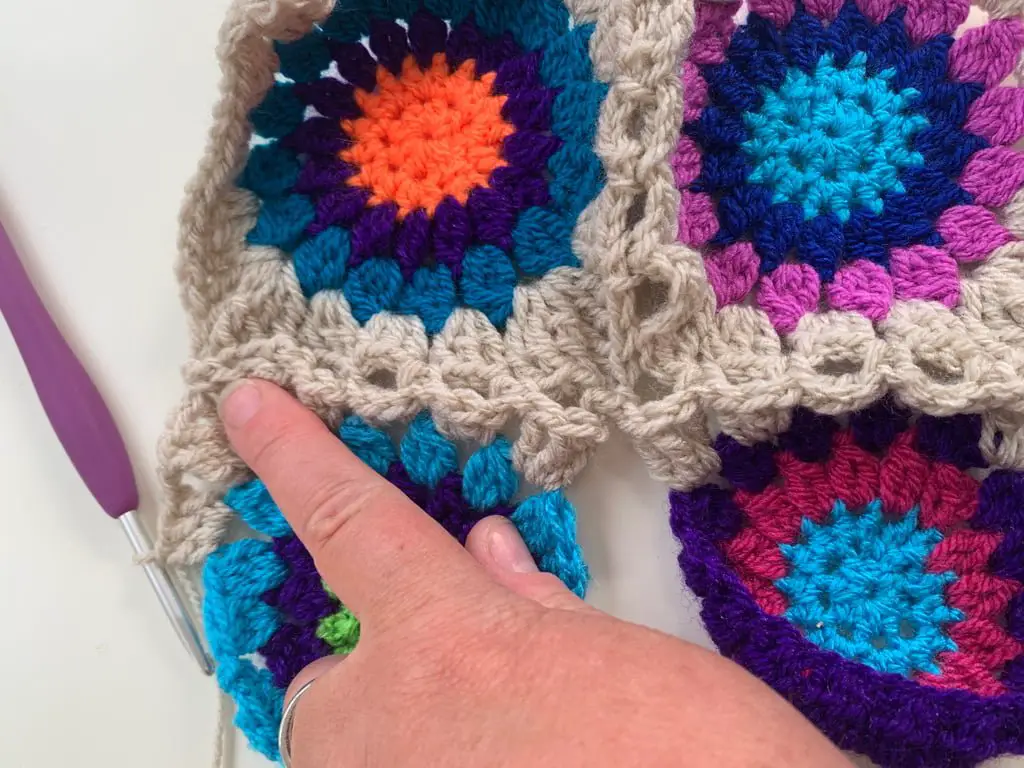
For the first square in row 2, work the next 3 sides as normal (just like square 1) – this will be a complete square.
Join the next circle, by slip stitching together just as you did at the beginning of row 1 when joining squares 1 to 2.
Notes
- If only joining 2 rows, make sure you SS the top edge trebles together – in the corners. If joiningg more rows not leave them open to join the next round, (Just like on row 1)
- If joining more than 2 rows, complete as per row 2, leaving the top corners not joined – you’ll catch these when joining row 3.
When working the final edge, carry on working around making sure you do the extra set of trebles in the corners that need them.
Video – Continuous joining of granny squares
This is a time stamped video, but you need to click through and watch on YouTube to see them and be able to click them. I’d love for you to hit subscribe while you are there.
>>>Watch the video on YouTube with the Timestamps
If you learnt a lot from this video – lets expand your knowledge with Continuously joining crochet Hexagons now
Thanks for joining me, hopefully you’ll have a blanket/ cushion made, joined continuously with only 2 ends to sew in now!
If you want to save this for later, please Pin this for later here.

Join me at Off The Hook For You to share your crochet!
Thanks for visiting – I’d love to stay connected with you so please sign up for my email list where a free PDF pattern is waiting for you (just so you can see what my PDF patterns are like).
Finished one of my crochet pattern makes? I’d love to see it and so would the world, so get sharing! You can find me in the following ways:
- Join my new Facebook group
- Share a picture on Instagram and tag me #offthehookforyou
- Share your projects on Ravelry
- Share your projects on LoveCrafts
Disclaimer
This post may contain affiliate links which I earn a small commission from if you choose to click and purchase anything from. You pay the same price, I get a very small amount for sending you their way. It helps me to make my crochet patterns free on the blog.


