I am absolutely massive fan of the corner to corner – or C2C technique for crochet. It’s my go to for any project, so I’ve decided to share a little beginners tutorial with you, that will teach you exactly how corner to corner (or C2C) works.
This post explains corner to corner crochet for beginners as I go really slowly through everything needed from holding the yarn, to how “feed the Yarn”, how to start oh – and I did I mention this is all contained in a handy video!
If you want to save this for later – please Pin it using the picture below.


I’ve loved this technique from the first tried I attempted corner to corner crochet or C2C- it just clicked!
After this – I was absolutely hooked. It’s so easy to do, and the textures it produces are beautiful – we aren’t talking holes here, and it doesn’t look like your traditional Granny Square

>>>Learn how to make a granny square for complete beginners here
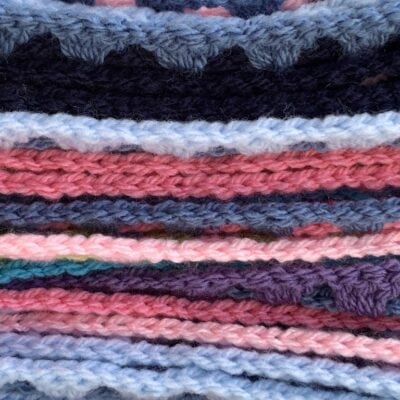
It’s absolutely brilliant to use to with self striping yarn too. The yarn above is Boho Spirit from Snufflebean Yarn. Its gorgeous, so so soft too.
I used this to make a crochet unicorn Pencil case – get the instructions here>>>
C2C Crochet for Beginners
This technique is absolutely perfect for making blankets, especially baby blankets – and I’ve made a few of these as when you get into a rhythm, you don’t need to think about what you are doing.
Click here for baby blanket patterns>>>
I made 2 baby C2C blankets, A rainbow one, and a black and white one.


>>>get the Bright Lines C2C blanket pattern here

My biggest achievement C2C wise I think is the beast known as the The Harry Potter Blanket – find out about it here>>>.
I learnt so so much about colour changing with this project.

If you want to learn about colour changing – read here>>>
So, here are just a few of the projects I’ve made with corner to corner that I’ve already told you about, I have so many more ready to type up, and photograph.
How to C2C or corner to corner crochet?
Well here is the great thing about C2C.
If you can make a granny square – you can almost certainly corner to corner crochet, and even if you can’t make a granny square – this is a great technique for teaching the “basic Stitches”
Why is C2C so good for beginners?
>>>Here is a great beginners baby blanket pattern using this technique>>>
Well they use the same stitches.
All you need to know are:
US Double / UK treble crochet
How to chain
How to slip stitch
And that is it!
Find out exactly how to do it, but watching the video below.
How to Corner to Corner Crochet
Most Corner to corner patterns will come with a chart. If not – don’t panic, the crochet pattern might just use the number of rows you need to make.
If you have a chart, you’ll start making the “pattern” from the bottom right corner. Each row starts on the Diagnol.
What you need to know is that every block = 1 square on the chart
So for row 1, this is 1 block, row 2 = 2 blocks, row 3 =3 blocks etc
(Top tip – cross off what row you are on using a pencil)
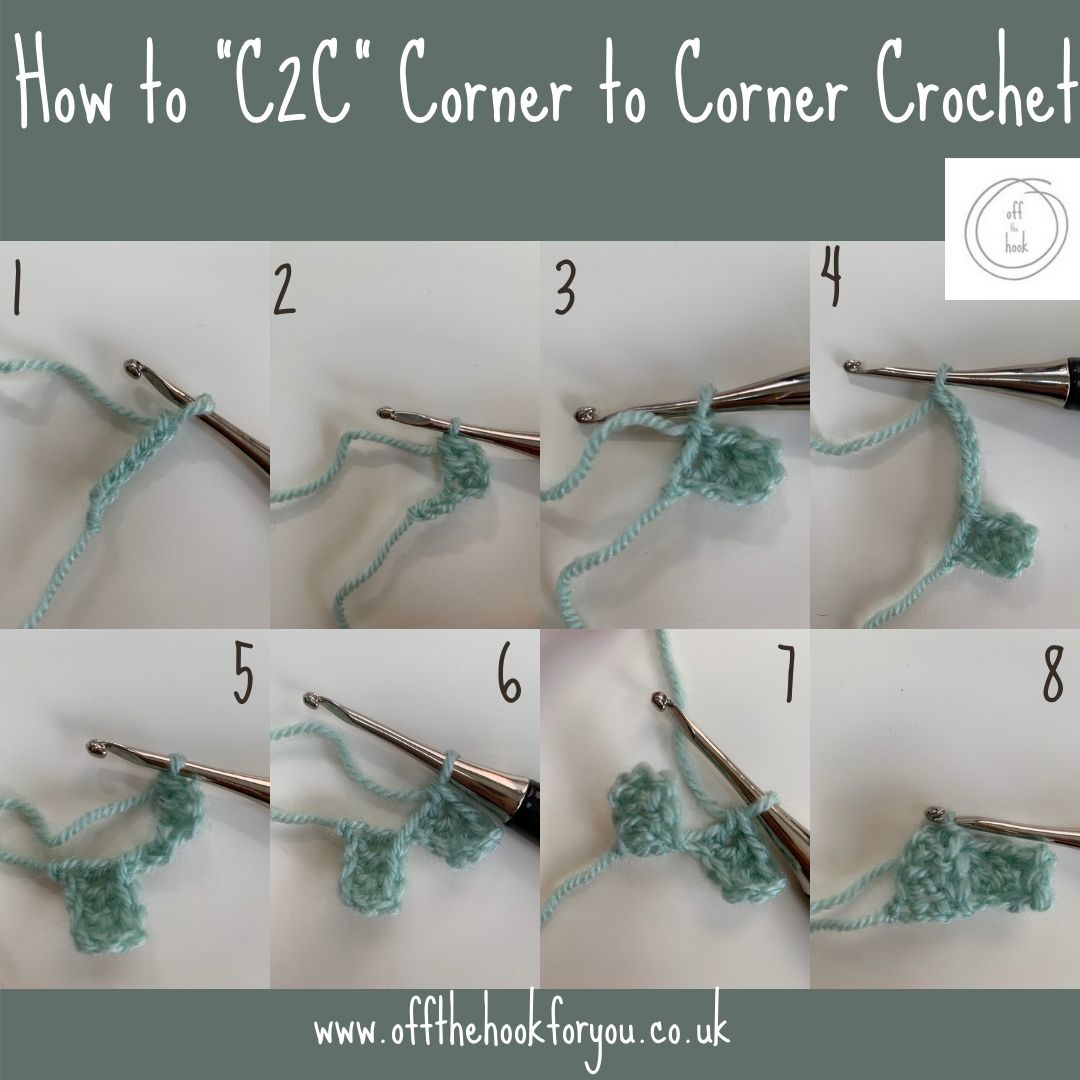
To make a C2C Block step by step

- Chain 6
- Work 1 DC in the third chain from the hook
- Work 1 DC in each of the remaining 3 chain (ch3, 3 DC = 1 block)
- Row 2, Chain 6
- Work 1 DC in the third chain from the hook
- Work 1 DC in each of the remaining 3 chain (ch3, 3 DC = 1 block of row 2)
- Flip/ turn block 1 up (It’s the block on the left) so the chain 3 is at the top.
- Slip stitch to join.

- Completing Row 2, a “Normal block” Chain 3, 3 DC in the chain 3 space (top of step 7).
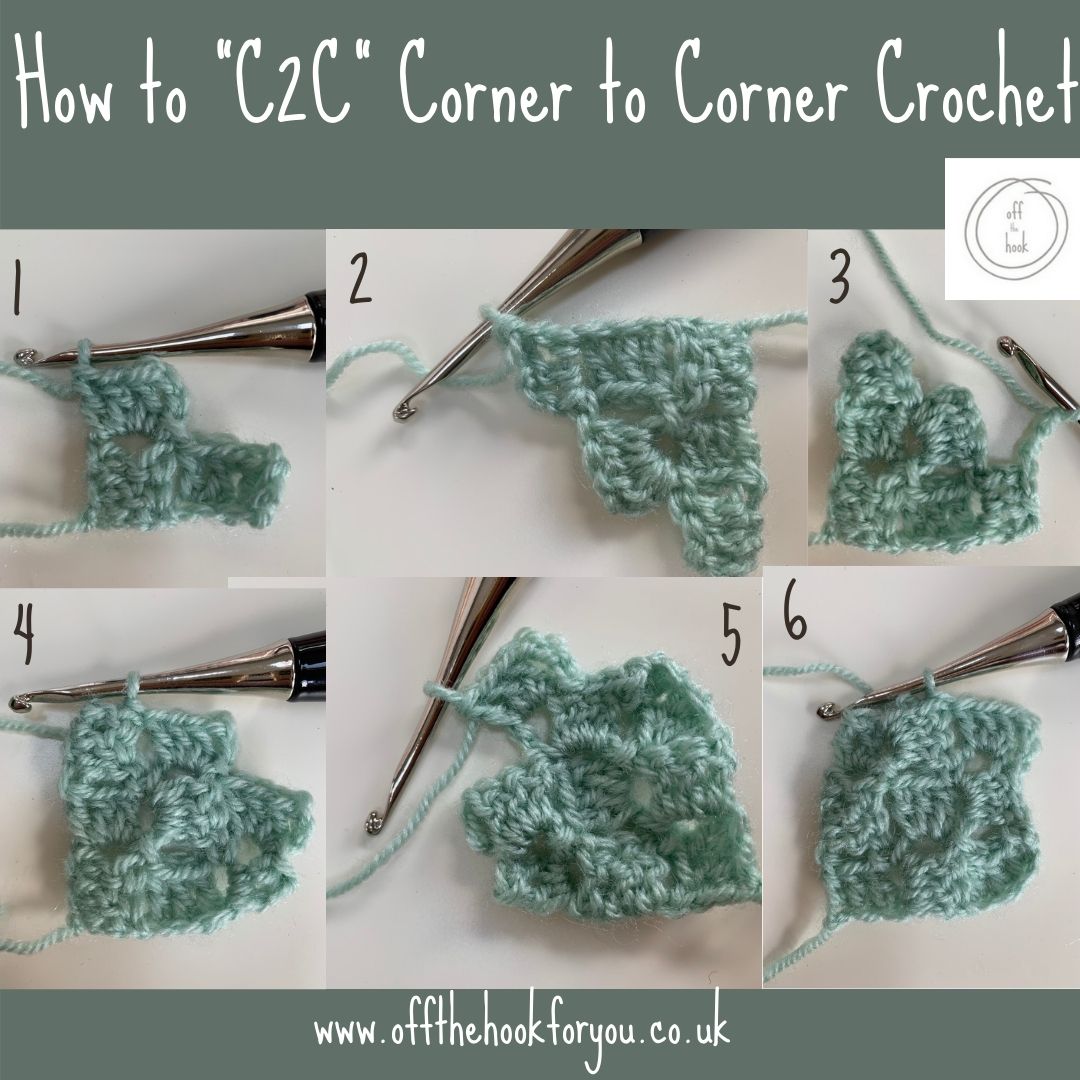
- Row 3, making a new block, so chain 6, and repeat steps 4-8 on the first picture. 1DC in the 3rd chain from the hook, 1 DC in next 2 chains, flip the crochet (step 7, slip stitch to join. Slip stitch in to the chain 3 space, make a new block on top of the next 2 blocks.
- Reducing slip stitch along the side of the block so get you yarn in the right place to work. Complete the next 2 blocks as normal, chain 3, 3 DC, SS to join.
- Reducing again, slip stitch along the side of the block so get you yarn in the right place to work. Complete the next block as normal, chain 3, 3 DC.
- Slip Stitch to join,
- Move you yarn by slip stitching over to the corner for a cleaner edge.
The Basics of Corner to Corner Crochet
Each “new” block is made by chaining 6, then working 1 DC in each of the 3 chains further away (i.e. starting in the 4th chain). This is 1 block.
Row 2, a new block – so chain 6, work 1 DC in each of the 1 chains as above. Now you’ve got 2 blocks. the one closest to you hook – keep hold of, the first one you made “flip it” by turning it upwards, and now * slip stitch in the chain 3 gap.
To work the next block – chain 3 (to get to the height of the DC), make 3 dc in the same gap BUT as changing colour here, you need to make the last Yarn Over of the 3rd with the new colour. (Block made and row 2 completed).
Row 3 – same as row 2, but you’ll repeat from the * twice (Where you slip stitch in the chain 3 gap.
Keep doing this adding one more block each row – while following the colour change chart until you get to reducing.
To reduce, make the block, then rather than chaining 6, you need to slip stitch back to the gap, and then chain 3, 3 DC – complete the row as normal.
Scroll down for the video
If you like this please subscribe to my YouTube channel for other How to Videos

>>>How to Continuous join as you go for granny squares
>>>How to Continuous Join Hexagons
But for now – here is a little video – super slow for beginners to show you all “how to corner to corner crochet – or C2C”
Corner to Corner Crochet for Absolute Beginners
If you like the video – please hit Subscribe on my YouTube Channel
If you’ve liked this video – please Pin it below and share it and save for later.


Join me at Off The Hook For You to share your crochet!
Thanks for visiting – I’d love to stay connected with you so please sign up for my email list where a free PDF pattern is waiting for you (just so you can see what my PDF patterns are like).
Finished one of my crochet pattern makes? I’d love to see it and so would the world, so get sharing! You can find me in the following ways:
- Join my new Facebook group
- Share a picture on Instagram and tag me #offthehookforyou and @offthehookforyou
- Share your projects on Ravelry
- Share your projects on LoveCrafts
Disclaimer
This post may contain affiliate links which I earn a small commission from if you choose to click and purchase anything from. You pay the same price, I get a very small amount for sending you their way. It helps me to make my crochet patterns free on the blog.


