Here you can find the free pattern for the Summer crochet wreath I designed to show the full gloriousness of the English cottage garden.
Taking my inspiration from the greens of summer leaves, to the browns of the soil, to hopefully the blue of the summer sky, this design celebration of my garden, when hopefully the sun is shining.
This a perfect stash buster project for yarn, so grab a hook and some yarn and lets get crocheting.
If you want to save this for plater, please Pin it below.
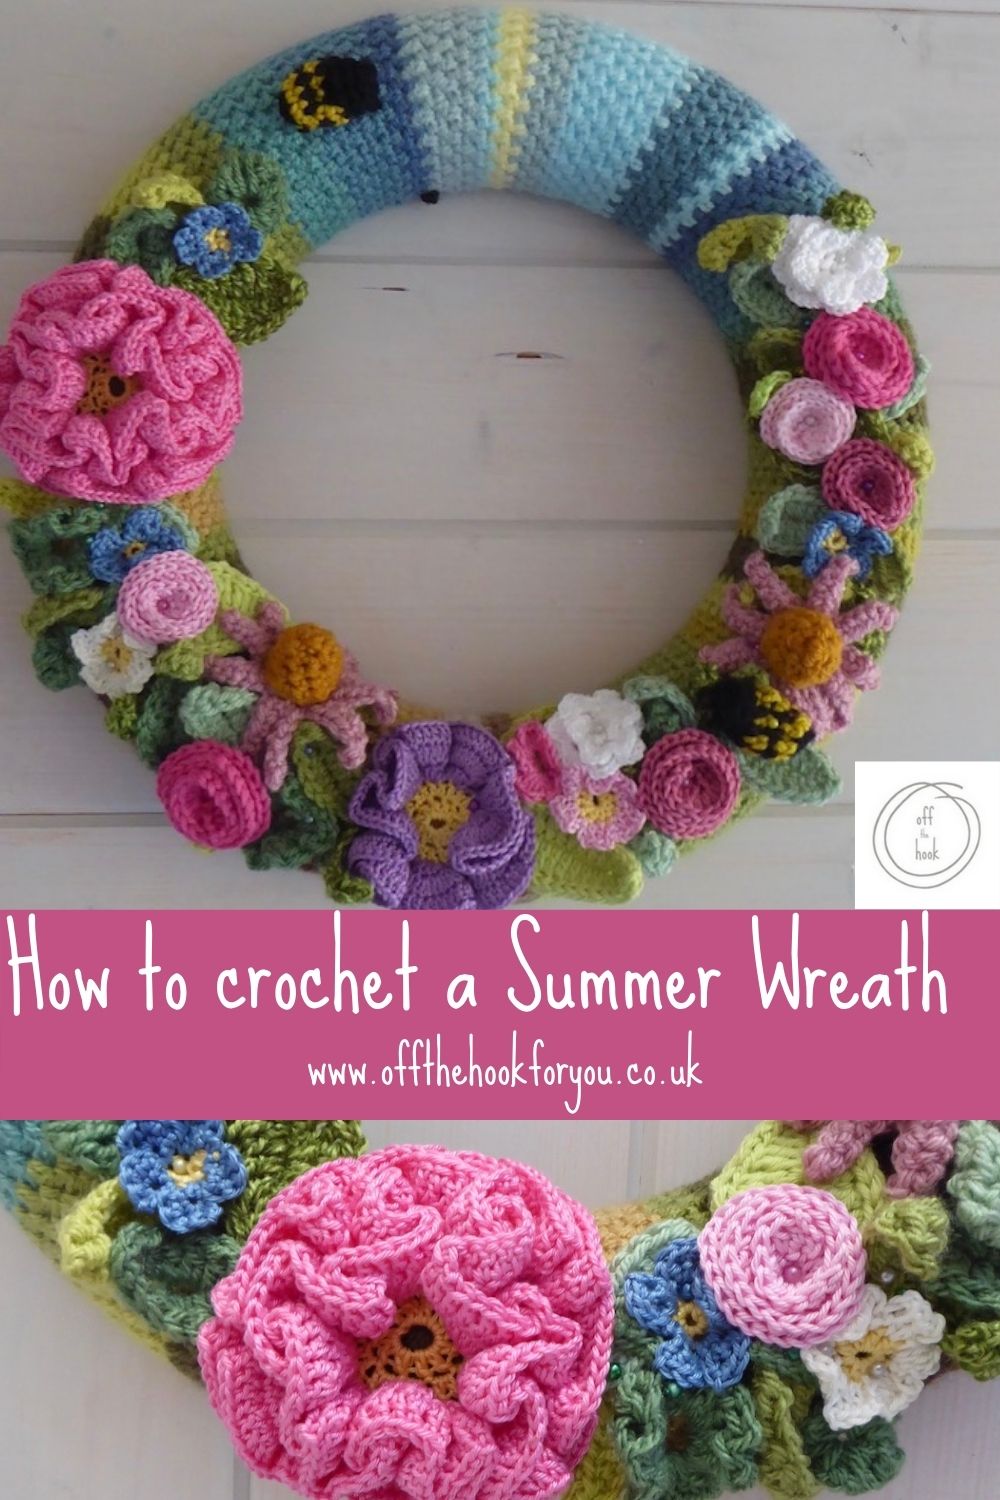
Summer Wreath – crochet-a-long (CAL)
This free crochet pattern is going to be released as a Summer crochet-along in 2021 on my blog. If you don’t know what I’m talking about a CAL, it’s a nice way for crocheters to join together and all make the project at the same time. You can share all you pictures over on Instagram tagging me @offthehookforyou and the #offthehookforyou, or in my facebook group.
#crochetsummerwreath is the hashtag for the CAL if you want to tag your makes – I can’t wait to see them!
My previous CALs (crochet-a-longs) have all been blankets, so this one is a little different given the season we are in!
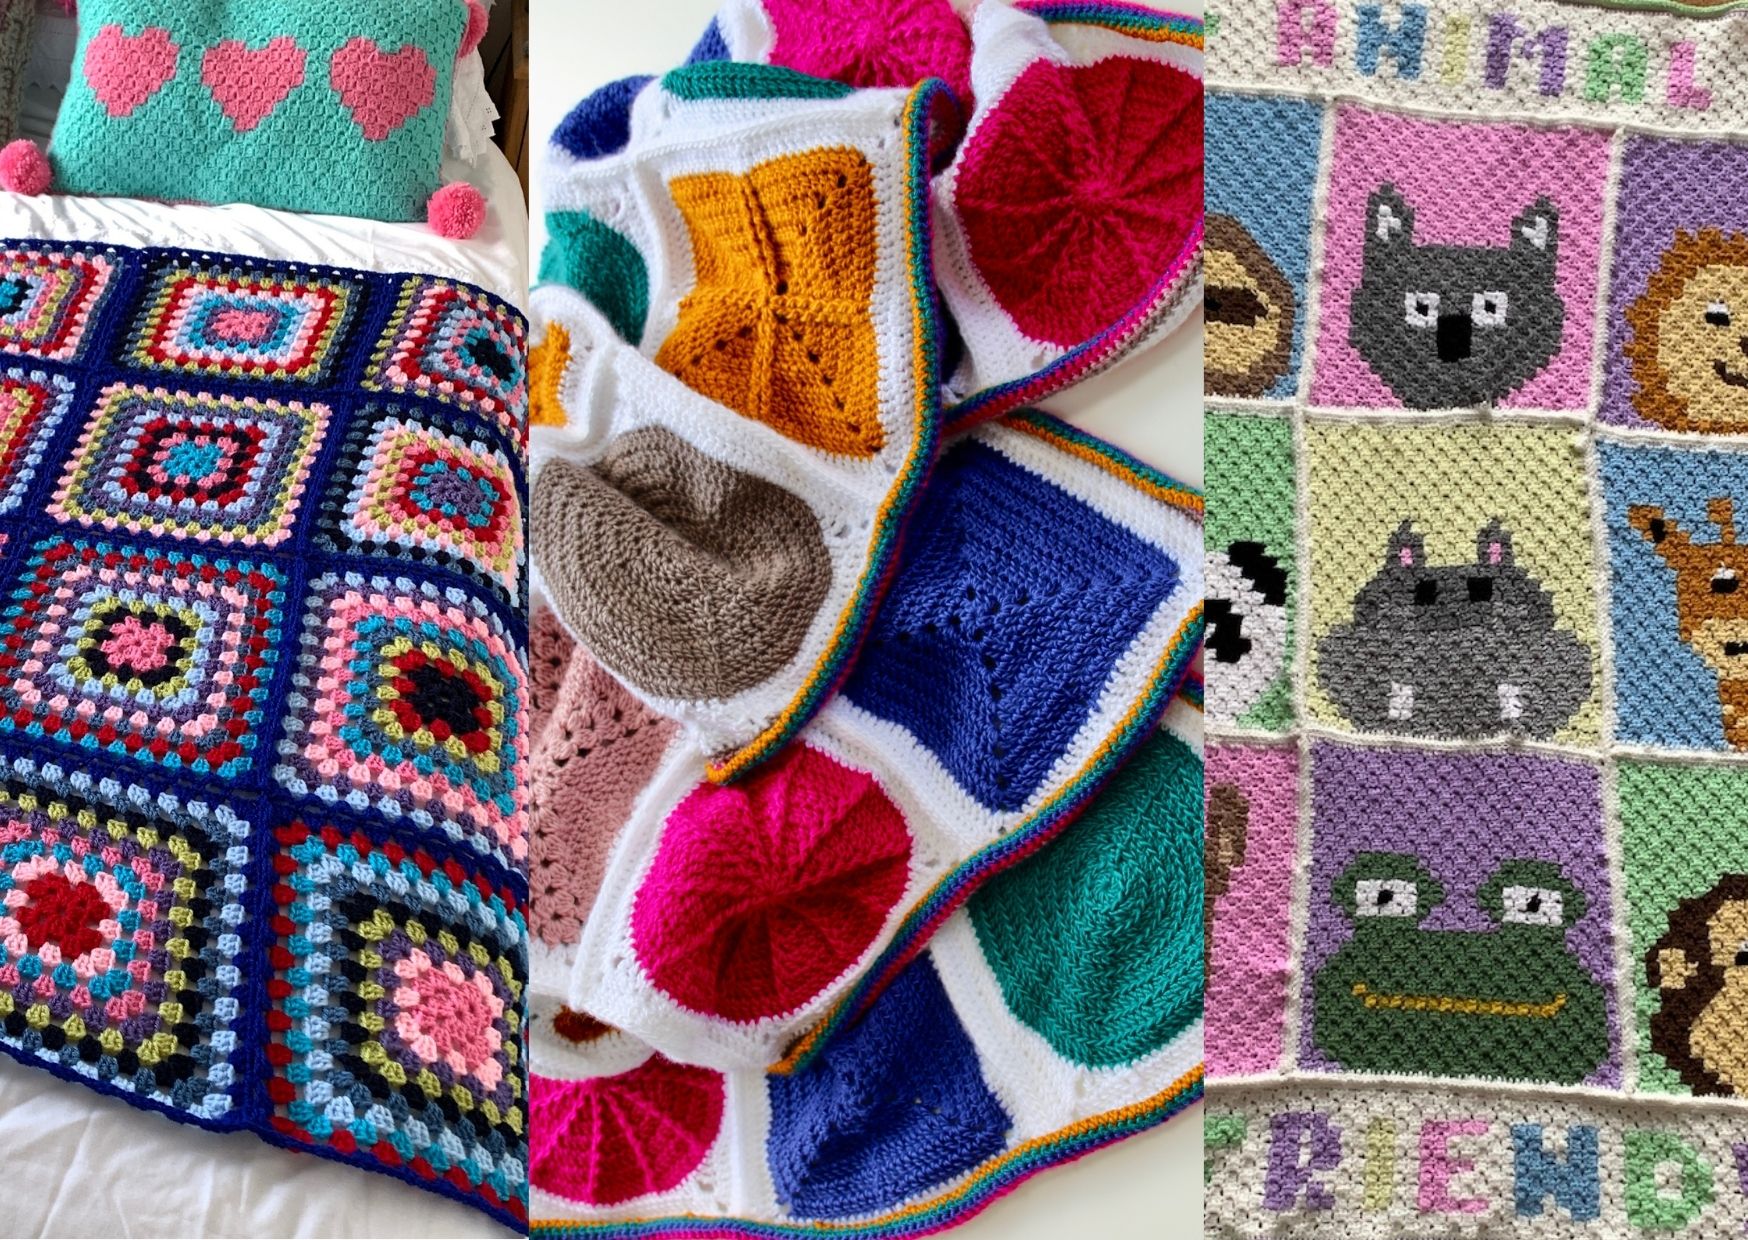
>>>The Nobrainer CAL A great granny square stash buster
>>>The Geo-Boho CAL A great beginners project to learn new techniques
>>>The Animal-a-long C2C The perfect blanket to prefect Corner to Corner crochet
I’ll be releasing all the components of this pattern on a weekly basis. Depending on when you find this post, the pattern might be complete, or it might be half way through – just bear with me.
The difference with this CAL, is that I’ll be giving you all the links to the patterns here. There may be different blog posts, but you’ll be able to get to everywhere you need from this post!
Why a Summer Crochet Wreath?
I don’t know about you, but when I think of a wreath, I instantly think about Winter and Christmas, holly, red berries, and robins! So I wanted to push myself outside of my comfort zone, and come up with something so summery, with flowers galore, it would be totally different to anything I’d seen before.
Of course, I couldn’t even talk about a crochet wreath without mentioning Lucy at Attic 24. This lady inspired me to make a crochet autumn wreath very early on when I first started crocheting.
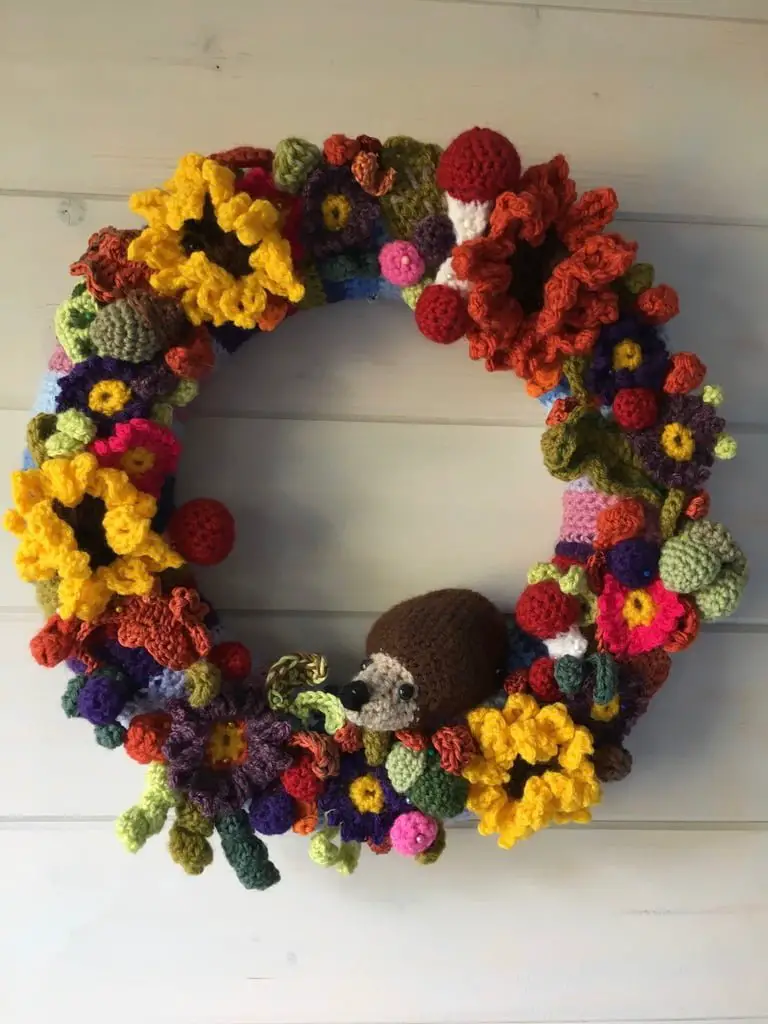
How long does it take to crochet a wreath?
It depends on how much you want to cover your wreath with flowers and how you make the base!
As a guide, the Autumnal wreath I made took about a month, crocheting on and off.
I taught an autumnal wreath workshop over 6 weeks. It took 2 hours learning the new techniques in the workshop, then another couple of hours each week to complete all the components.
As I learnt so much teaching the wreath classes, I’ll be using the same formula here!
Inspiration for the Summer Crochet Wreath
I wanted this crochet wreath to show the colours of summer, and I didn’t want all the effort of crocheting a beautiful wreath base to be covered by flowers and leaves.
I took a look at the views of the English countryside, and decided on the browns of the soil, the greens of the foliage and the blues of the sky.
Then for foliage, as many greens as I could find, and thrown into the mix, pinks and purples for flowers.
One thing that I wanted was different textures, and sheens in the flowers, to get this I used different yarns on purpose.
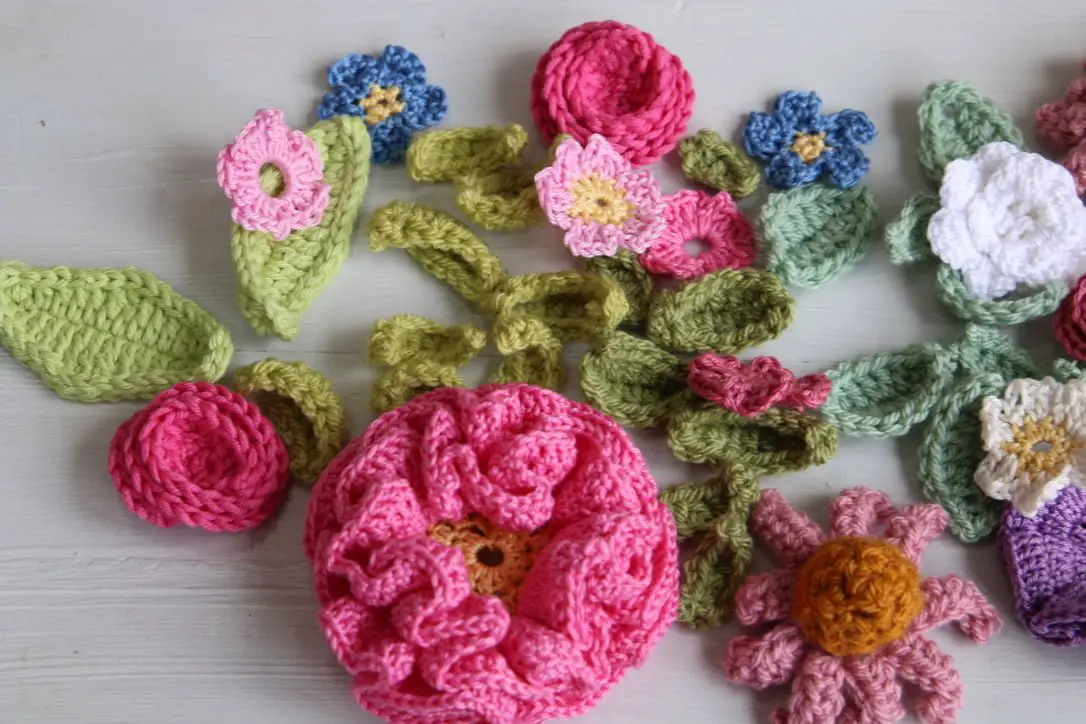
Yarn for a Crochet Wreath
Here is the best bit about this crochet pattern – you can use any yarn you want! This is the perfect stash buster, and apart from the wreath base, everything was made from yarn already in my stash.
Wreath Base – all Stylecraft Special DK
I’ve used a combination of yarns to get different textures and shines for the flowers, most from my stash, but there were some specifics which I’ll list when I write about that part of the wreath.
The best bit about most of this wreath is that the mini 10/ 25g balls of yarn from either Yarn and Colours or scheepjes are absolutely perfect.
USA friends – The 25g minis here are great too>>>
US Friends – FlyingTiger is also really good for little balls of cotton yarn – it’s well worth a look if you are passing.
Standard Double knit yarn
I chose the Stylecraft Special DK for this, simply as it’s a great value, acrylic yarn and comes in 101 different colours. It was all about the colour, and the matt texture (to help the flowers stand out.
Mercerised Cotton
I’ve used Mercerised cotton for some of the flowers as it’s gives a nice shiny texture. It is also a joy to crochet with in the summer months as it’s cotton!
Cotton Yarn
Again, I’ve used cotton yarn for the flowers, to give a matt effect, and different textures. I’ve also used this for some of the leaves, again to vary texture to make sure your eyes are drawn to different parts of the wreath.
What you need
1 polystyrene wreath base – 30 x 5 cm – with a flat back (this is important)
Stash yarn, or you can use what I list, the choice is yours!
Lots of Greens, 5 different browns and creams, 5 different blues, pinks, purples, white and yellow!
What you need to know (or will be taught!)
This is the fun part of this project, as each week will we’ll be doing slightly different things.
If you are a beginner – don’t worry, this wreath is great at expanding your crochet knowledge gradually.
(However if you are a complete beginner, to make this easier – I do recommend learning how to do a granny square first >>>Learn how to make a granny square for absolute beginners)
So for example, when we make the wreath base, this is great way to :
- Improve you stitch consistency of repeating one stitch
- Learn how to work in straight lines
- Learn how to change colour neatly
Then take the leaves, these will teach you
- How to work in the chain
- The heights of the different stitches
- How to work in the back of the chain
Then onto flowers, these will teach
- How to make a magic ring
- How to work in a circle
- How to increase a circle
- The different heights of stitches
- How to get curly crochet
Finally the bees
- These will teach very beginners amigurumi
- Working in a spiral
- How to change colour
- How to count stitches and how to read an amigurumi pattern
Summer Crochet Wreath Pattern
Part one is here now, all the colours you need, and some hints and tips too.
The Crochet Wreath Base
This had so much information in it, it’s a completely separate post listing all yarn colours, dimensions, every you need to know!
>>>How to crochet a wreath base
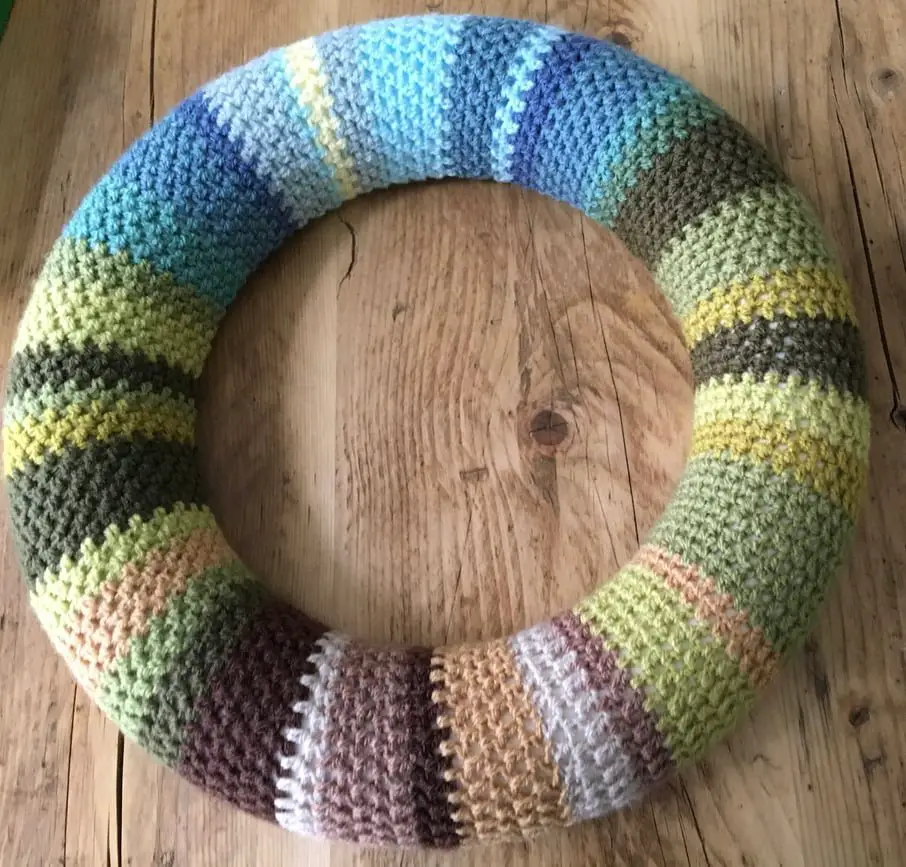
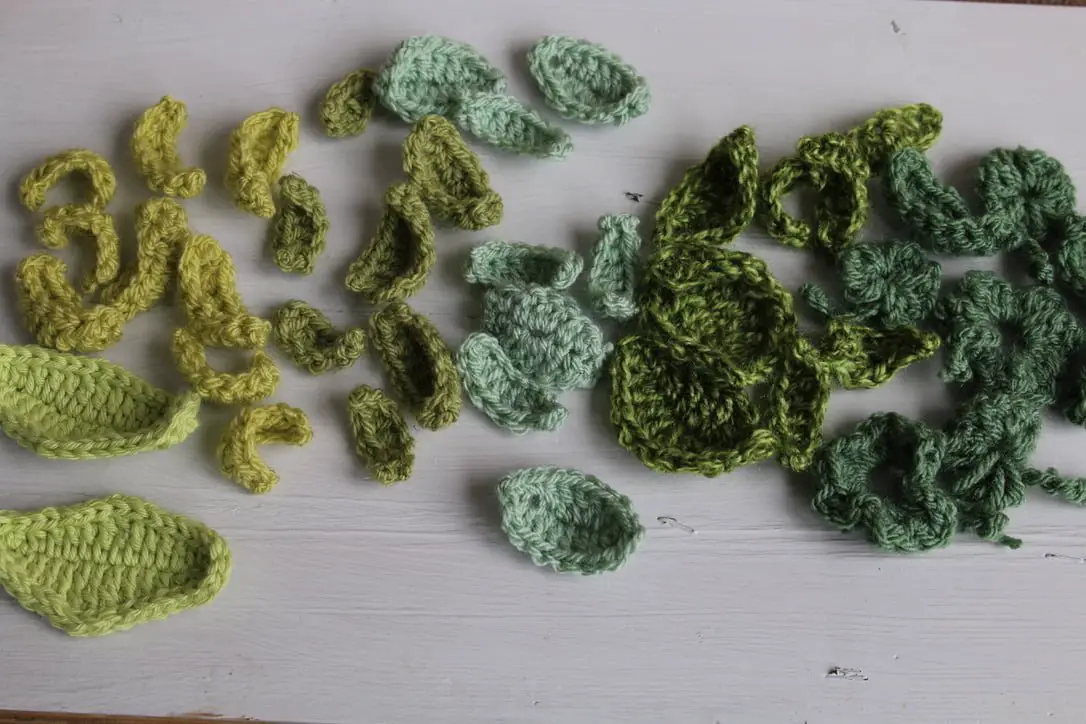
At this point you have a decision to make, in how you want to build your wreath at the end, I’m putting this out there now, as if you want to sew it together, I would NOT sew in my ends.
I’d keep these on every piece of greenery and the flowers, as they can be used to attach the pieces to the wreath, saving you a lot of sewing.
If you do want to sew in your ends, I have video here showing you how to do it>>>
The other option is to pin the wreath together, using colourful pins. This is what I did, as I wanted the option to change it, also, the pin add another little bit of detail to the wreath.
Crochet Leaves
Part 2 and this week we are making the leaves for the wreath.
So we need green yarn, and lots of different greens!
I’ve used mainly Stylecraft Special DK again, but also a cotton.
You will need to make:
11 basic green leaves 4 in Lincoln and 3 in Meadow, 4 in Greengage.
6 shamrock leaves in Cypress
>>>Learn to make a shamrock/ clover here
23 half leaves 9 in Pistachio, 2 in Lincoln 4 in Meadow, 6 in Greengage and 2 in Cypress
To make a half leaf – follow the beginners tutorial here, but rather than turn and work back down the chain. Stop crocheting at the end of the chain.
Large Light Green Leaves – make 2
Note these are matt in colour, and I’ve used a thicker yarn for these. These were made from stash yarn, but Drops Paris in Pistachio or Lime would be a good substitute.
This is very similar to the beginners leaf, but working 2 of each stitch.
Abbreviations – USA terms
SC Single Crochet
HDC Half Double Crochet
DC Double Crochet
TC Treble Crochet
With a 5mm hook, Chain 17.
Working in the 2nd chain from the hook, SC, SC, HDC, HDC, DC, DC, TC, TC, DC, DC, HDC, HDC, SC, SC, now working in the back of the chain, SC, HDC, HDC, DC, DC, TC, TC, DC, DC, HDC, HDC, SC.
Crochet Flowers
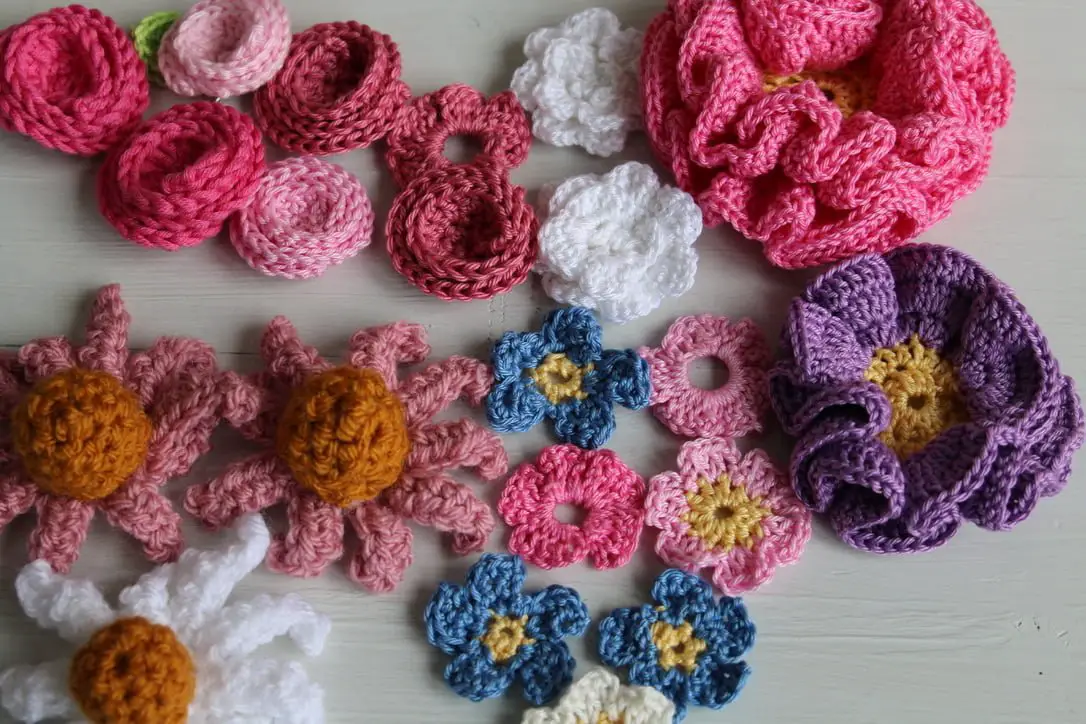
There are a lot of different flowers on this Summer wreath, I think this is what gives it its impact if I‘m honest! I’m releasing these over a few weeks as there are so many of them!
You’ll need pinks, whites, purples, and the odd blue to, and if you can mercerised cotton to give a nice sheen to them.
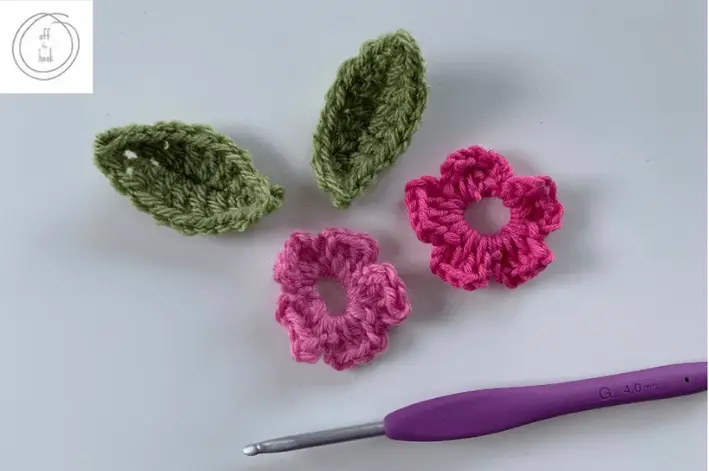
Easy crochet flower
We’ll start with some really basic easy crochet flowers.
Make 3 basic flowers from this crochet pattern.
>>>Easy beginners flower pattern
1 in dusky rose pink from Yarn and colours, 1 in light pink Yarnart Begonia, and 1 in white.
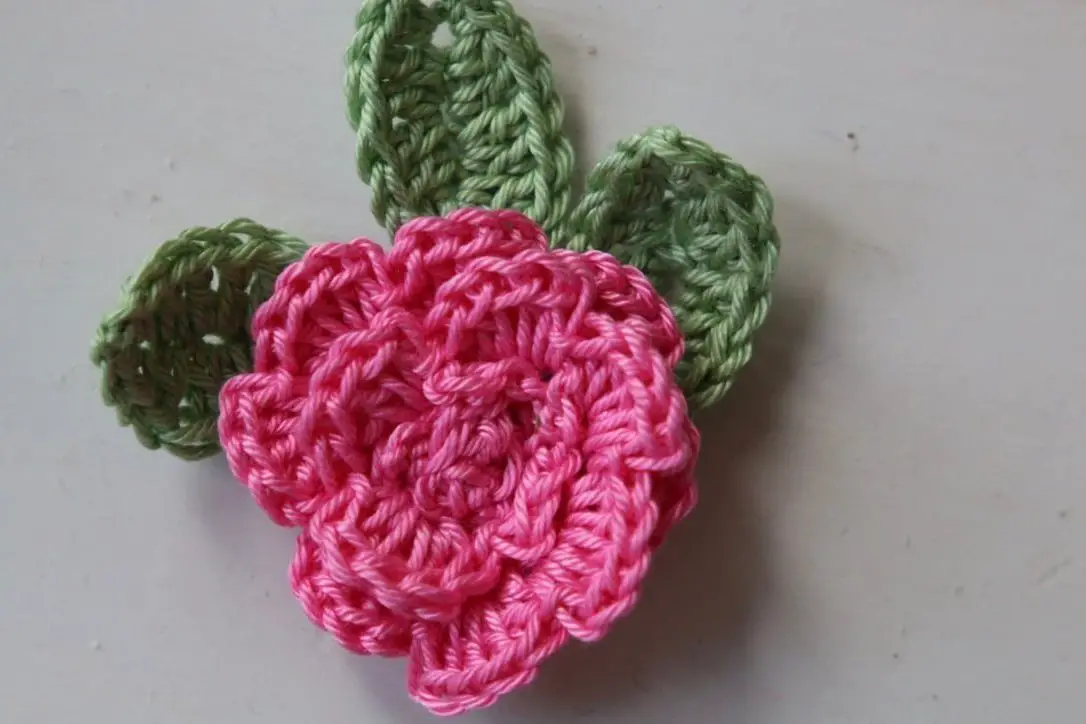
Crochet Roses
Make 2 Crochet Roses in white cotton DK using this pattern.
>>>Quick and Easy Crochet Rose
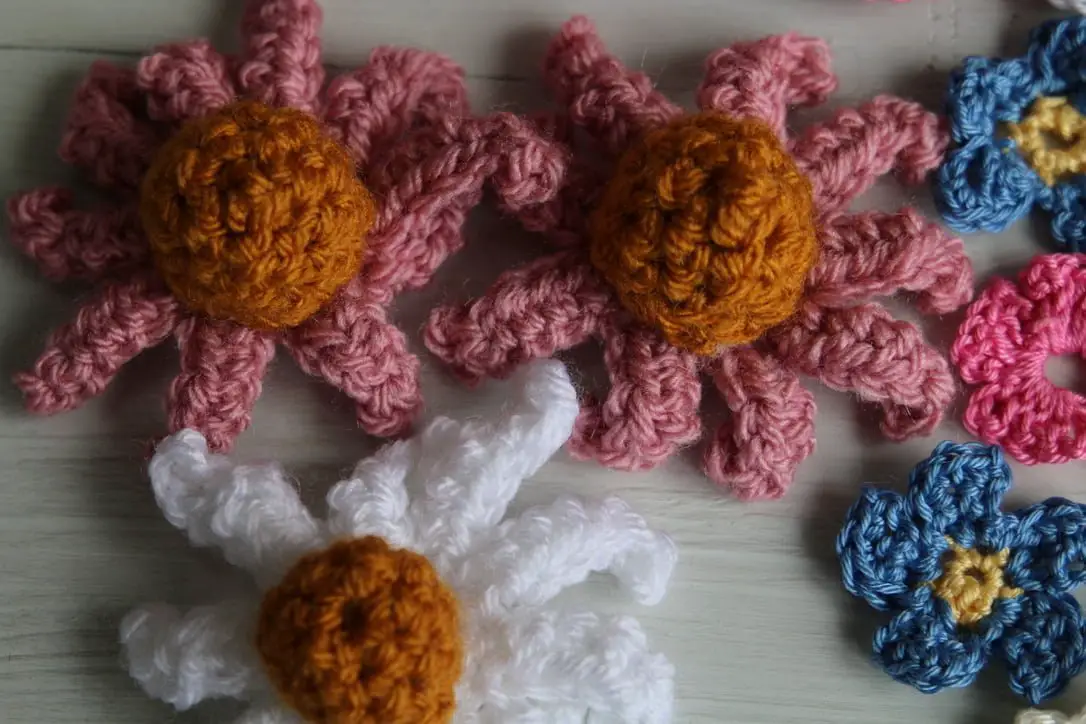
Crochet Echinacea
Make 3, 2 in dusky pink and 1 in white (all with Stylecraft yarn) and a 4mm hook. (
Notice the different sheens to the mercerised cotton and the normal DK?)
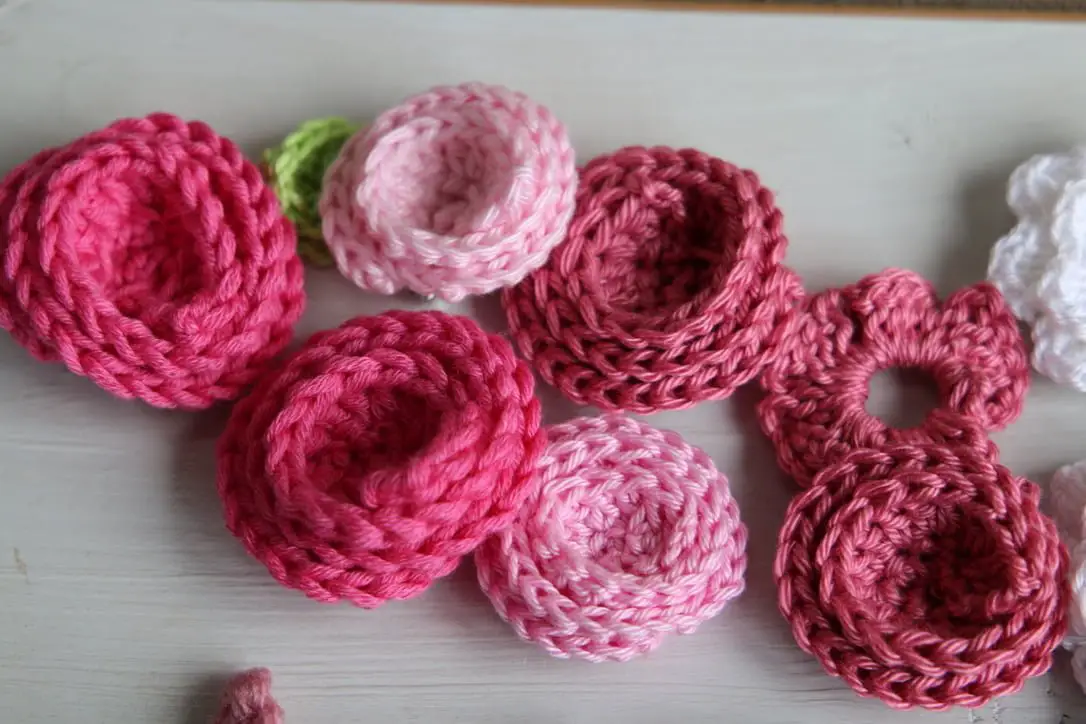
Crochet Spiral Roses
The spiral roses make up a lot of the flowers on this wreath, as I absolutely love them, and they are so so simple to make! Using the different hook sizes and the
Make 6,
2 in Yarn and Colours Dusky pink with a 4mm hook
2 in Yarnart Begonia Pink with a 2.5mm hook
2 in White cotton DK with a 4mm hook
>>>Crochet Spiral Rose Pattern
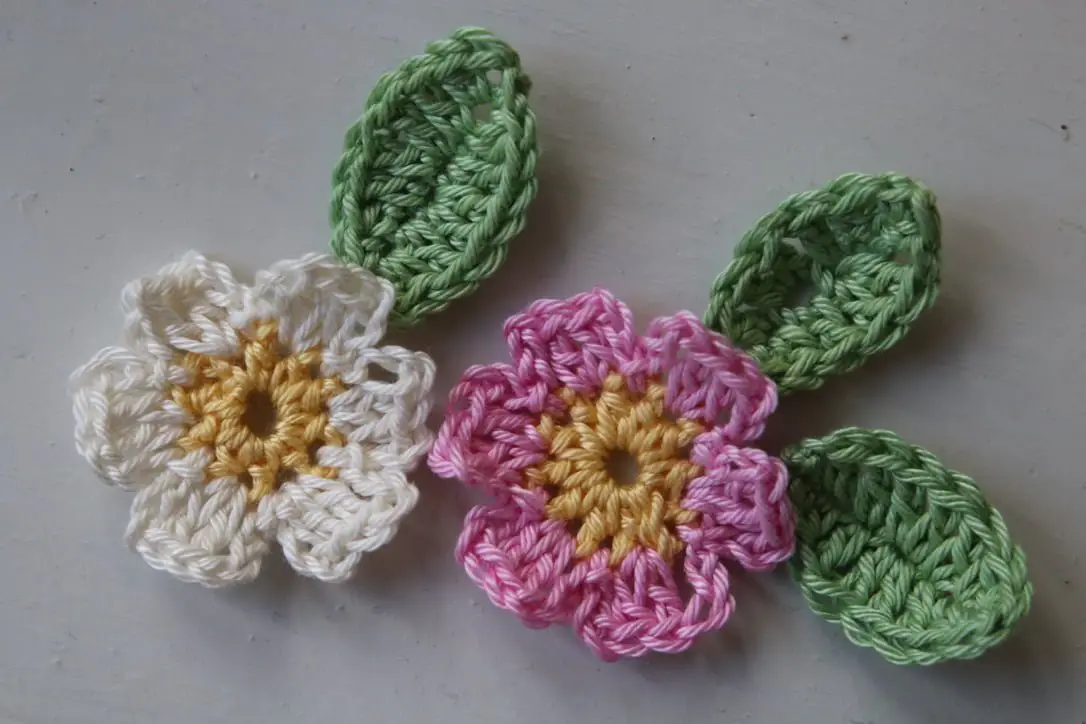
Crochet Daisies
These are a great little pattern that make a flower very effectively. We are going a bit “wild” with colours, and looking for forget-me-knot blues here.
Make 5,
3 in blue in Yarnart Begonia with a 2.5mm hook, then 1 in pink and 1 white one.
>>>Get the Quick Crochet Daisy pattern here
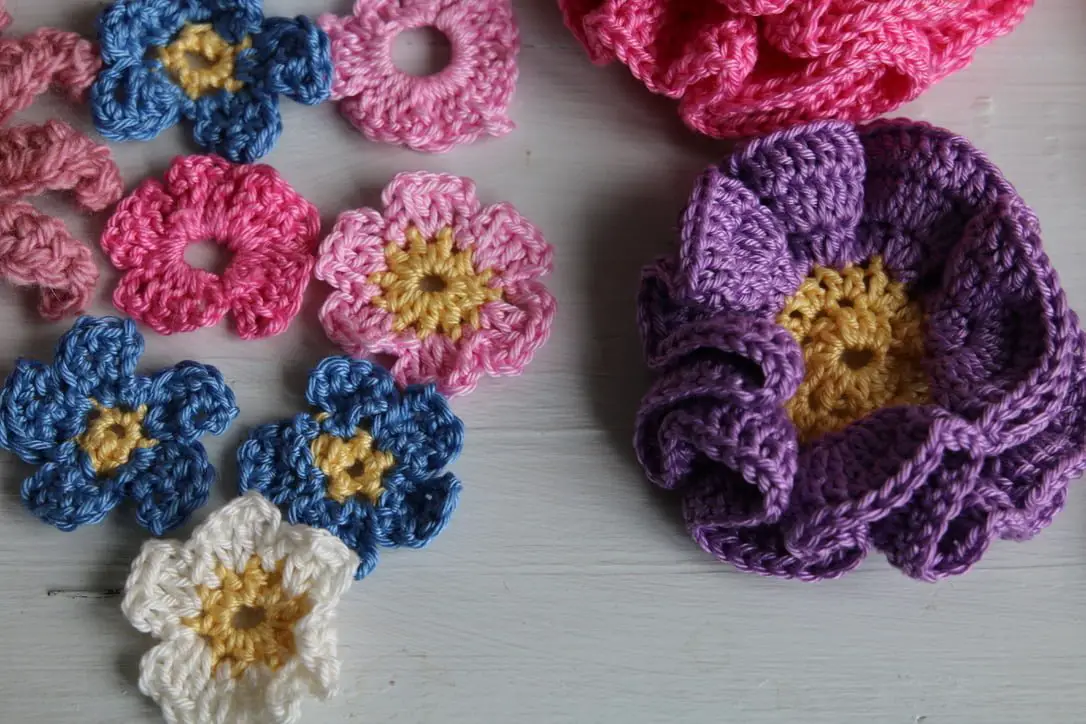
Purple Wavy Flower
This is one of the centre pieces of the summer wreath, and is surprisingly simple. You only need to know Double crochets and a magic ring for this one!
Be warned though, it’s simple, but it takes longer than it looks!
Make 1 in yellow and purple with Yarnart Begonia with a 2.5mm hook
>>>Get the Easy Large Flower Pattern here

Crochet Peony
Next on the list of flowers is the huge show stopping crochet Peony.
For this gorgeous flower, you’ll need to use a mercerised cotton.
YarnArt Begonia in Pink and Yellow>>>
Make 1 peony flower, and leave yourself enough time. This one is going to take at least a couple of hours to crochet.
>>>Get the Crochet Peony Pattern here
Small Crochet Bumble Bees
This week it’s the turn of the crochet crochet bee, the final part of the actual crocheting!
These little bumblebees are great, and very quick to make. You want to make 2 BUT alternate the colours of the pattern below, so you start with black.
I didn’t make wings, or add eyes, but this is your choice!
>>>Get the Small Crochet Bee Pattern here
Wreath Assembly
The final part of the wreath, putting everything together.
Remember back when I said you needed to decide how you were going to assemble your wreath way back as we started making leaves?
If you sewed your ends in as you went, you probably chose to pin the wreath together. That’s what I did.
If you’ve still got your ends, use pins to help position the pieces before sewing.
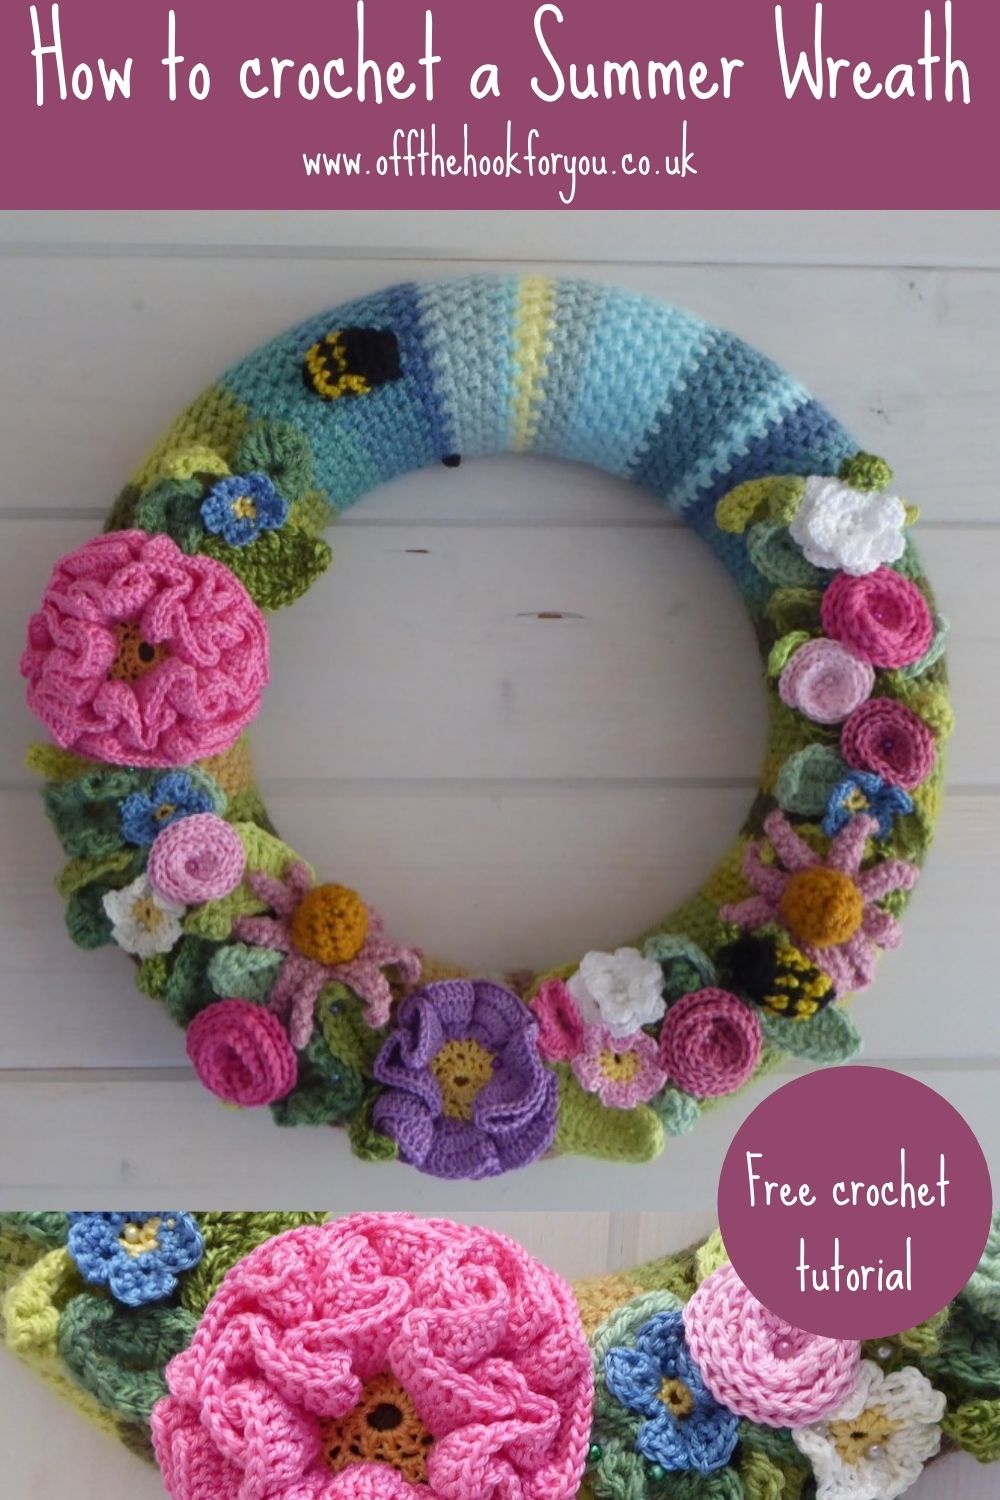
All I can say here, is I used the same colour pins as the item I was pinning, so the middle of the peony used yellow pins, pink flowers used pink pins etc.
Use the picture below as a guide, and don’t be afraid to move things around, my first version looked nothing like this one!
Good luck, I’d love to see photos of your finished wreaths, either tag me on social media, or hit the contact me button on the top menu.
If you’d like to save this please Pin it below
Join me at Off The Hook For You to share your crochet!
Thanks for visiting – I’d love to stay connected with you so please sign up for my email list where a free PDF pattern is waiting for you (just so you can see what my PDF patterns are like).
Finished one of my crochet pattern makes? I’d love to see it and so would the world, so get sharing! You can find me in the following ways:
- Join my new Facebook group
- Share a picture on Instagram and tag me #offthehookforyou
- Share your projects on Ravelry
- Share your projects on LoveCrafts
Disclaimer
This post may contain affiliate links which I earn a small commission from if you choose to click and purchase anything from. You pay the same price, I get a very small amount for sending you their way. It helps me to make my crochet patterns free on the blog.


