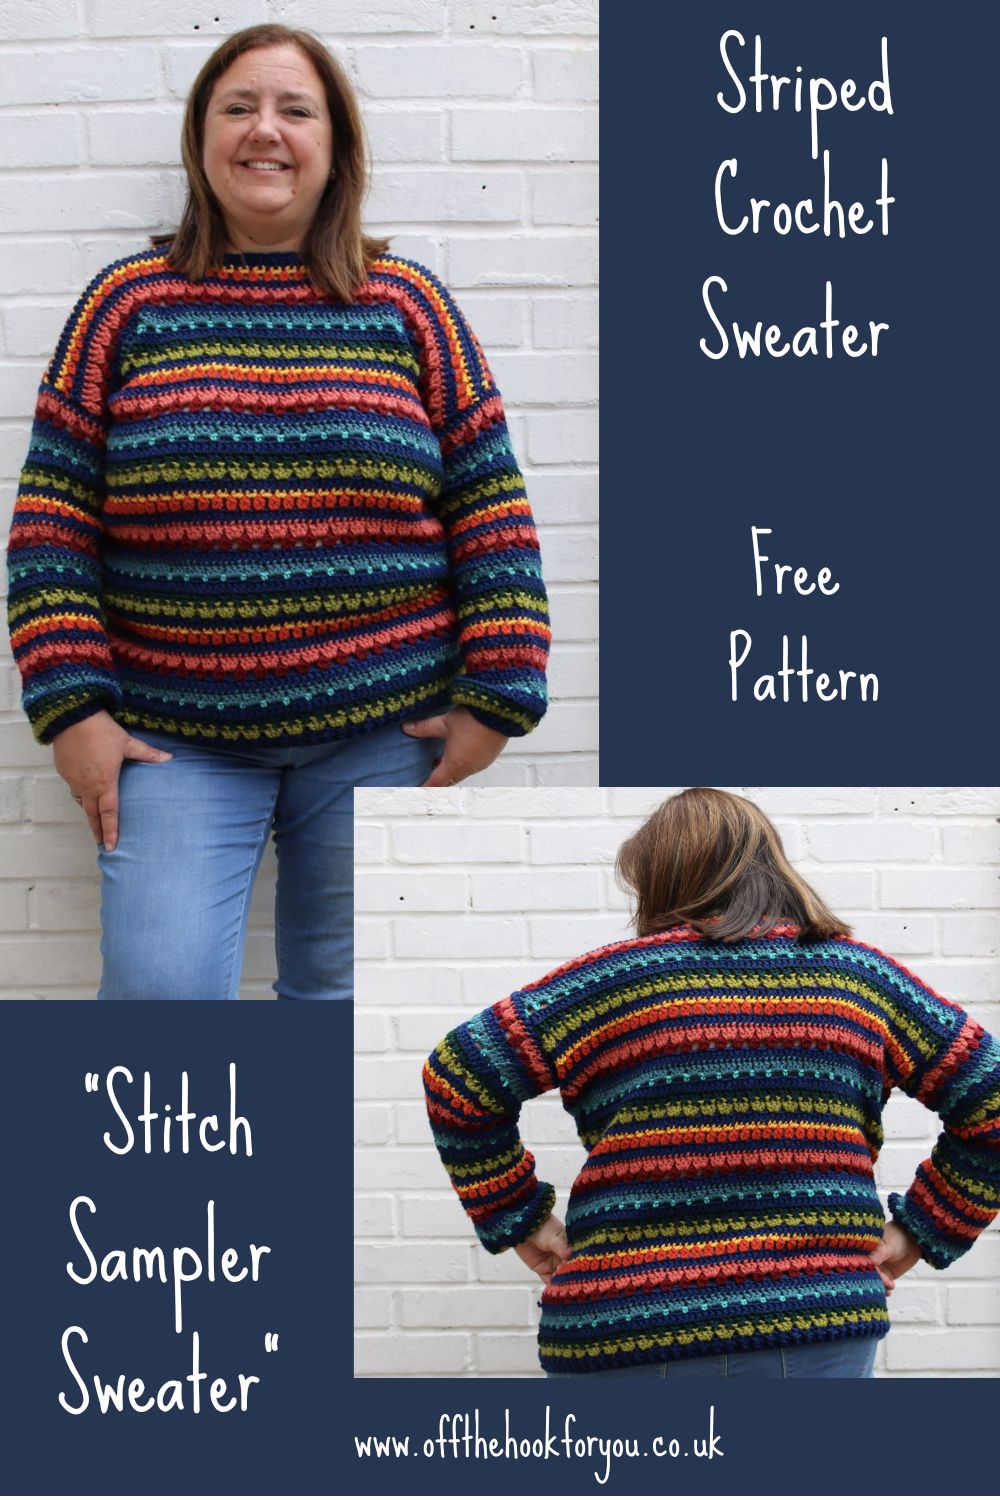
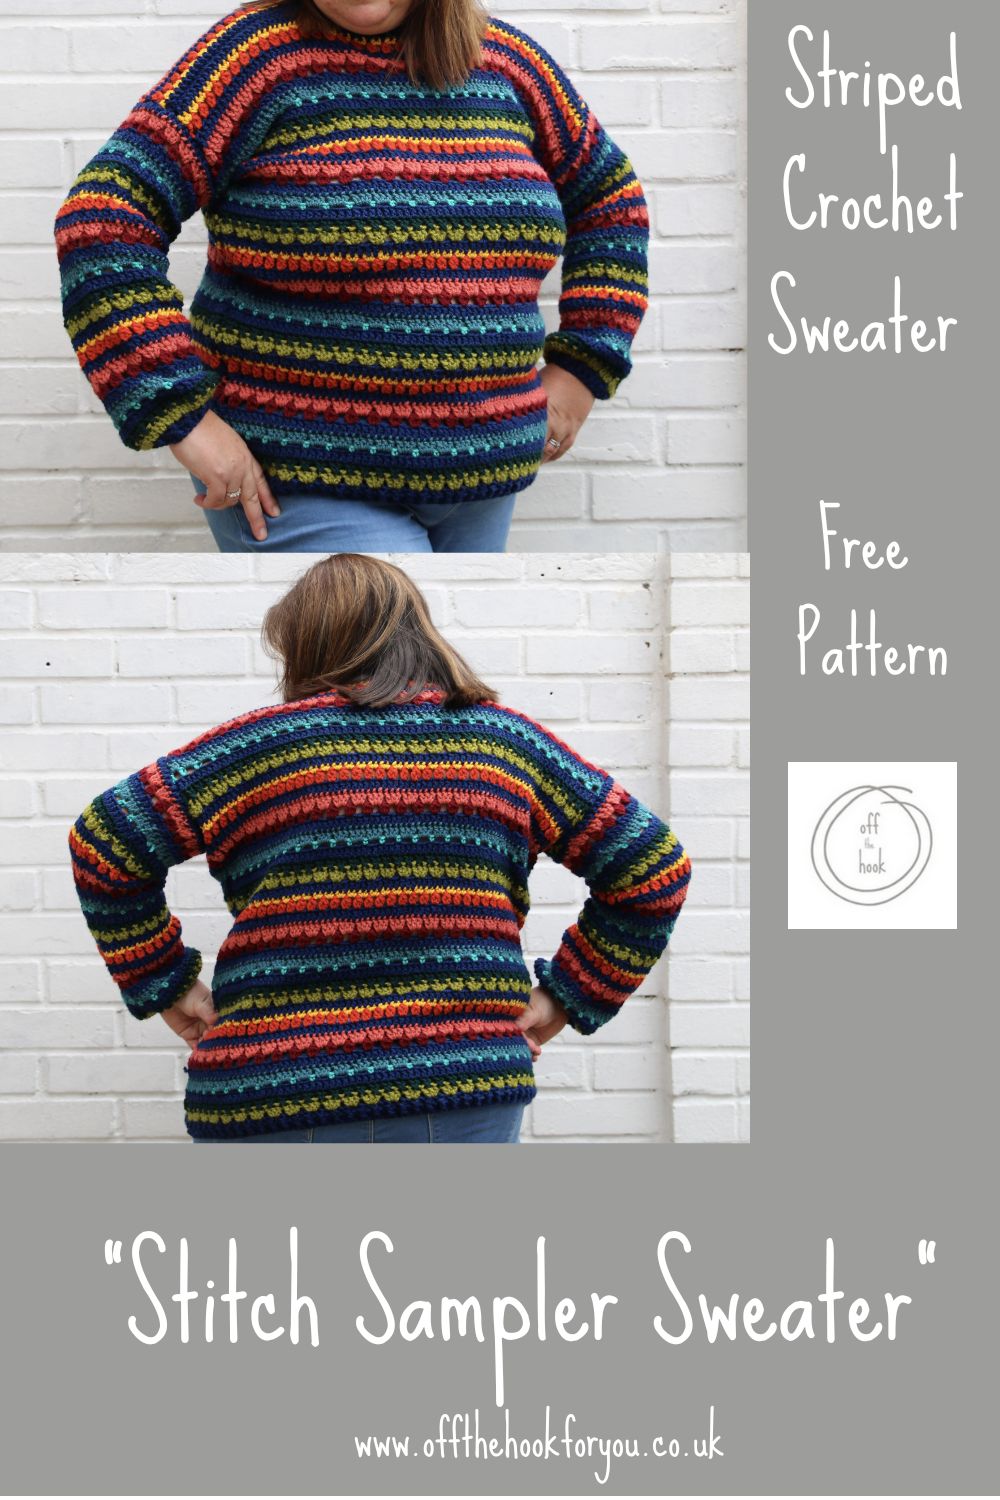
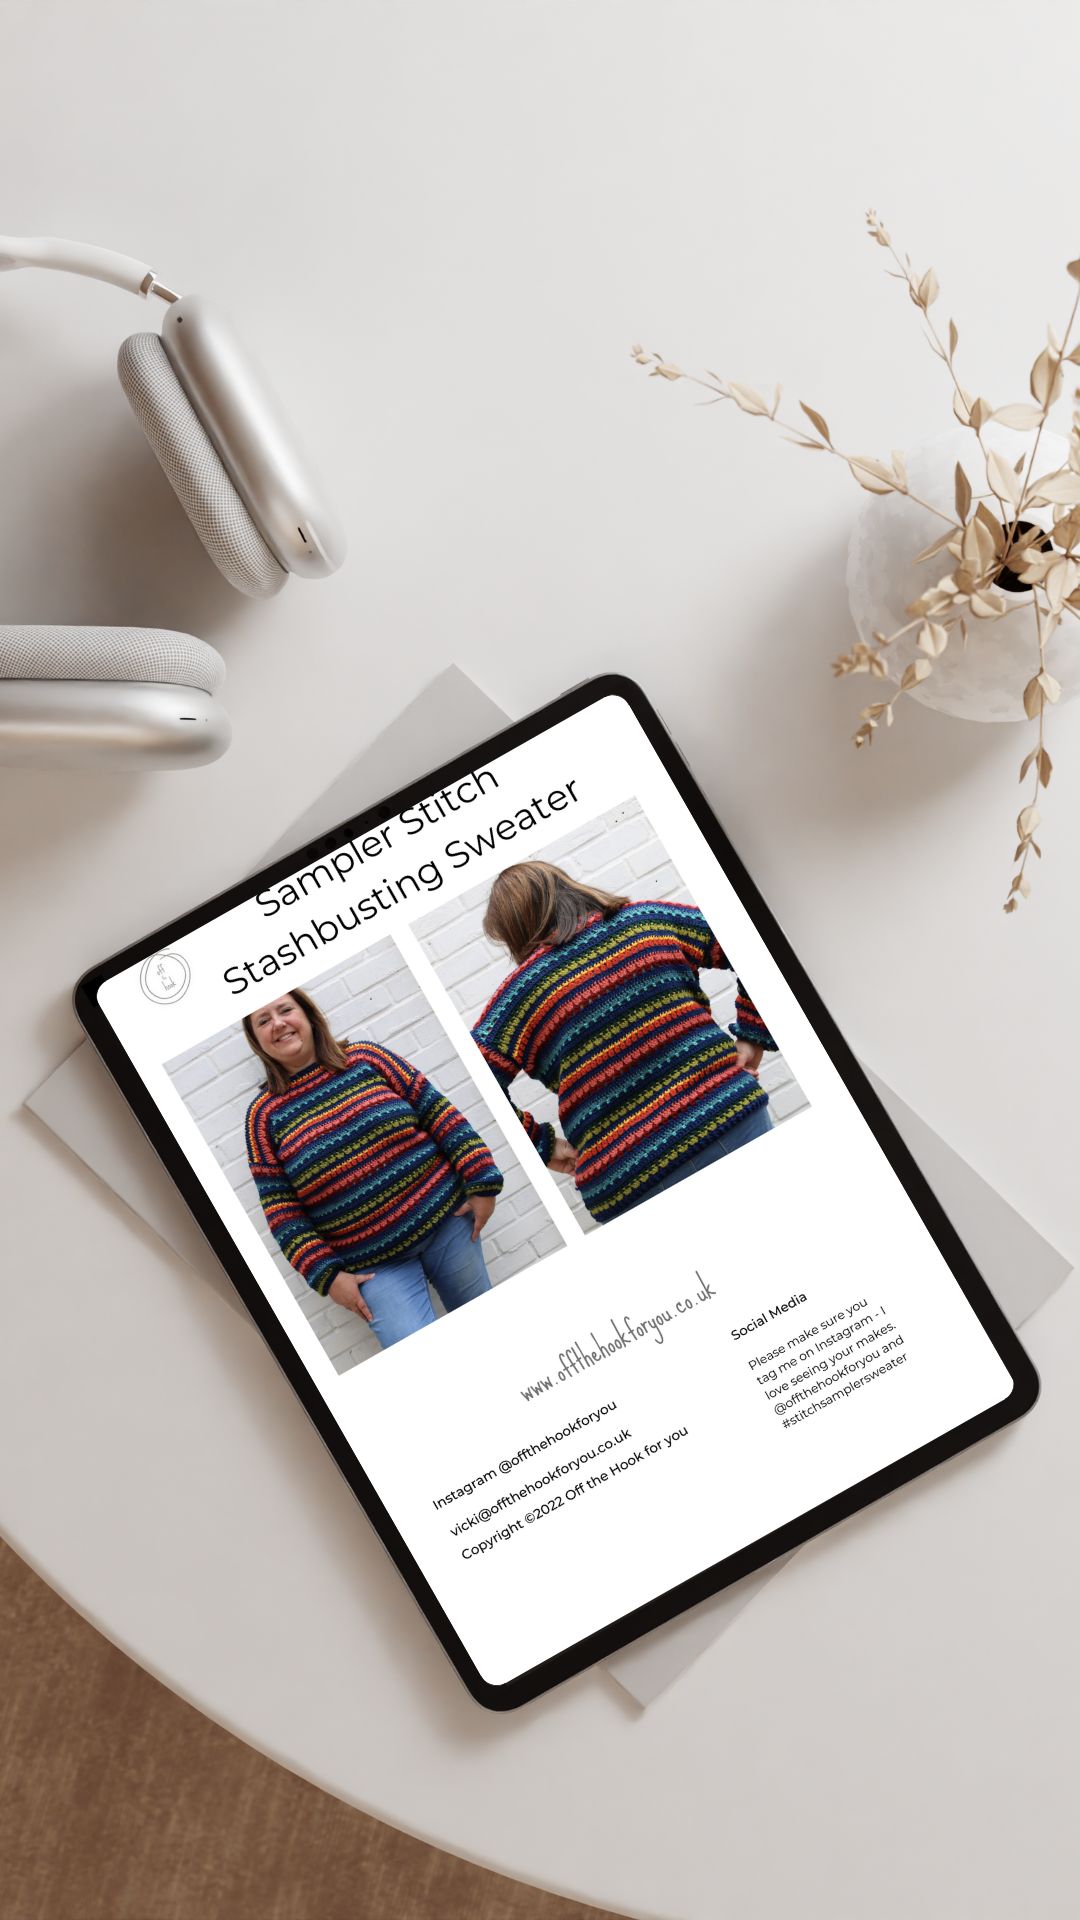
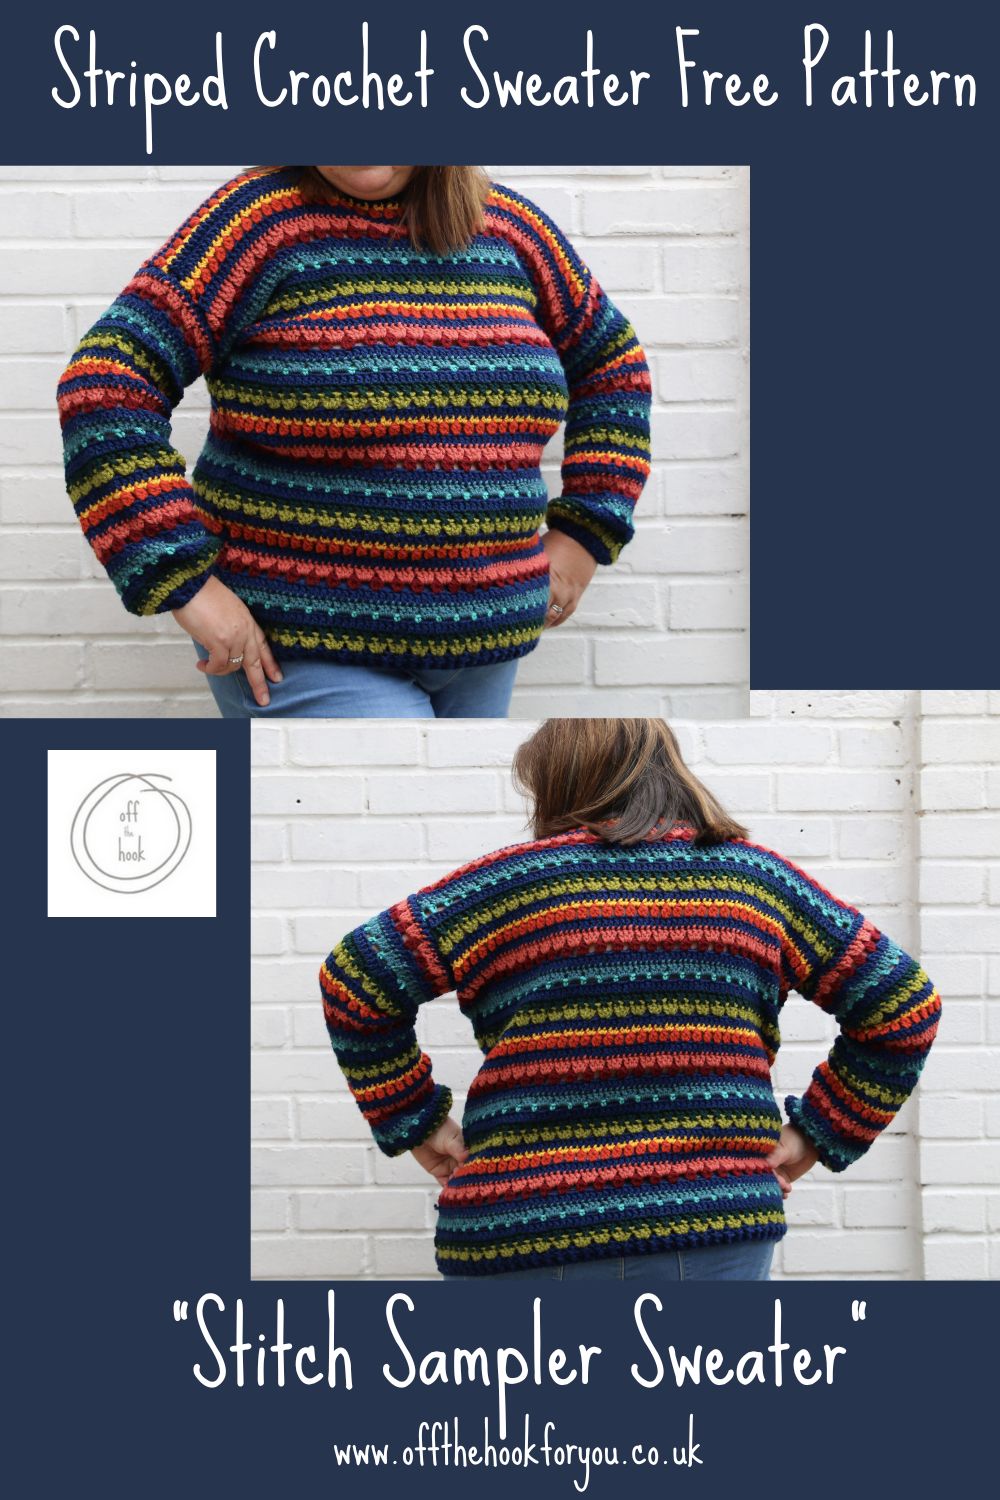
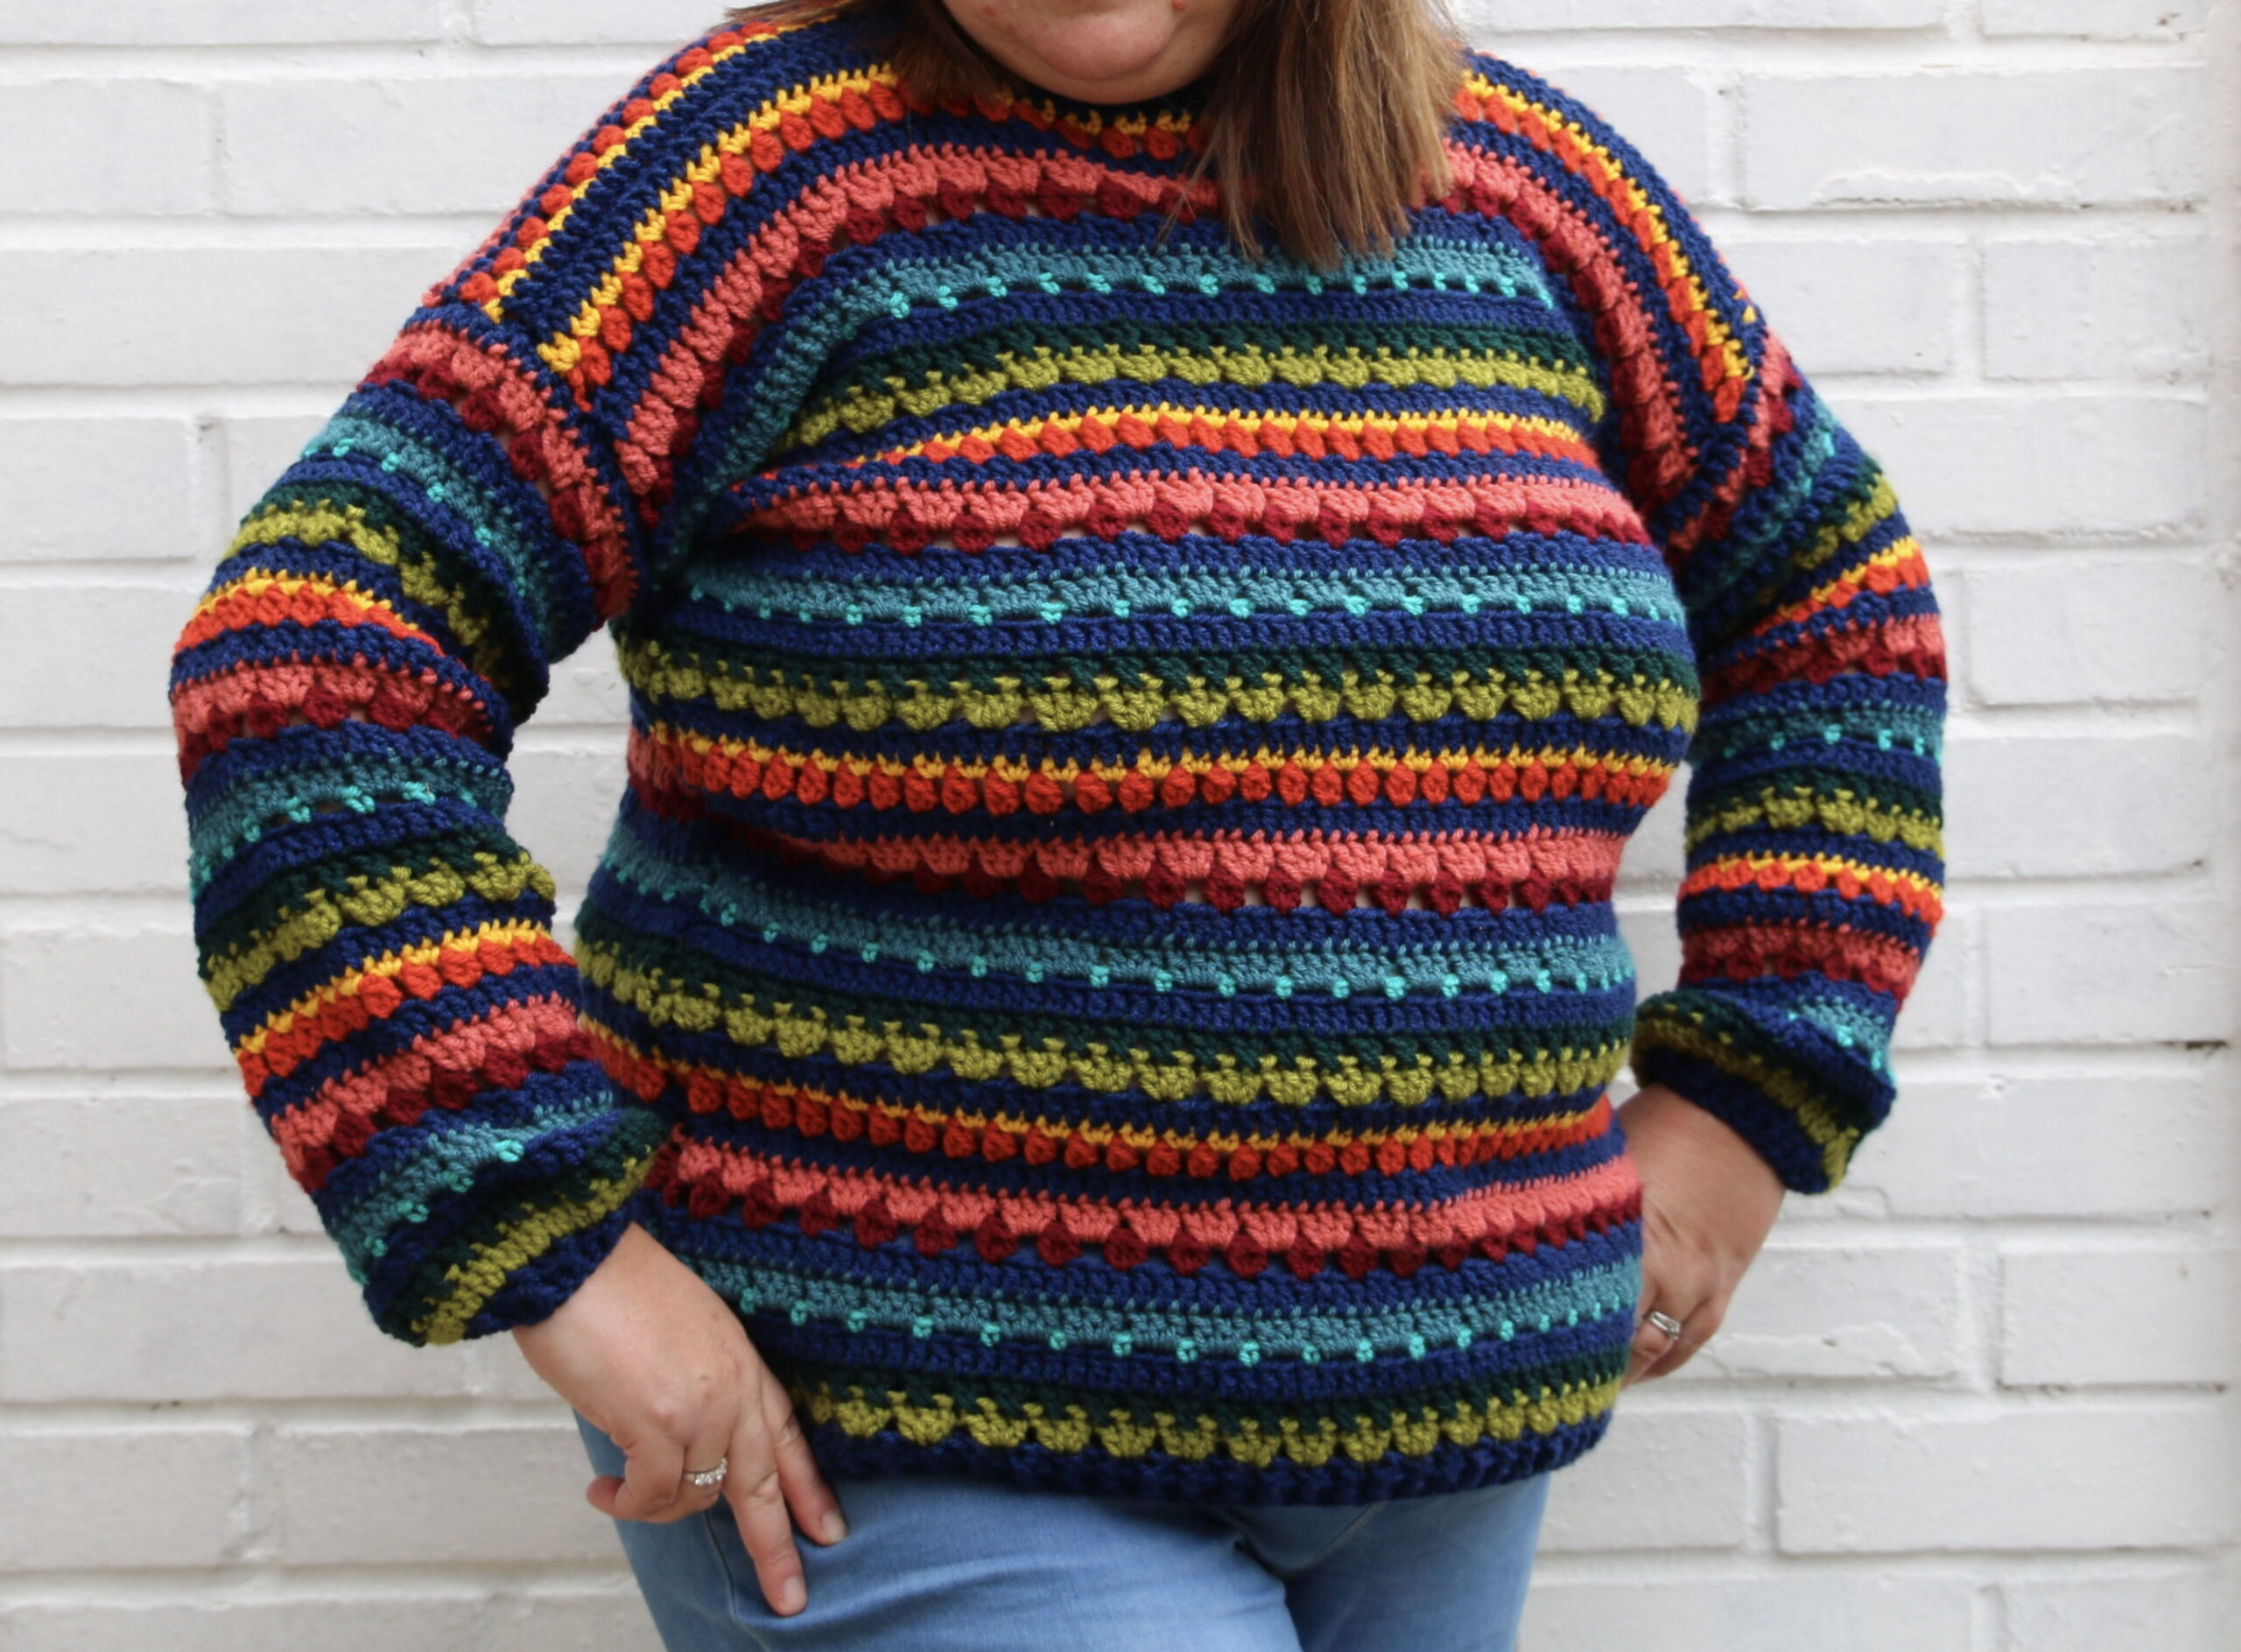
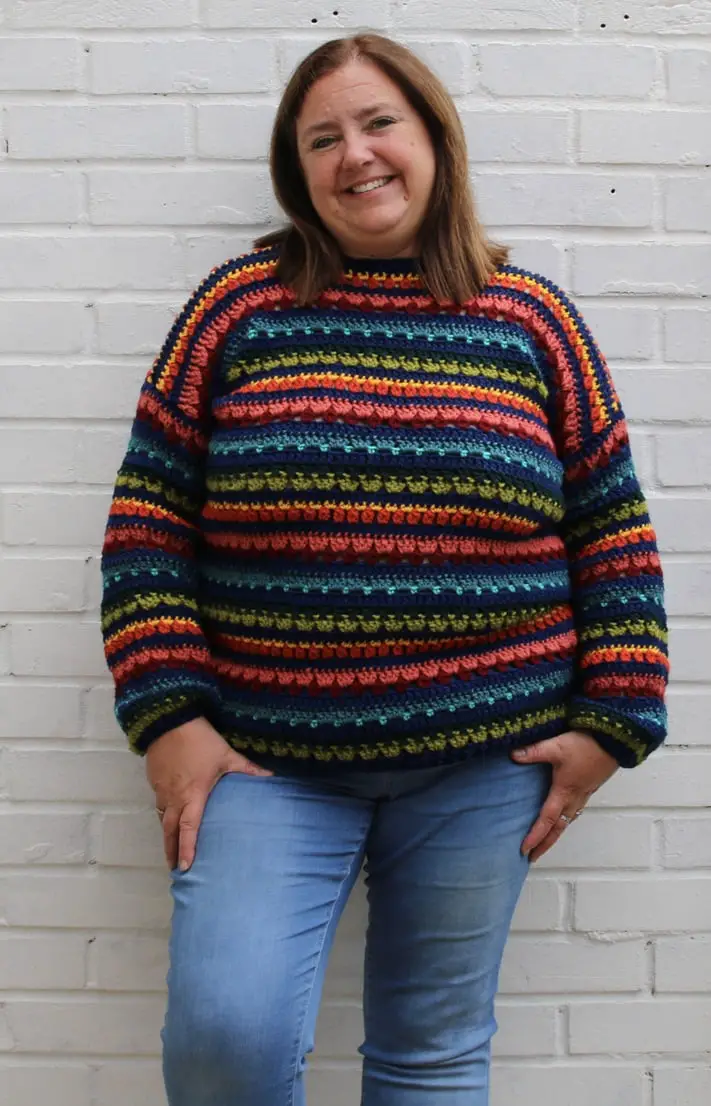
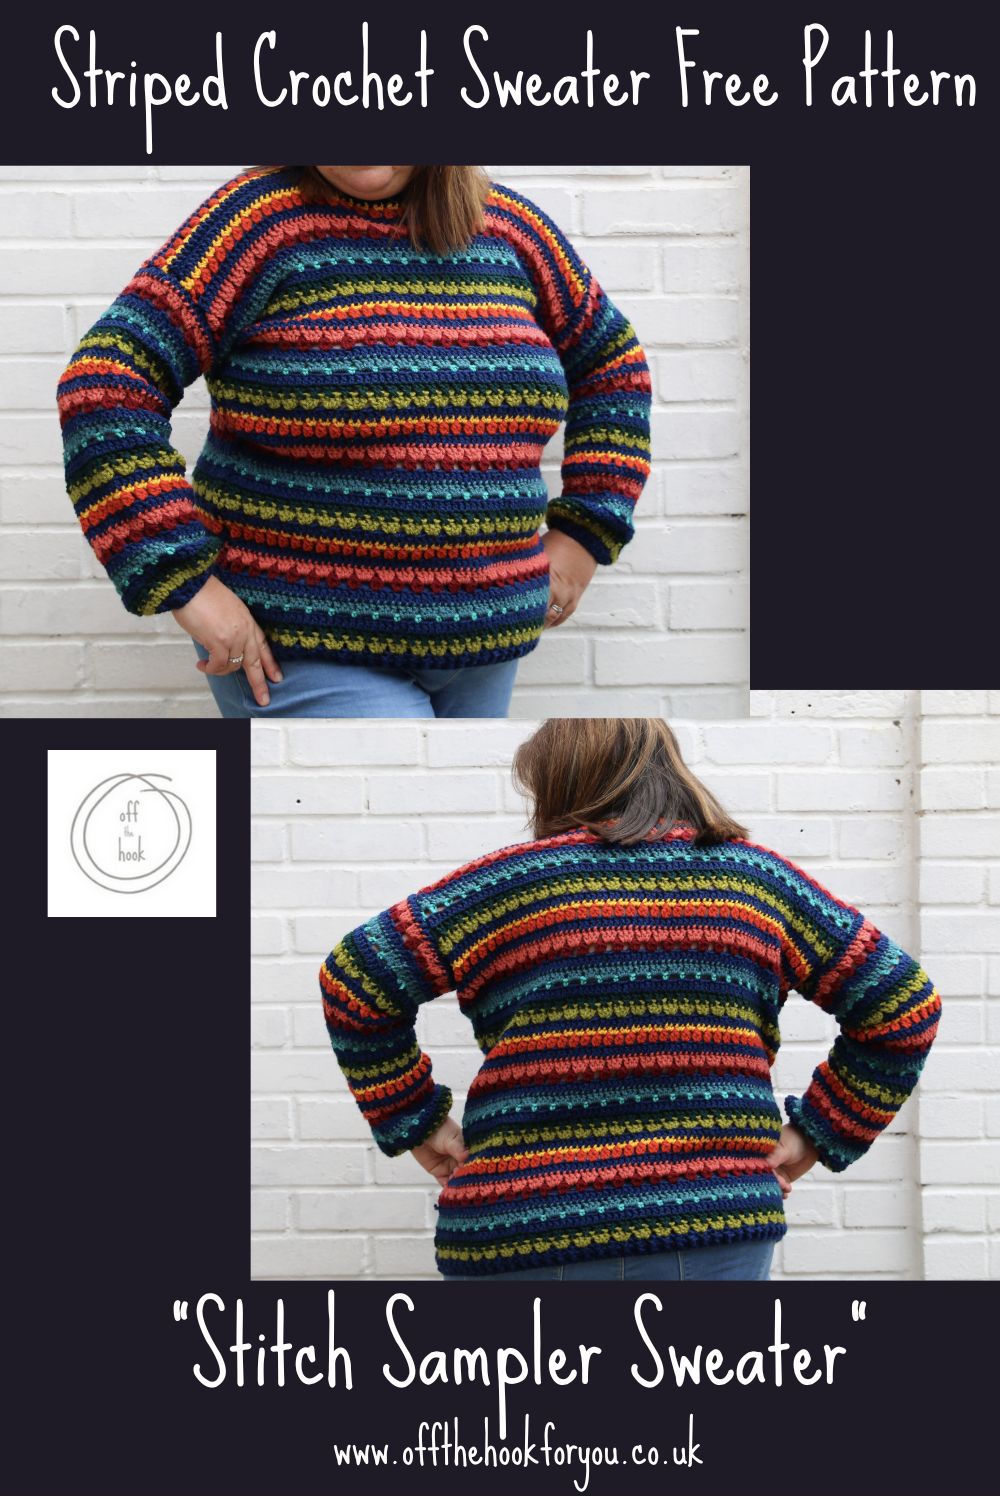
Here you can find the free crochet pattern for The Stitch Sampler Crochet Sweater, a great Striped Sweater that is crochet!
This was an absolute dream for me to write the pattern for this Striped Sweater as it uses Stripes my absolute favourite type of jumper, rainbow ordered colours,a lot of navy blue (I adore blue), and it’s crochet!
Now here we come onto some Uk and USA differences. In the UK we’ll call this a crochet jumper, but across the pond in the USA you’d call this a sweater or a pullover.
Regardless of where we all live, this is a super warm colourful striped crochet jumper, that you can get the pattern for free here.
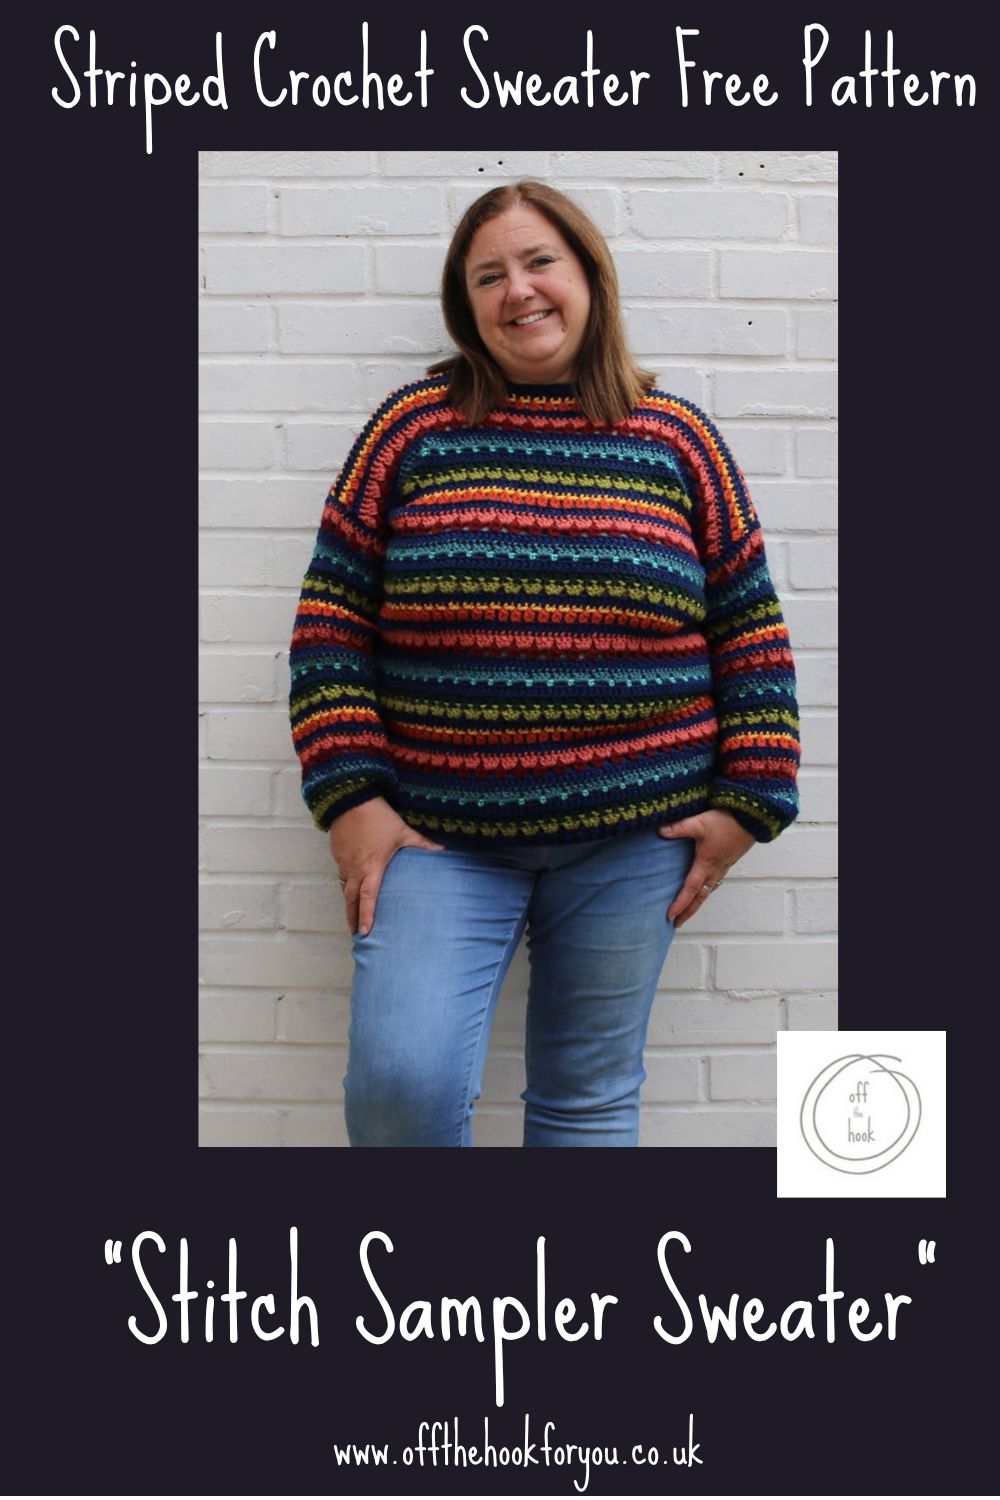
Why the Stitch Sampler Sweater?
I wanted to have a crochet pattern for a striped sweater that was a little different to the standard Double crochet scripted sweaters.
>>>Check out my Striped Easy Cardigan here
I’d seen a really colourful jumper on the internet and knew I wanted one of my own but with a challenge!
The Stitch Sampler Sweater was a challenge with maths, stitch repeats and getting a straight edge, but I’m really happy with my colourful rainbow striped crochet sweater.
What stitches do you need to know to crochet a striped sweater?
You will need to know how too:
- Foundation Double Crochet
- Front post/ Back post double crochet
- Granny Stripe
- Crossed Double crochet
- Double crochet
- Single crochet and chain
- 3DC Cluster
- 2DC Cluster
- Fasten off, weave in ends.
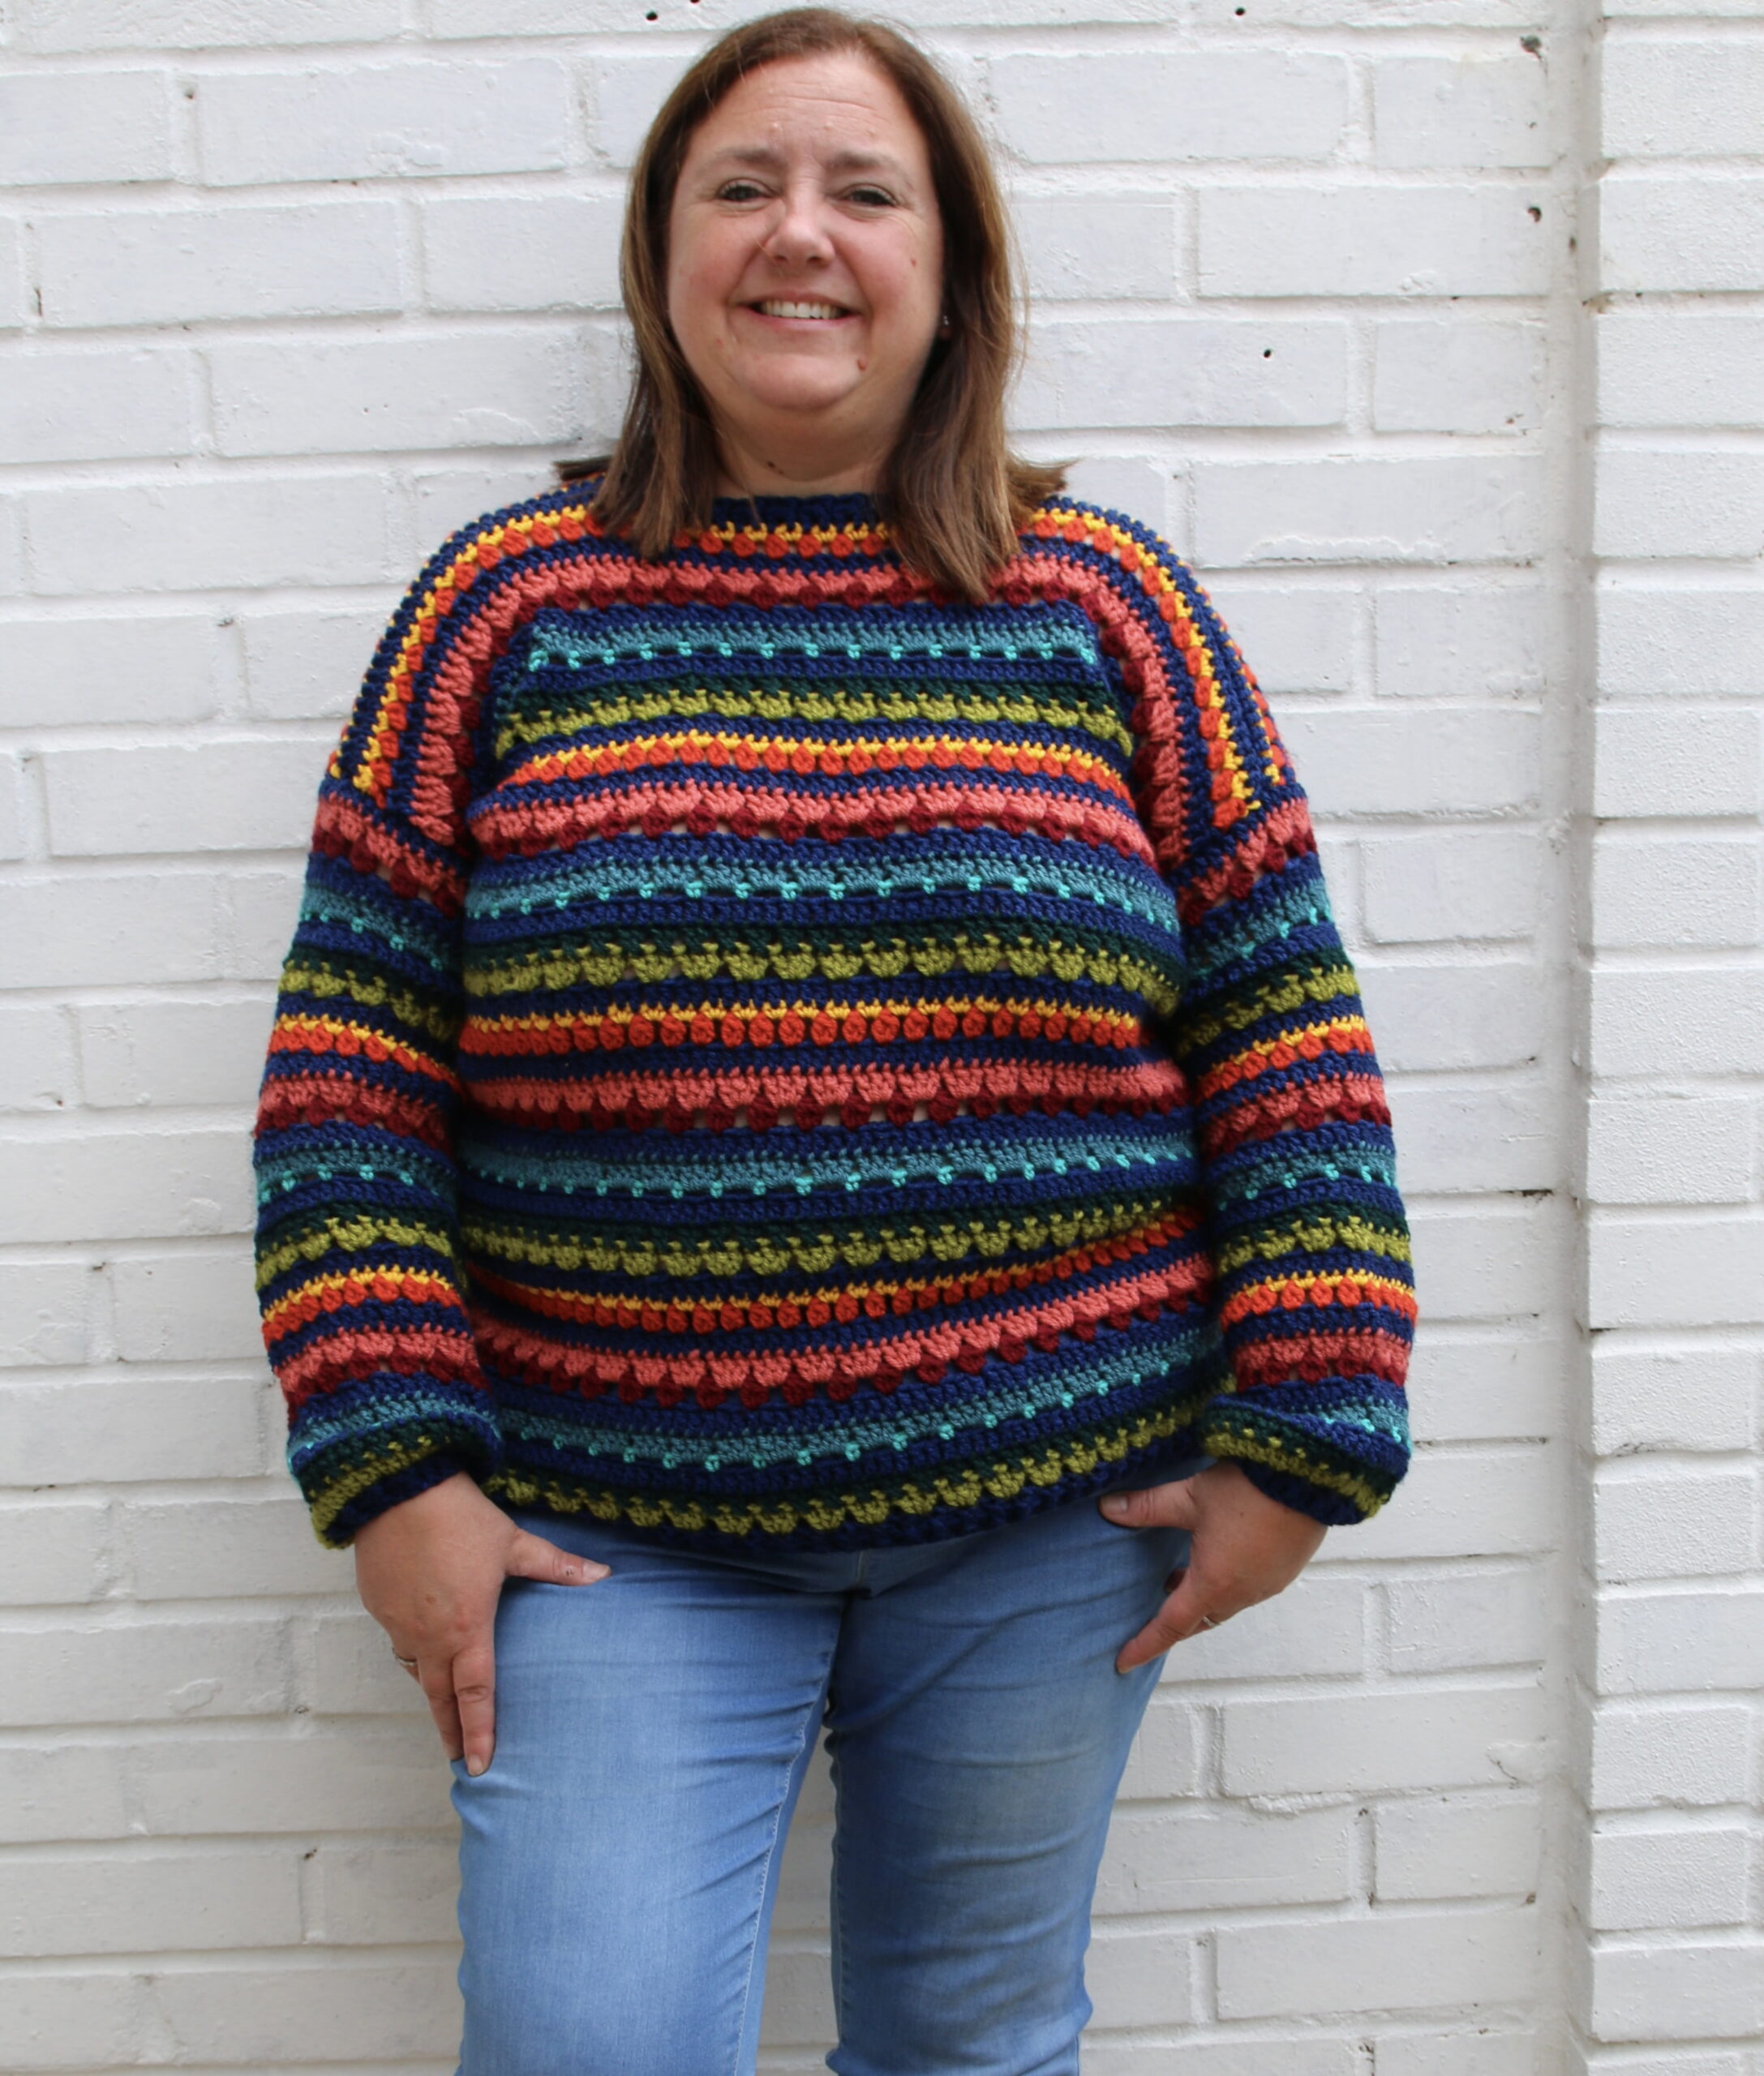
Easy Striped Crochet sweater?
I would call this an advanced beginner sweater.
If you can make a double crochet stitch you will be able to make this sweater, whilst increasing your stitch knowledge at the same time.
What fit for a crochet sweater?
This sweater is designed to be quite a tight fit. If you want a more sloughy striped sweater, make the next size up.
Make sure you make a tension stripe first to check your stitches are the required height and width so the sweaters fits as it should do.
Other Crochet cardigan patterns
>>>Easy Textured short Sleeved Crochet Cardigan
How long does it take to crochet a striped sweater?
As this sweater uses Worsted weight yarn it is really quick to make.
I made an XL and it took about 3 hours per sleeve, then about 6 hours for the back and fronts each.
So this is more that a weekend project, but not by much.
My tester CrochetingPoweredbyGin said “a great pattern that was so relaxing to make, a nice bit of detail to make it a methodical make. As soon as I started making it, I was planning to make several more…. Colour schemes kept popping into my head.
What yarn for a crochet sweater?
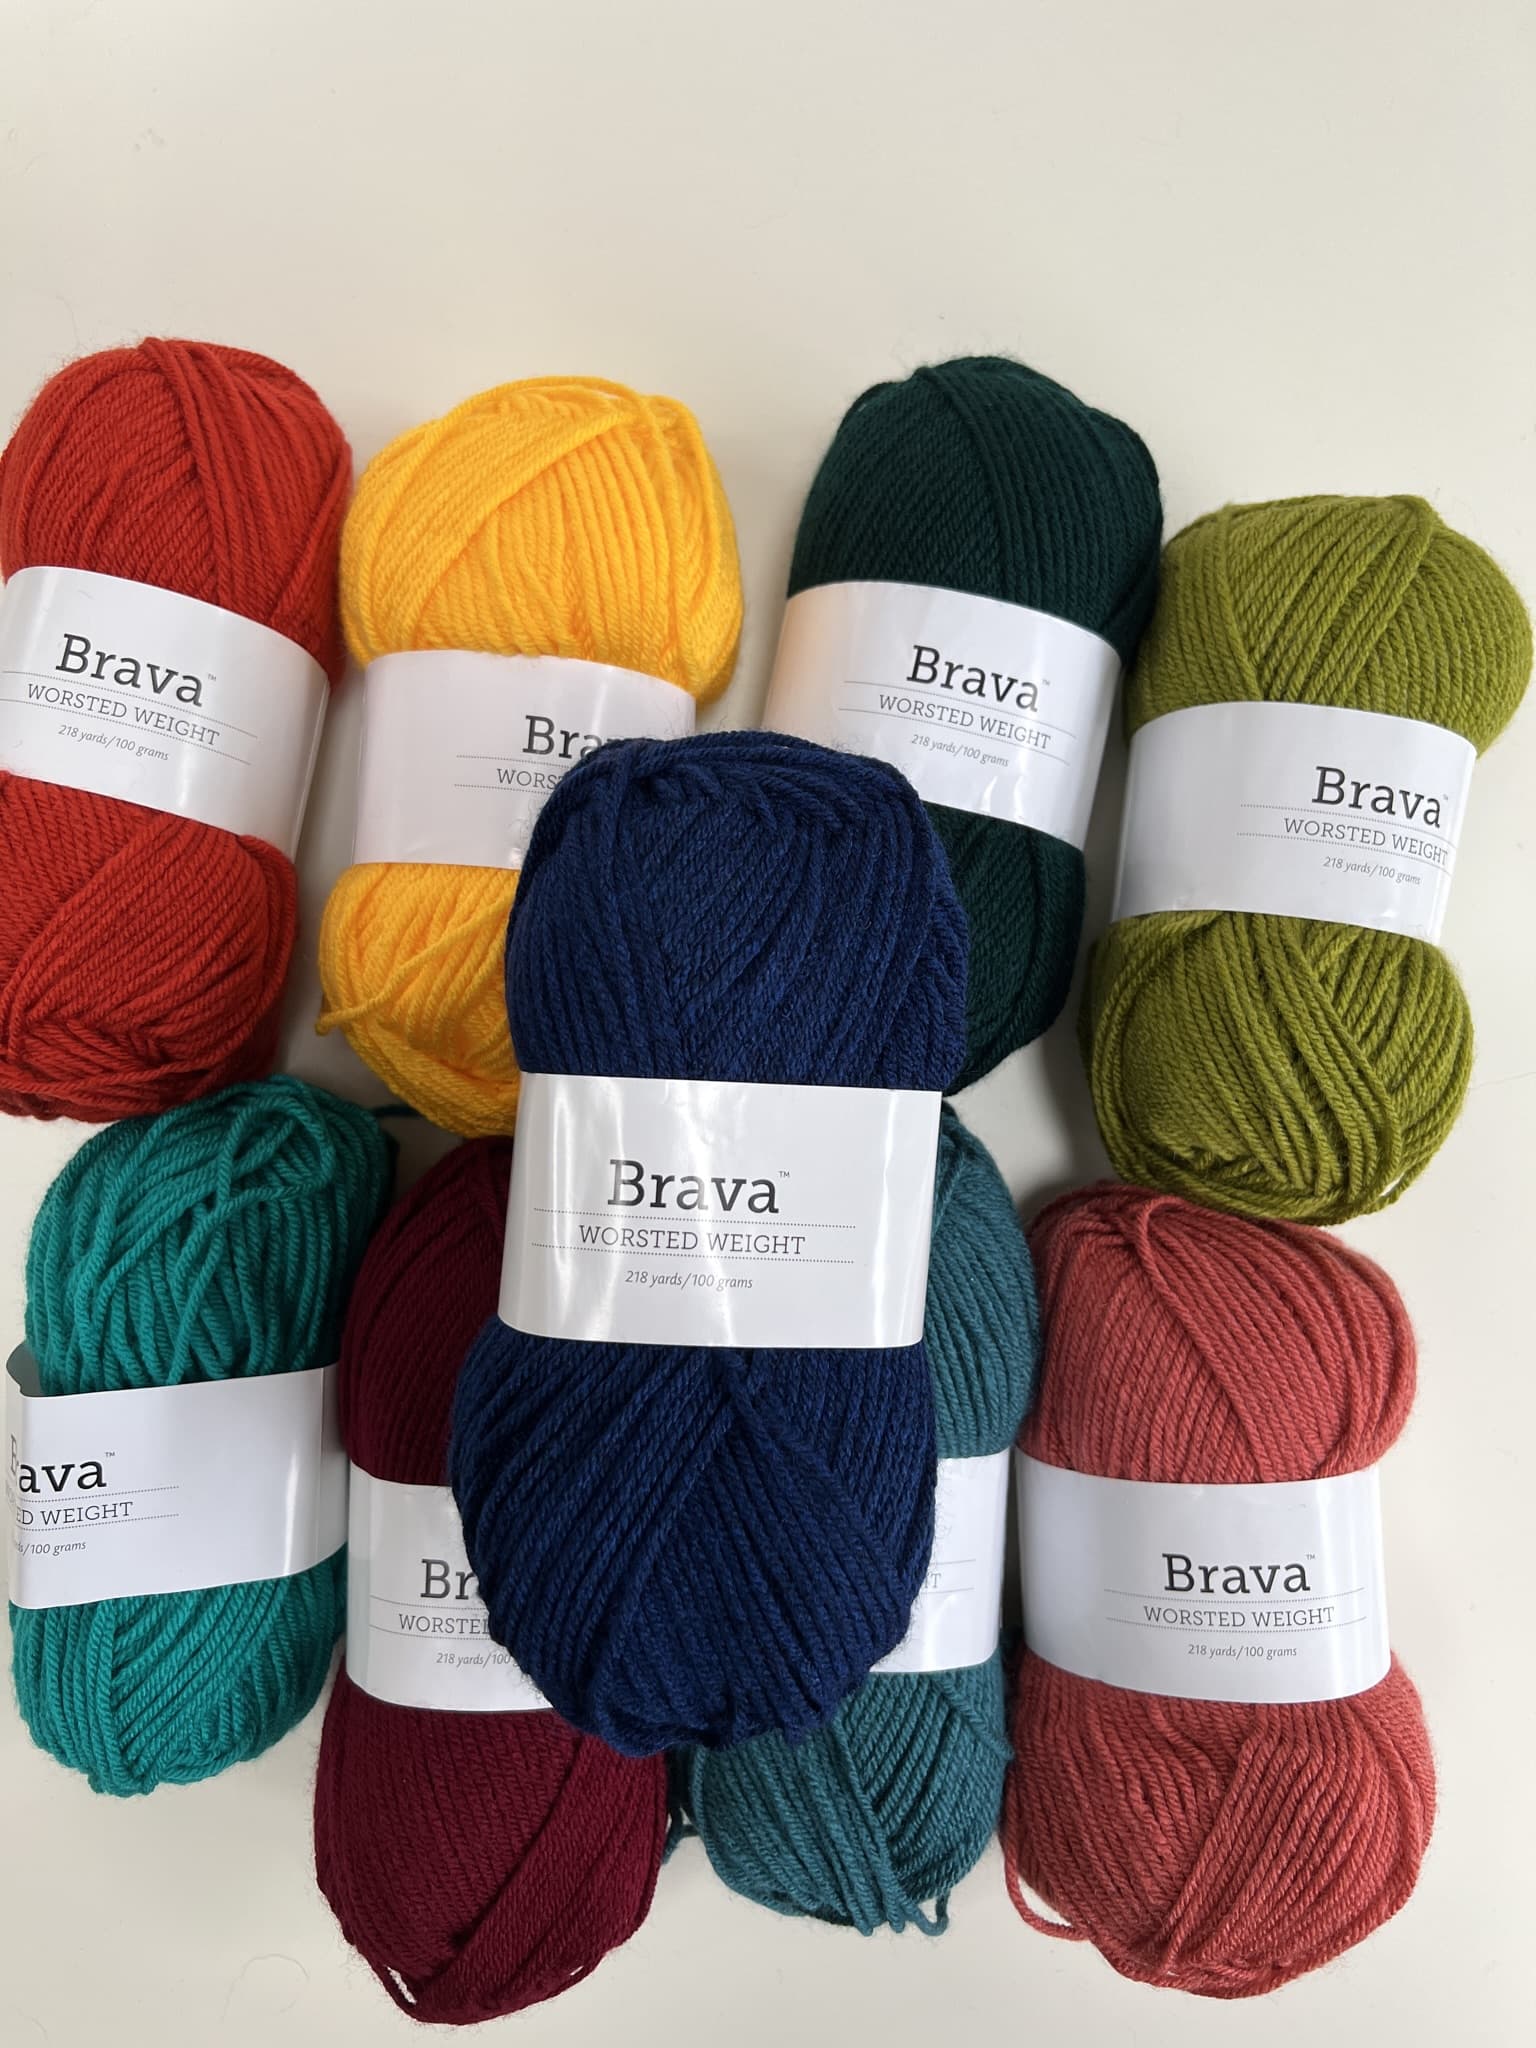
I was very kindly gifted the yarn from Wecrochet for this sweater as part of the winter blog hop with Itchin for some Stitchin, Ned and Mimi and Hanjan Crochet.
I chose their Brava worsted range, and I have to say this yarn is amazing value, and so so soft.
I wanted to choose a yarn that was readily available and also at a good price point for people to make this sweater.
Being in the UK Worsted weight yarn, isn’t out “go to” for a yarn weight, we call this Aran, we tend to go for DK weight, why I have no idea!
The worsted weight yarn is great as it uses a 5.5mm hook, making the sweater really quick to crochet!
For my other designs in Brava check out
>>>Kids Christmas Crochet Sweater
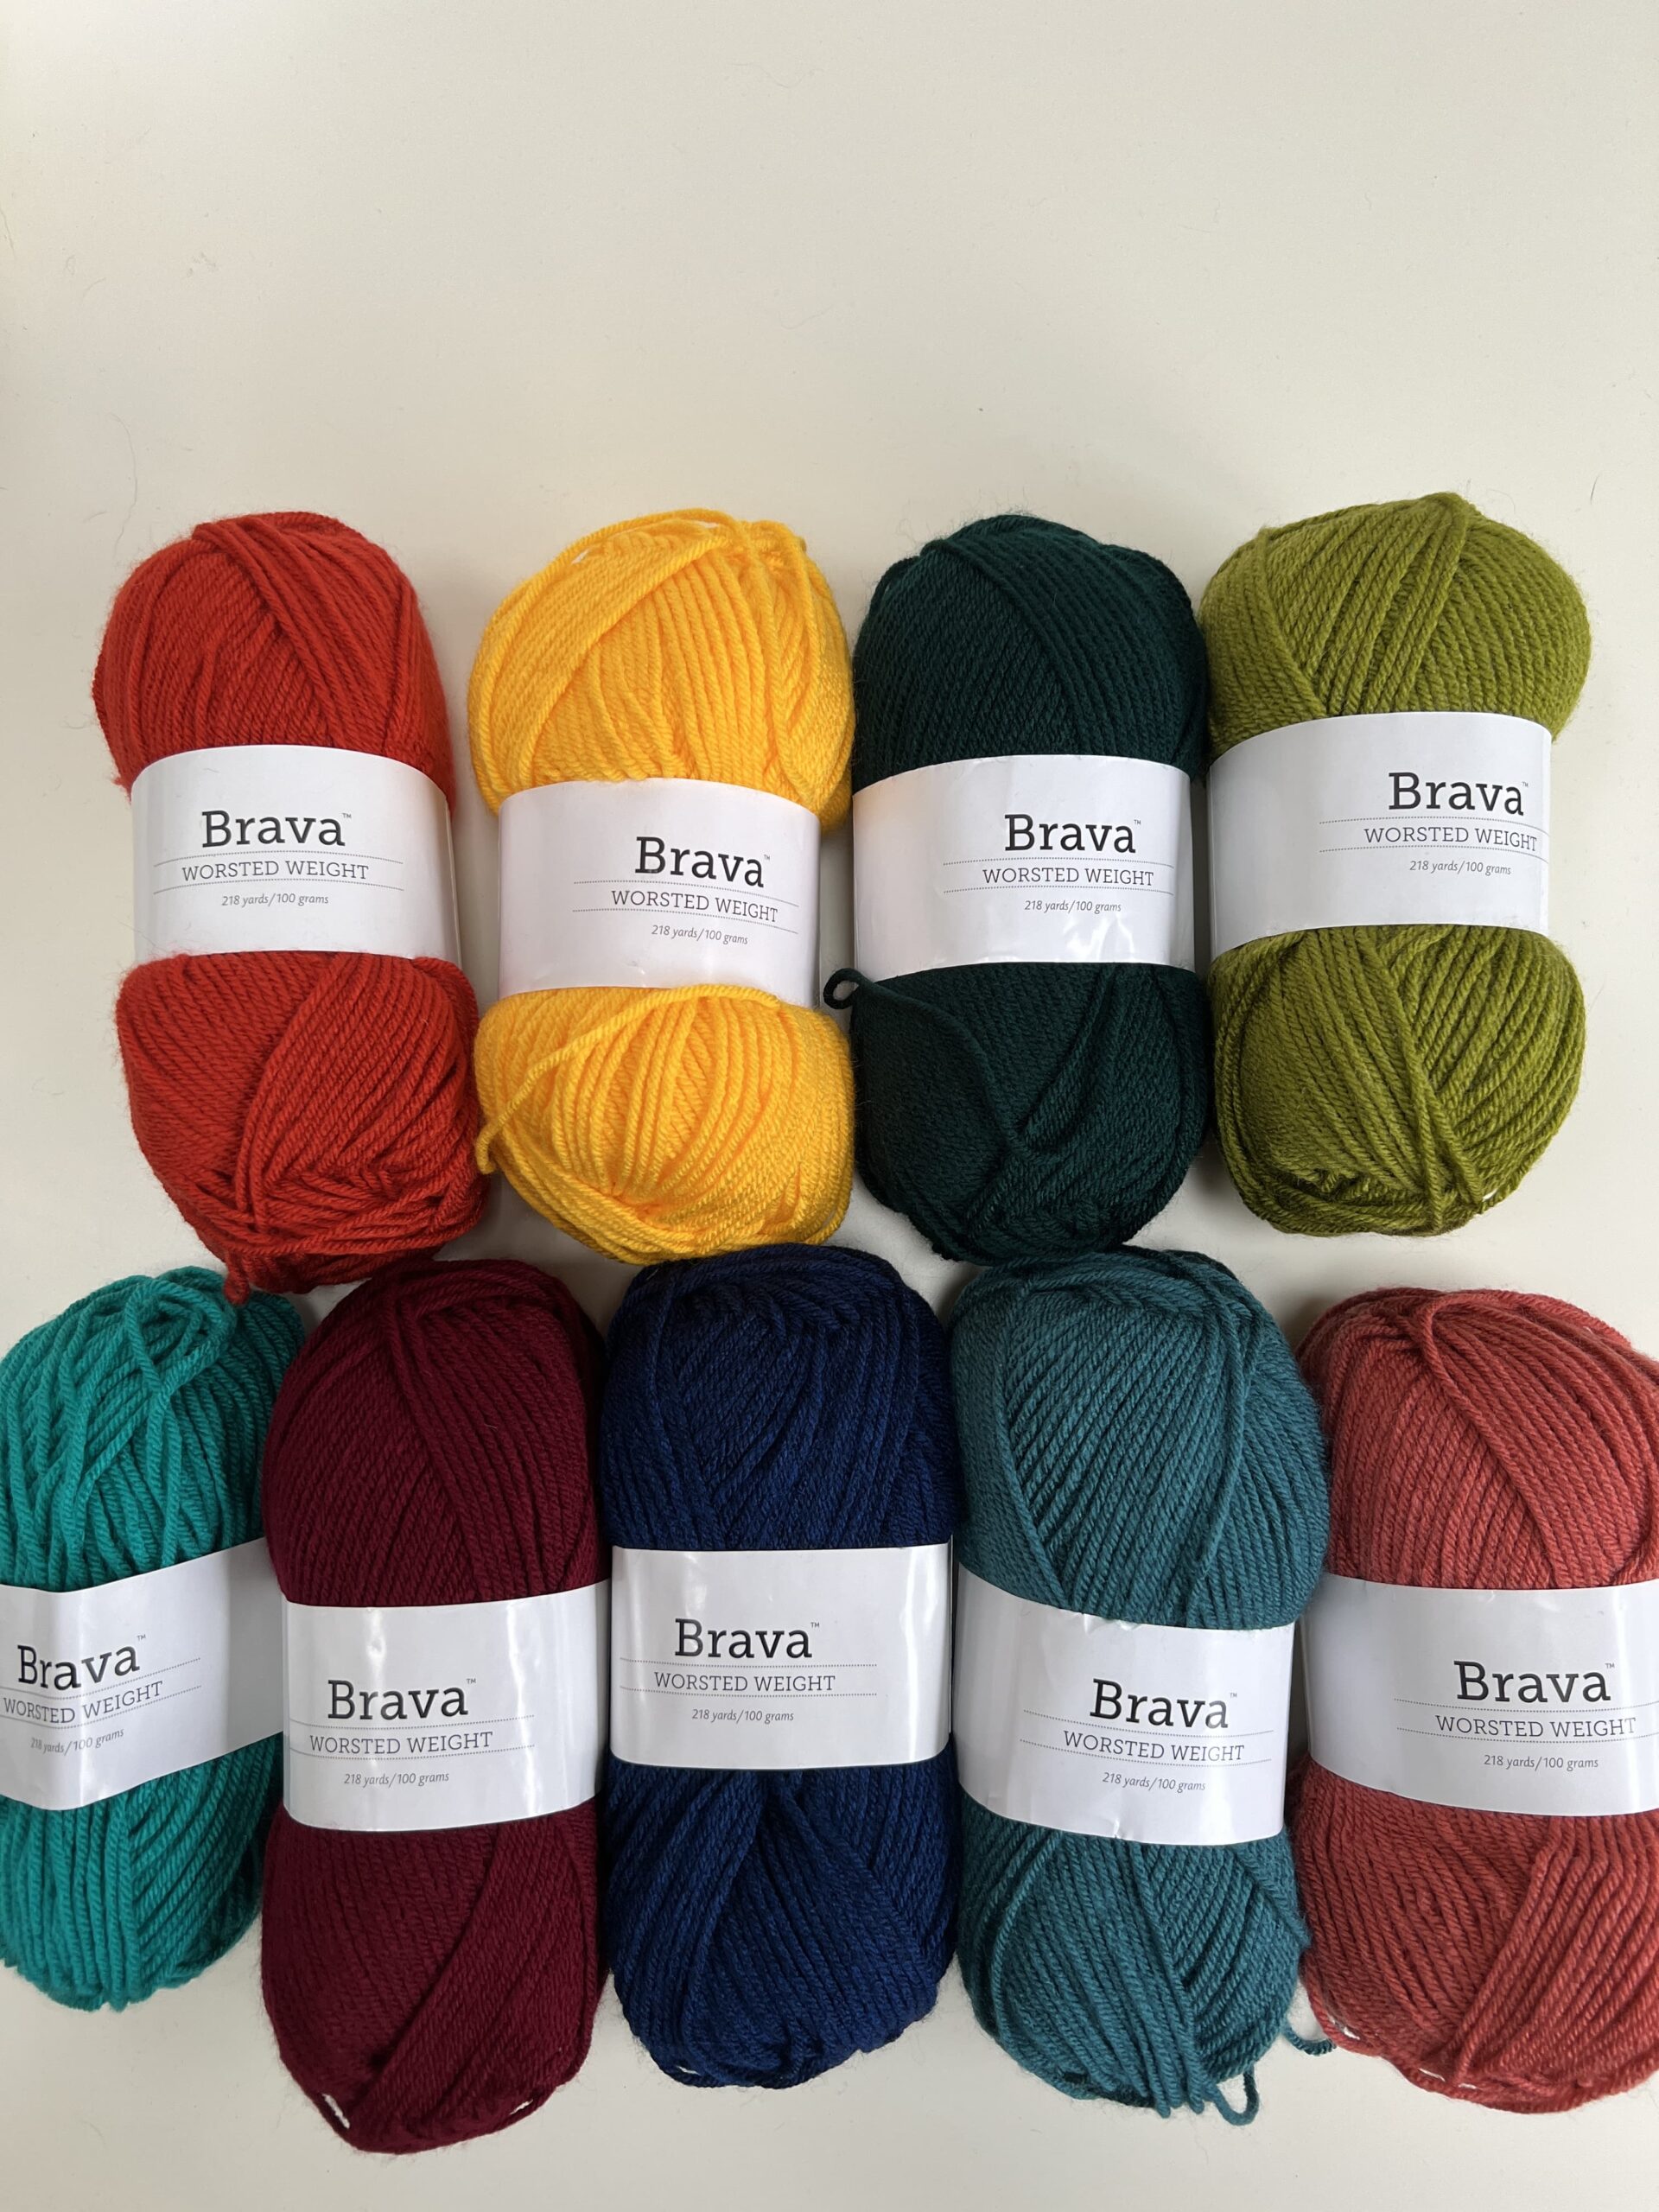
Colour choice was a big things for me, I love a rainbow and I love navy blue…….
Yarn A Solstice Heather (C28452)
Yarn B Avocado (C28412)
Yarn C Hunter (C28435)
Yarn D Marina (C28347)
Yarn E Tidepool (C28453)
Yarn F Wine (C28456)
Yarn G Coral (C28421)
Yarn H Paprika (C28441)
Yarn I Canary (C28416)
Which stitch for a crochet sweater?
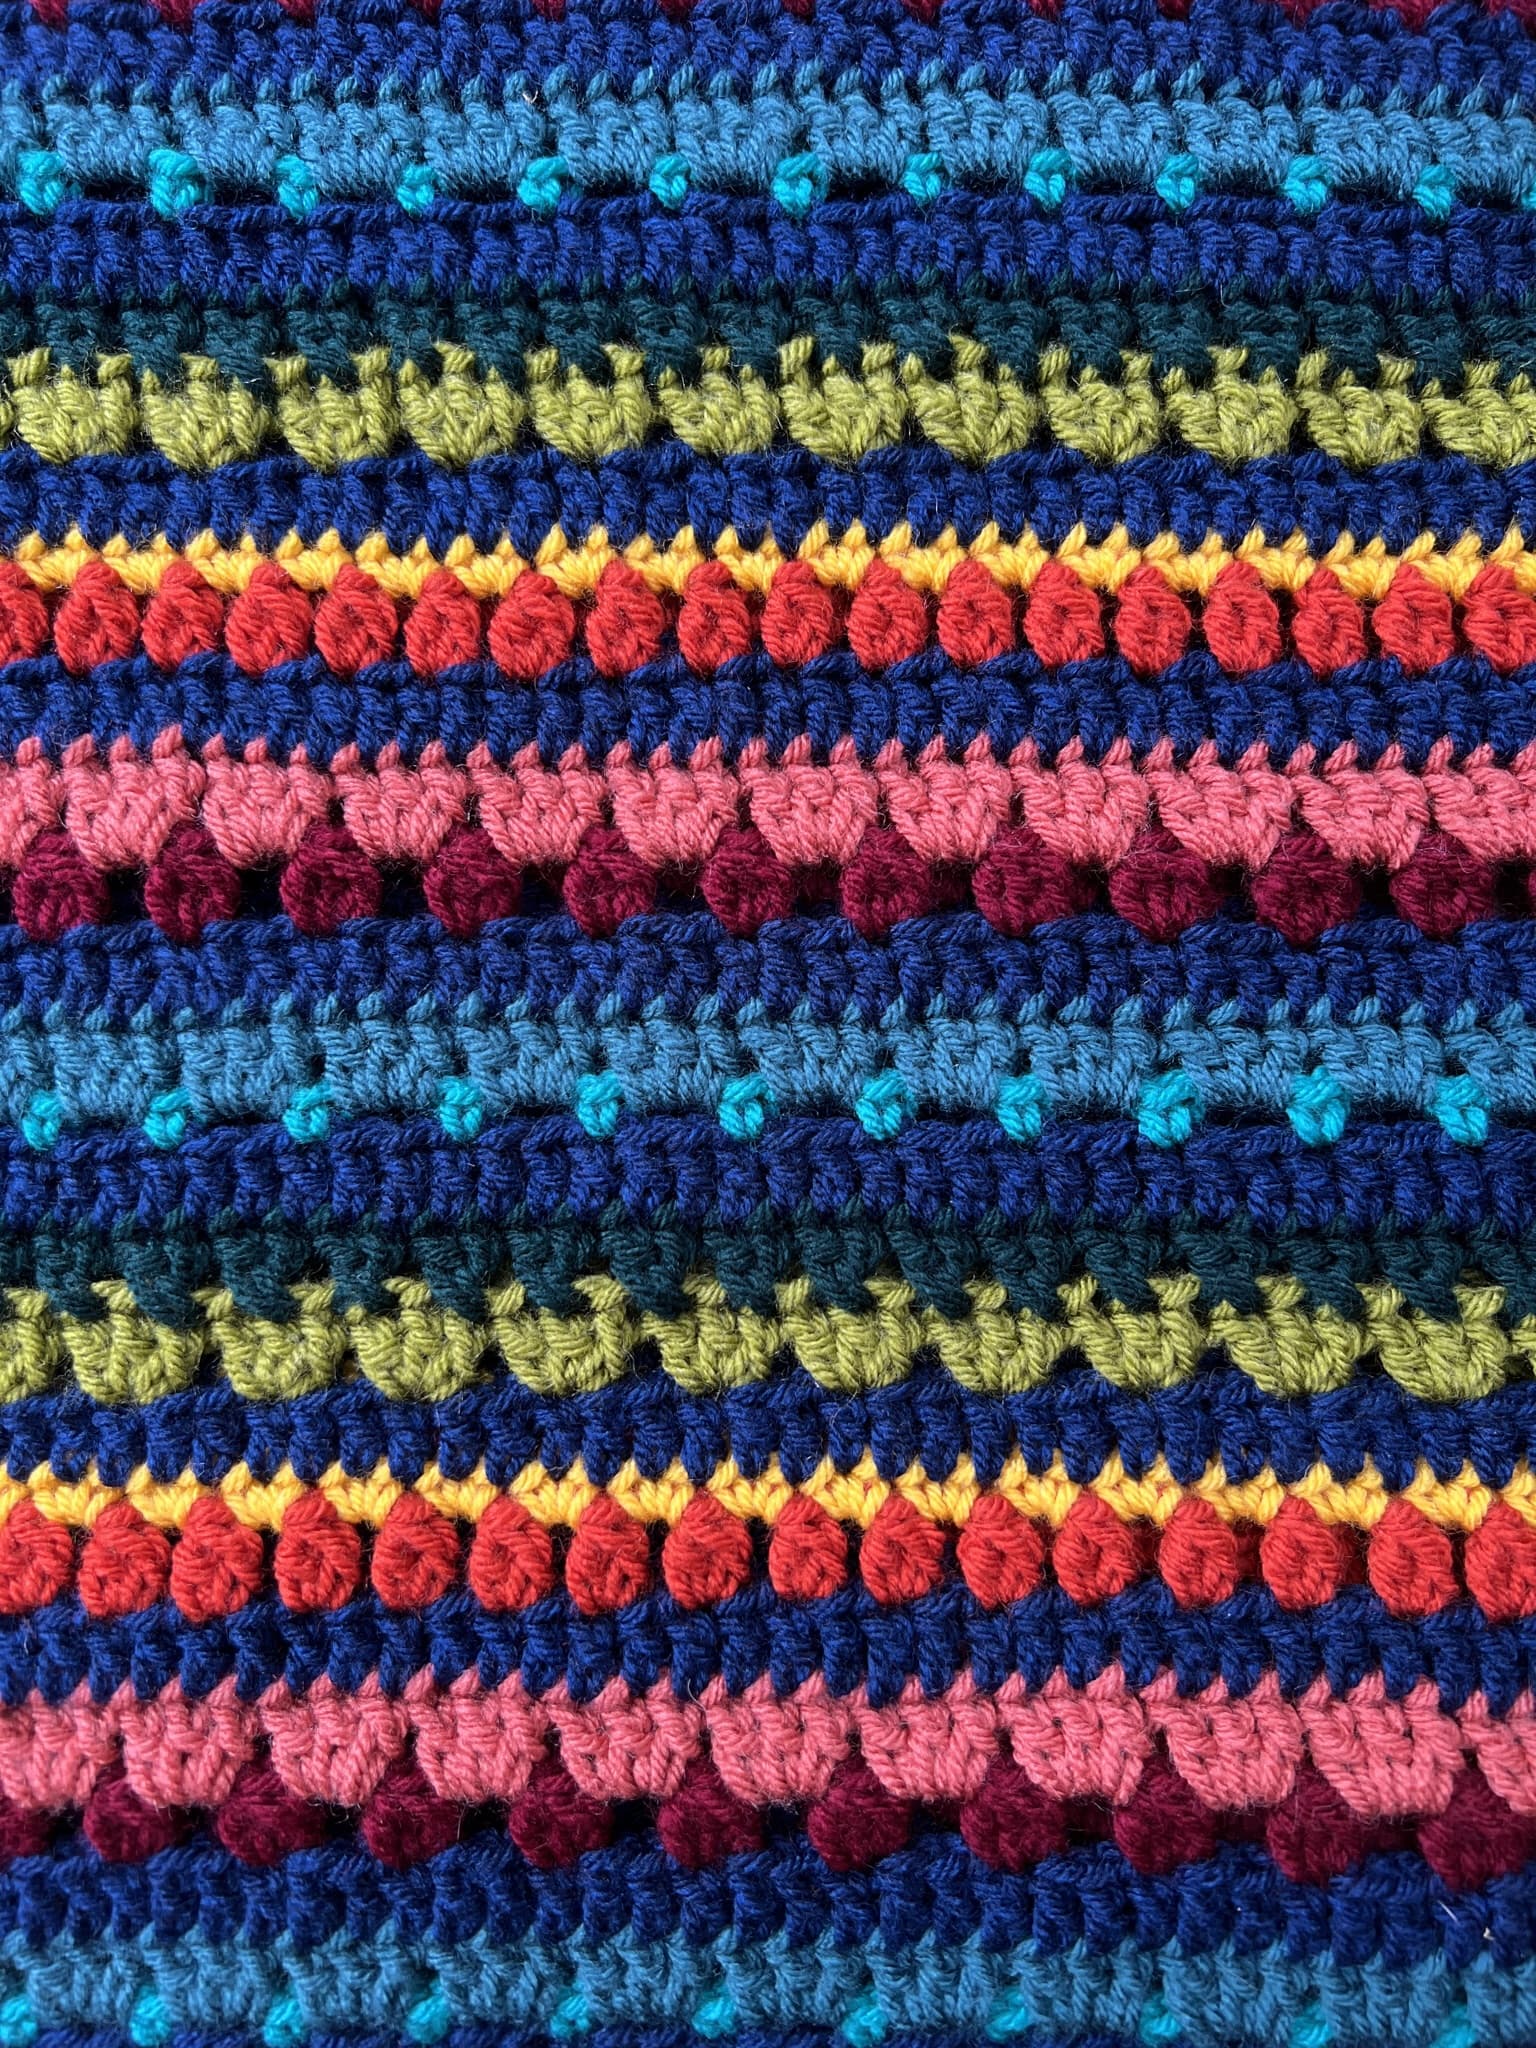
Well that is the best bit about this sweater, I used lots of different ones! I started with my absolute go to – Foundation Double Crochet, a great way to get a straight line.
Then my next go to for a ribbing is Front Post Double crochet followed by Back post Double crochet.
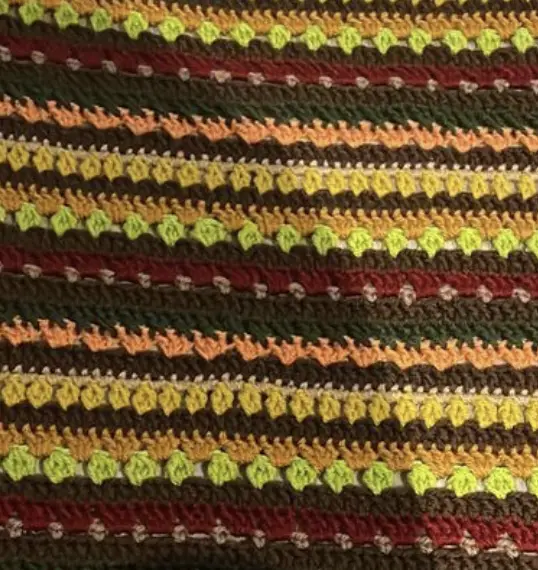
Then I added a bit of granny stripe – which is just 3 double crochets together and skip 2 stitches.
Next a crossed Double crochet, just working a double crochet one stitch over before going back to make the one you missed.
Then a row of Double crochets to get the stitch count correct.
Then I headed into block stitch (which I used for my Block it hats and the cowl in the Crochet Society box)
Adding in another row of Double crochet again to get the stitch counts right and the edges straight.
3DC clusters as I love these, then a bit more Granny Stripe, followed by another row of Double crochets.
2DC clusters and single crochet…. And then repeat the above a few more times.
Crochet Pattern Options
There are a few ways you can get the crochet pattern for my Crochet Striped Sweater, and help support Off the Hook for You.
- You can find and use the Striped Sweater pattern ‘The Stitch Sampler Sweater” here on the blog that is supplemented with ads.
- You can purchase, print and keep the 10 page advert-free pattern PDF in any of my shops as an instant download below.
- You can get the pattern free as part of the Winter Wonders Blog hop 2022 on the 5th November 2022 12:00 to 23:59 EST.
- Or you can buy the pattern bundle containing 43 crochet patterns for $15.99
What else the PDF pattern gets you:
Stitch chart and colour codes sizes.
Get the Ad free Pattern on Etsy
Get the Ad free pattern Lovecrafts
Get the Ad Free Pattern Ravelry

Striped Sweater Crochet Pattern
Brava Worsted Weight yarn 218 yards/ 100g, 100% premium acrylic
1 ball/ Skein of each colour apart Solstice Heather Yarn A (C28452) which needs 2 balls for sizes XS, S and 3 balls for sizes M, L XL, 4 balls for 2XL, 3XL, 5 balls for 4XL and 5XL
Yarn A Solstice Heather (C28452)
Yarn B Avocado (C28412)
Yarn C Hunter (C28435)
Yarn D Marina (C28347)
Yarn E Tidepool (C28453)
Yarn F Wine (C28456)
Yarn G Coral (C28421)
Yarn H Paprika (C28441)
Yarn I Canary (C28416)
Scissors
Stitch marker
Tapestry Needle
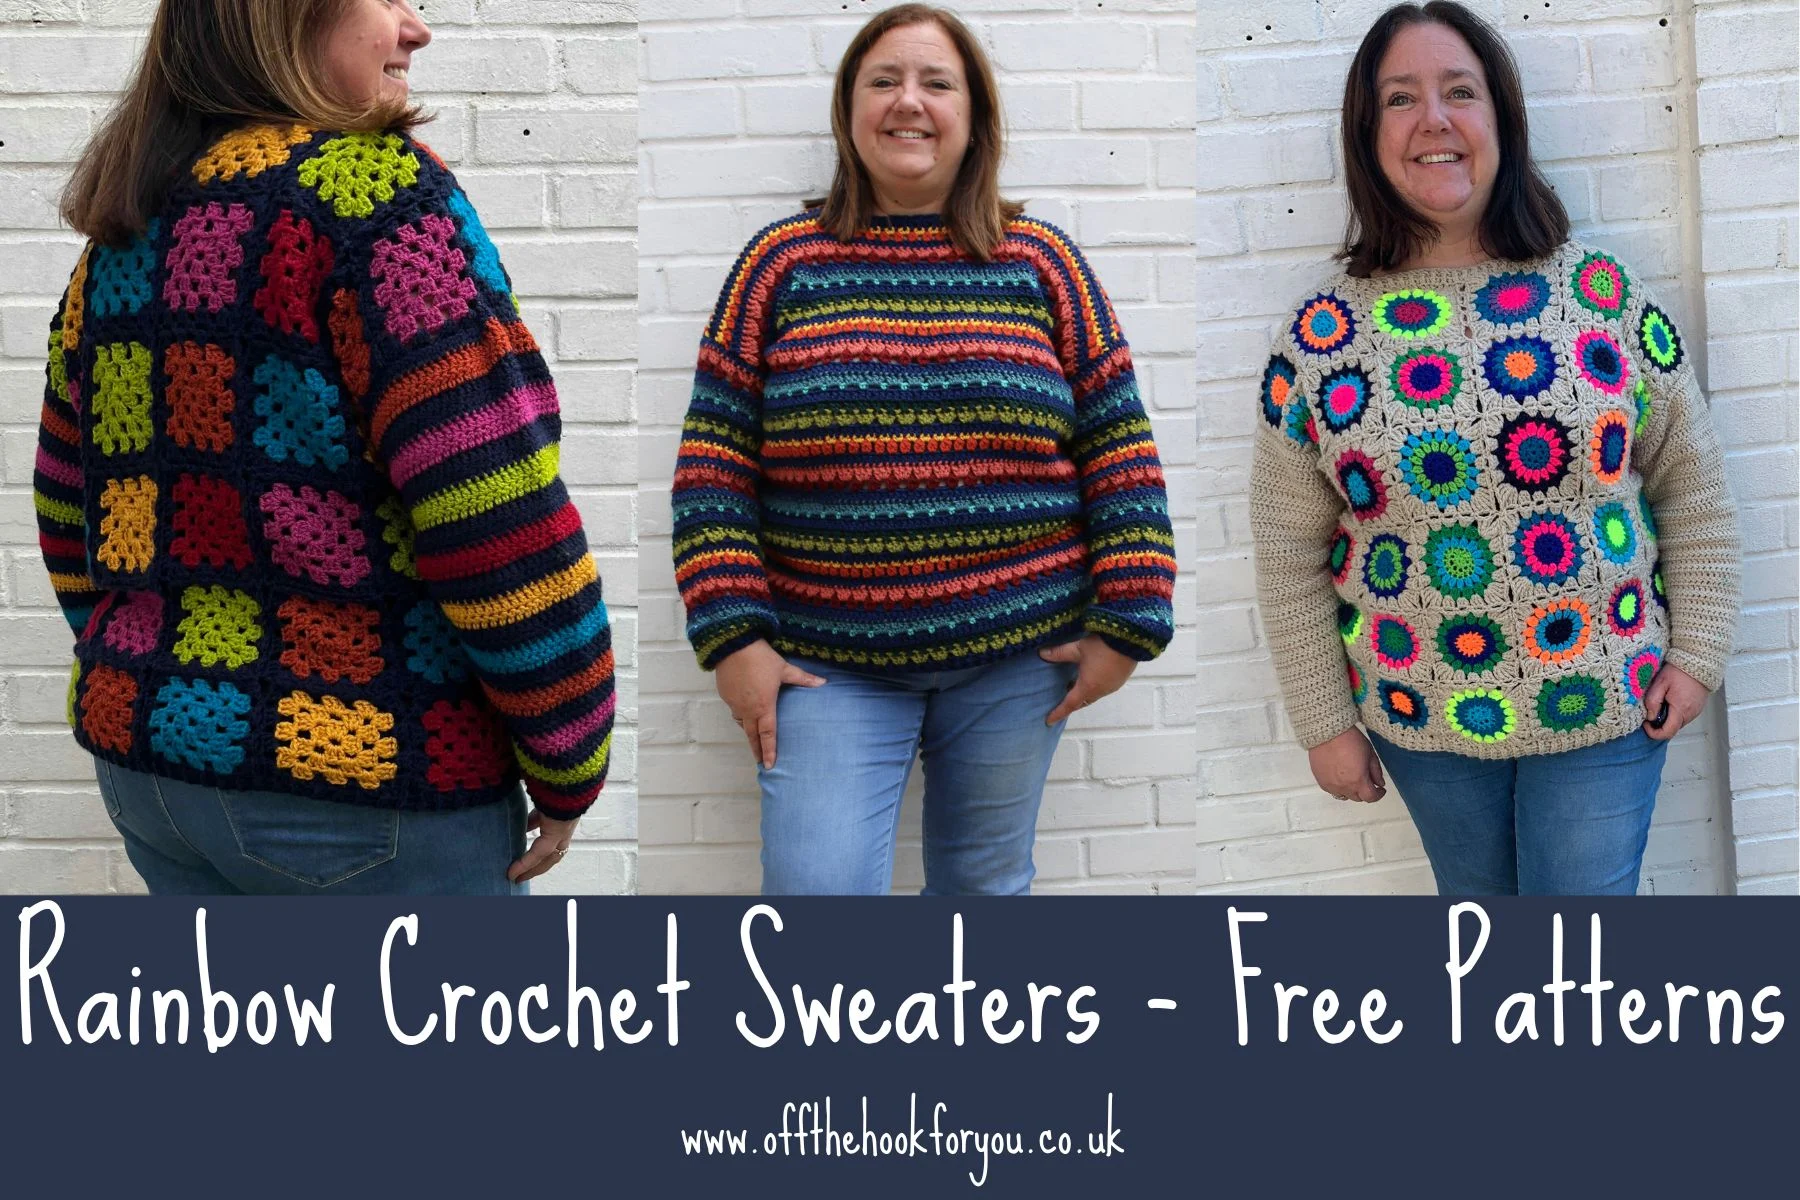
Table 1: Sizing
| Size | XS | S | M | L | XL | 2XL | 3XL | 4XL | 5XL |
| To Fit Bust (cm) | 76 | 86 | 97 | 107 | 117 | 127 | 137 | 147 | 158 |
| Actual Bust (cm) | 77 | 86 | 94 | 103 | 120 | 129 | 137 | 149 | 157 |
| Length (cm) | 60 | 60 | 60 | 60 | 60 | 60 | 60 | 60 | 60 |
| Armhole depth (cm) | 17 | 19 | 19 | 21 | 24 | 24 | 24 | 26 | 28 |
| Sleeve Length (cm) | 43 | 43 | 43 | 43 | 43 | 43 | 43 | 43 | 43 |
| To Fit Bust (inches) | 30 | 34 | 38 | 42 | 46 | 50 | 54 | 58 | 62 |
| Actual Bust (inches) | 30 | 34 | 37 | 40 | 47 | 51 | 54 | 58 | 62 |
| Length (inches) | 24 | 24 | 24 | 24 | 24 | 24 | 24 | 24 | 24 |
| Armhole Depth (inches) | 7 | 7 | 7 | 8 | 9 | 9 | 9 | 10 | 11 |
| Sleeve Length (inches) | 17 | 17 | 17 | 17 | 17 | 17 | 17 | 17 | 17 |
Pattern Notes:
The jumper is made by making 2 squares, for the front and the back. Worked in rows, fastening off the yarn at the end of each row and rejoining yarn on the same side.
The Sleeves are made by Slip stitching to join, and worked in the round. You can carry the dark blue (Solstice Heather) yarn up the inside of the sleeve.
Make a tension square before you start – to check your tension. FDC18 sts, and work pattern repeat as per body pieces.
You can use the ends to sew the jumper together, rather than sew them in and join with a new colour.
Beginning ch counts as a stitch unless otherwise stated.
Stitch count for the body is as row 1 unless stated.
Stitch count for the sleeves is as row 3 unless stated.
Abbreviations – USA Terms used
Ch – chain stitch
BPDC – back post double crochet
DC – double crochet
FDC – foundation double crochet
FPDC – front post double crochet
pul – pull up loop
RS – Right Side
ss – slip stitch
st(s) – stitch (es)
YO – yarn round hook
Foundation Double Crochet (FDC): Ch3 (counts as first 1DC), yrh, insert hook in 3rd Ch from hook, [YO, pul, YO, draw through 1 loop on hook (Ch made), YO, draw through 2 loops] twice (DC made)], insert hook in last Ch made; rep [ ] for number of sts required.
2DC Cluster (2DCcl) – YO, through st, pull back through, YO, pull back through 2 loops, YO, through same st, YO, pull back through, YO, pull back through 2 loops, YO pull back over all loops.
3 DC Cluster (3DCcl) – YO, through st, pull back through, YO, pull back through 2 loops, YO, through same st, YO, pull back through, YO, pull back through 2 loops, YO, through same st, YO, pull back through, YO, pull back through 2 loops, YO pull back over all loops.
Crossed Double crochet Stitch – 3ch, *skip next st, DC in next st, working behind st just made, DC into skipped st; rep from * to last, DC in last. (row 5)
Front Post Double Crochet (FPDC), work the treble around the post of the stitch inserting hook from front to back to front again
Back Post Double Crochet (BPDC), work the treble around the post of the stitch inserting hook from back to front to back again.
Tension
1 Full Pattern repeat, 3-14 rows = 15 cm in height
14 st and 8 rows of crochet pattern to measure 10cm x 10cm (4in x 4in) square with a 5.5 mm hook.
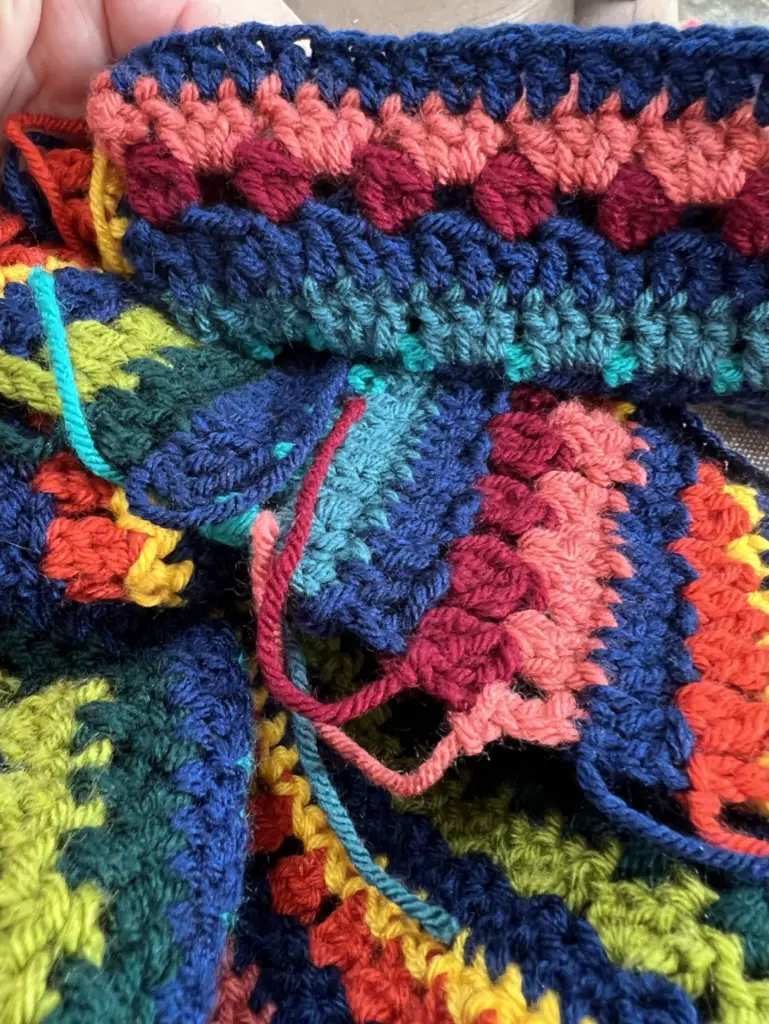
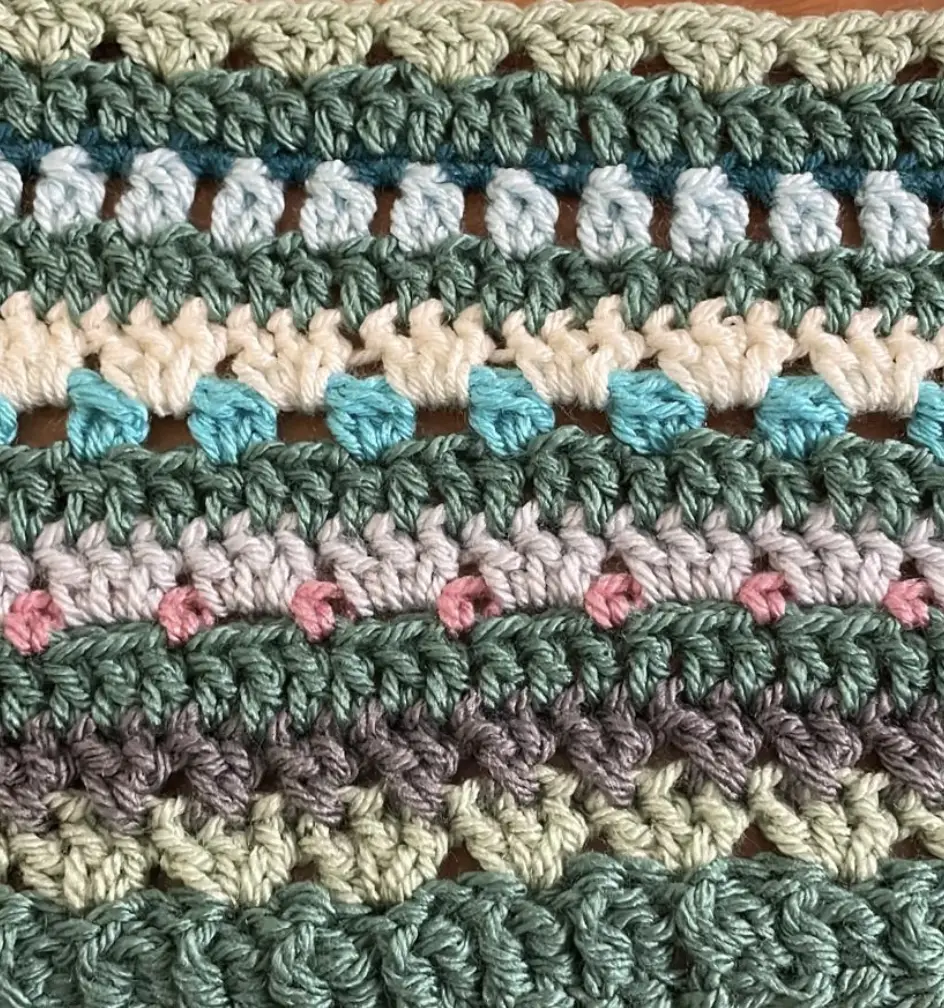
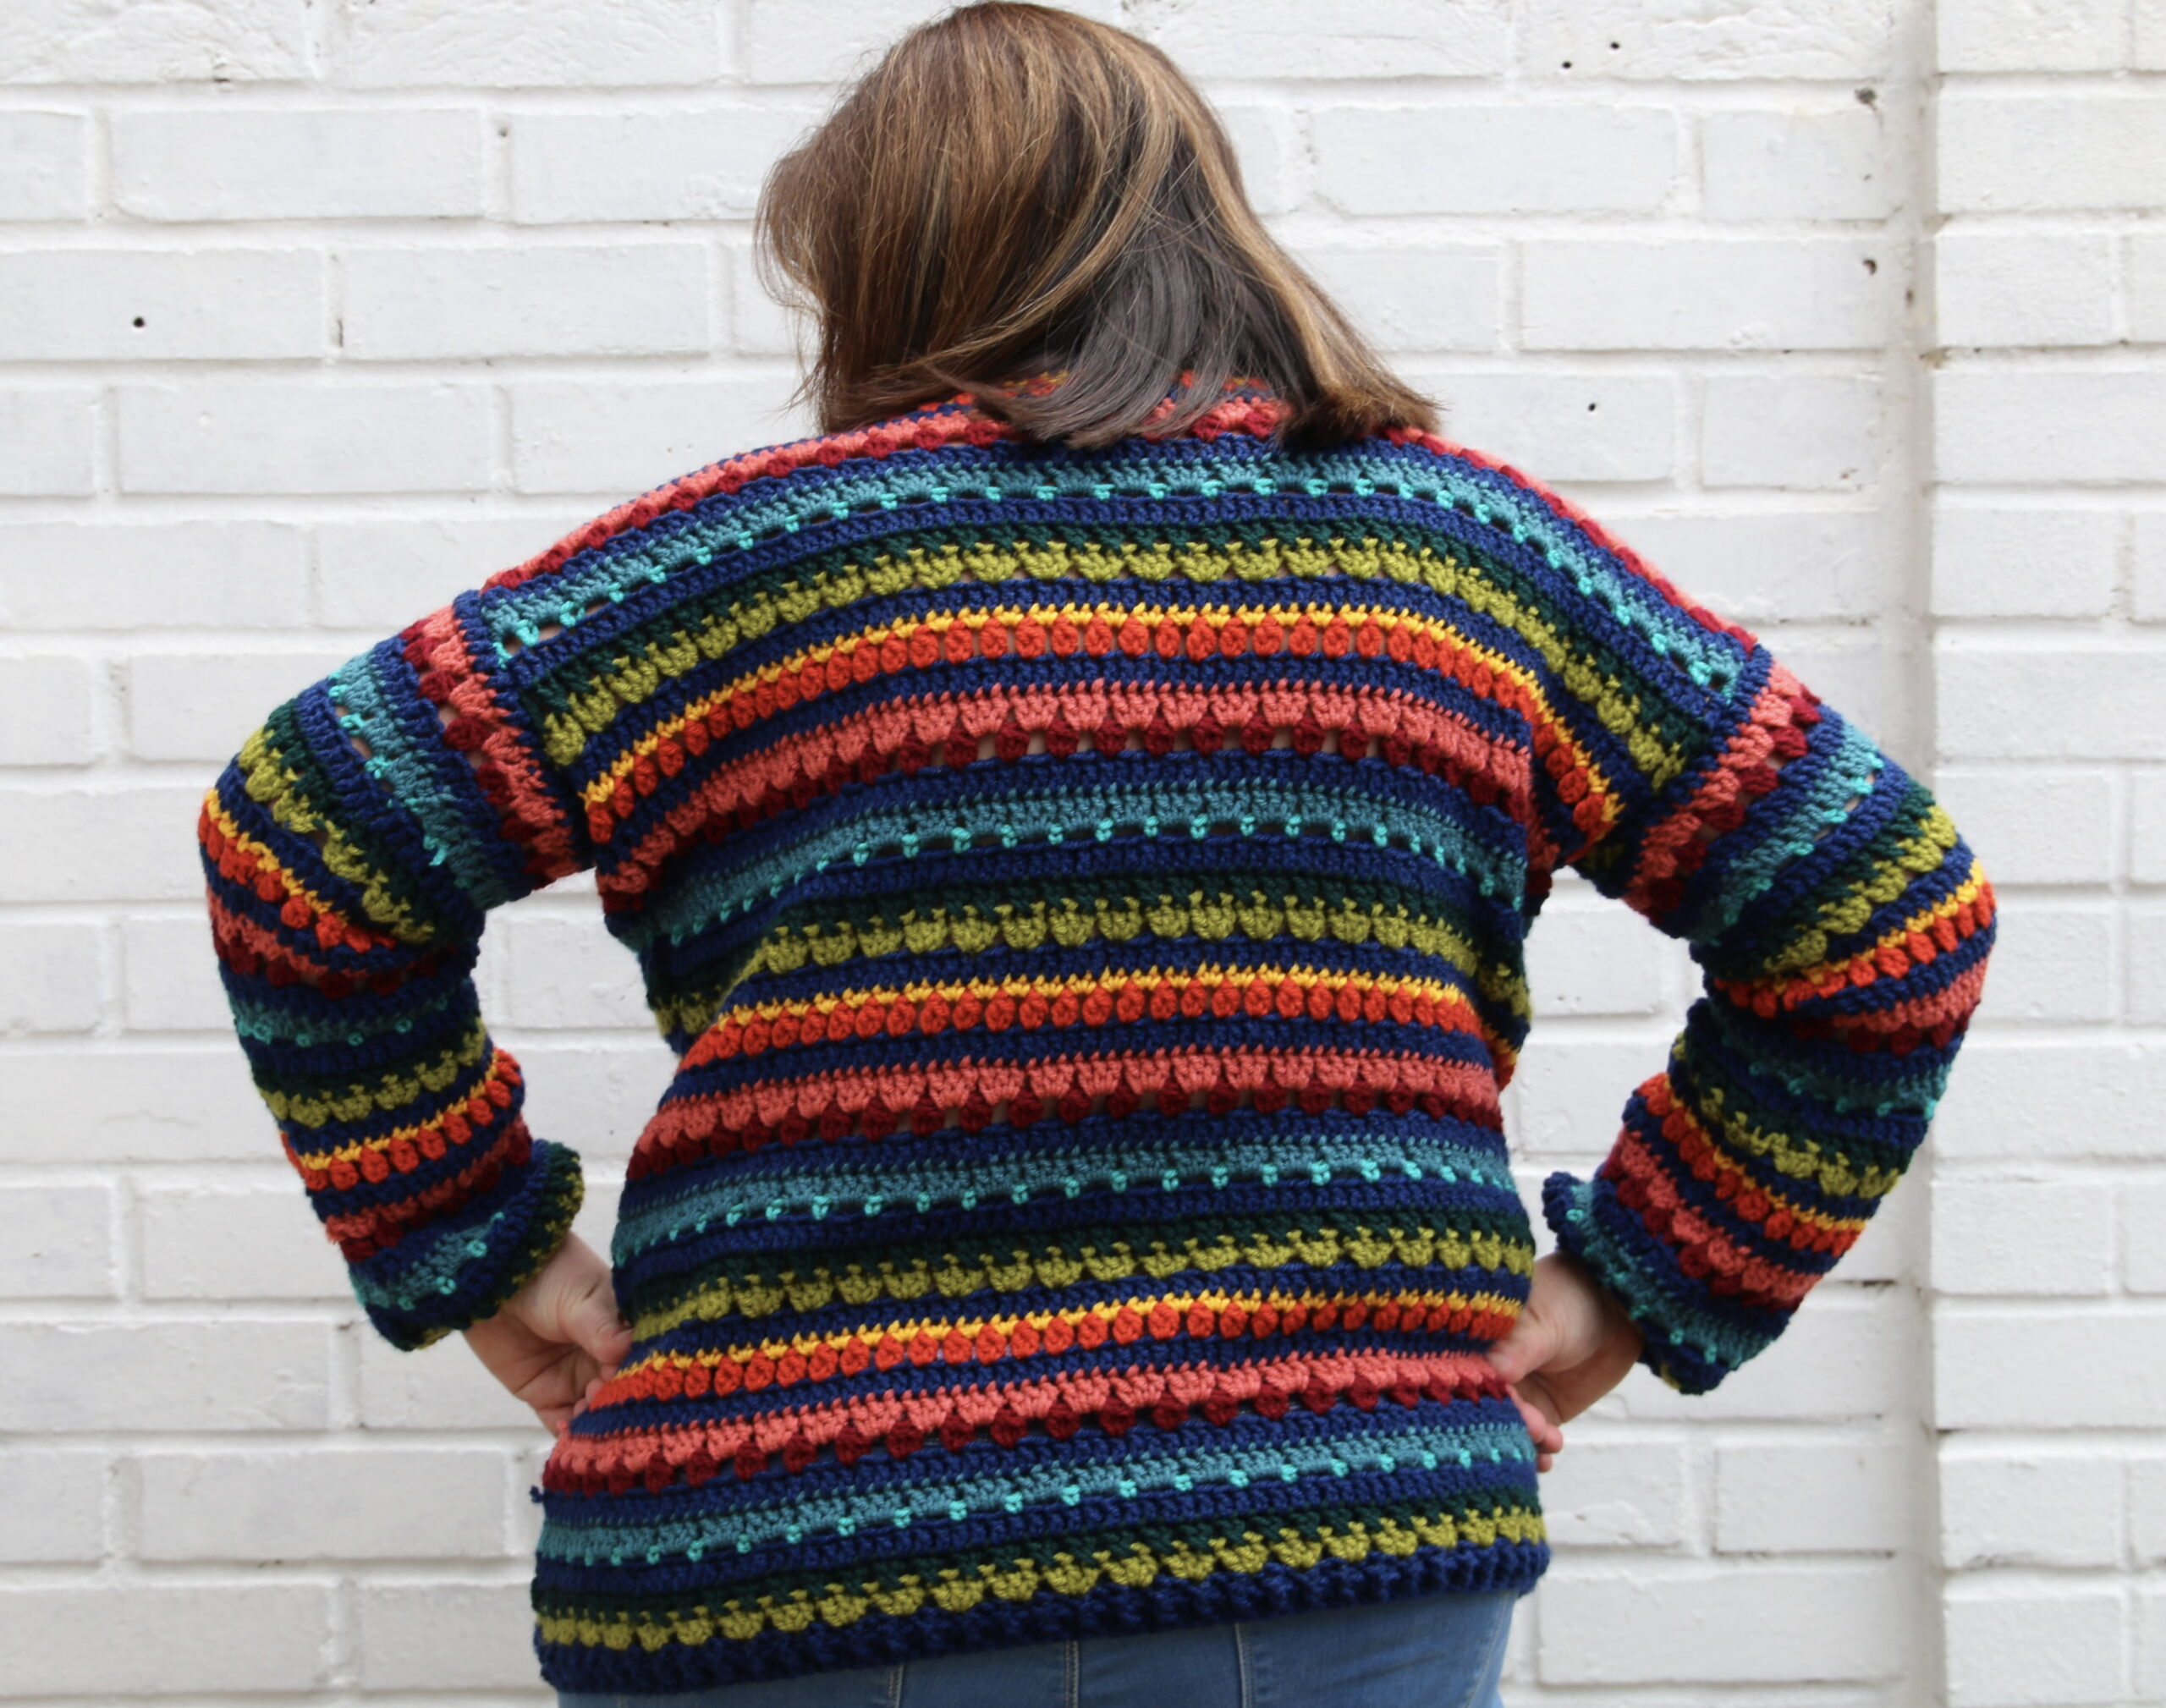
The picture below shows the different stitches used in the colours as per the pattern.
Make a tension square before you start – to check your tension. FDC18 sts, and work pattern repeat as per body pieces.
Body (make 2)
Made in rows. Fasten off yarn at the end of each row and rejoin yarn working with the right side facing you for every row. Do not turn your work.
Row 1 (RS): With Yarn A, and 5.5mm hook FDC 54 (60, 66, 72, 78, 84, 96, 104, 110). Fasten off. (or keep yarn fastened and turn for this row only)
Row 2: Join Yarn A in the top of the ch 3 from row 1 if fastened off. ch3 (Counts as a stitch throughout) * FPDC, BPDC. Rep from * across. Fasten off. Change to Yarn B joining in the top of the ch3 from the previous row.
Row 3: ch3 1DC in base of chain, * skp 2 sts, 3DC in next st. Rep from * across. 1DC in the last stitch of the previous row. Fasten off. Change to Yarn C joining in the top of the ch3 from previous row.
Row 4: ch3, 1DC in next st, * skip st, 1DC in next st, 1DC in skipped st. Repeat from * across. Change to Yarn A, joining yarn in the ch3 of the previous row.
Row 5: ch3 1DC in each st across. Change to Yarn D, joining yarn in the top of the ch3 from the previous row.
Row 6: ch3 (first ch counts as the first SC), skp 2 sts, SC in next st, ch2, skp 2 sts, SC, Rep from * across. On the last rep, there will only be 1 st to skp before the SC. Change to Yarn E, joining in the ch2-sp. [21SC,20 ch2-sp (23SC, 22 ch2-sp, 25SC, 24 ch2-sp, 27SC, 26 ch2-sp, 29SC, 28 ch2-sp, 31SC, 30 ch2-sp, 33SC, 32 ch2-sp, 35SC, 34 ch2-sp, 37SC, 36 ch2-sp) sts]
Row 7: ch3, 2DC in the ch2-sp, 3DC in each ch2-sp across. Change to Yarn A, joining in the top of the ch3 from the previous row.
Row 8: ch3 DC in each st across. Change to Yarn F, joining in the top of the ch3 from the previous row.
Row 9: ch3 2DCcl in the base of ch, * ch1 skp 2 sts, 3DCcl. Rep from * across. Change to Yarn G, joining yarn in the first ch1-sp. [21 clusters,20 ch2-sp (23 clusters, 22 ch2-sp, 25 clusters, 24 ch2-sp, 27 clusters, 26 ch2-sp, 29 clusters, 28 ch2-sp, 31 clusters, 30 ch2-sp, 33 clusters, 32 ch2-sp, 35 clusters, 34 ch2-sp, 37 clusters, 36 ch2-sp) sts]
Row 10: ch3, 2DC in the first ch1-sp, 3DC in each ch1-sp across. Change to Yarn A, joining in the top of the ch3 from the previous row.
Row 11: ch3 DC in each st across. Change to Yarn H, joining in the top of the ch3 from the previous row.
Row 12: ch3, DC in st at base of ch, skp st, 2DCcl in next st, *ch1, 2DCcl. Rep from * across, making 1DC in final st. Change to Yarn I, by joining to top of ch3 with a SC. [31 clusters, 30 ch1-sp (34 clusters, 33 ch1-sp, 37 clusters, 36 ch1-sp, 40 clusters, 39 ch1-sp, 43 clusters, 42 ch1-sp, 46 clusters, 45 ch1-sp, 49 clusters, 48 ch1-sp, 52 clusters, 51 ch1-sp, 55 clusters, 54 ch1-sp) sts]
Row 13: 2SC in each ch1-sp across, make 1SC in top of final DC. Change to Yarn A, joining in the first SC where the yarn was joined.
Row 14: ch3 DC in each st across. Change to Yarn B, joining in the top of the ch3 from the previous row.
Repeat rows 3 -14 a further 3 times.
Sleeves – make 2
Worked in the round, finish the stitch, then ss to join with new colour. Fasten off each colour at the end of each round.
Round 1 (RS): FDC 15 (18, 21, 24, 27, 30, 33, 36, 39) ss to join continue in the same direction. [15 (18, 21, 24, 27, 30, 33, 36, 39) sts]
Round 2: ch3 FPDC, BPDC across. Change to Yarn B
Round 3: ch3 DC in base of chain, 2DC in each st around. ss to join changing to Yarn C. [30 (36, 42, 48, 54, 60, 66, 72, 78) sts]
Round 4: ch3, 1DC in next st, * skp st, DC in next st, DC in skipped st. Repeat from * across. Change to Yarn A.

Round 5: ch3 1DC in each st around. ss to join with Yarn D.
Round 6: ch3 (first ch counts as the first SC), skp 2 sts, SC in the 3rd st, * ch2, skp 2 sts, SC. Repeat from * around, ss to top of ch1. Change to Yarn E joining in the ch3 sp. [10SC,10 ch2-sp (12SC, 12 ch2-sp, 14SC, 14 ch2-sp, 16SC, 16 ch2-sp, 18SC, 18 ch2-sp, 20SC, 20 ch2-sp, 22SC, 22 ch2-sp, 24SC, 24 ch2-sp, 26SC, 26 ch2-sp) sts]
Round 7: ch3, 2DC in the ch-sp, 3DC in each ch2-sp around. ss to join, change to Yarn A.
Round 8: ch3, 1DC in each st around. ss to join with Yarn F.
Round 9: ch3, 2DCcl, ch1 *skp 2 sts, 3 DCcl, ch1. Repeat from * around. ss to join, change to Yarn G, joining in a ch-sp. [10 clusters,10 ch2-sp (12 clusters, 12 ch2-sp, 14 clusters, 14 ch2-sp, 16 clusters, 16 ch2-sp, 18 clusters, 18 ch2-sp, 20 clusters, 20 ch2-sp, 22 clusters, 22 ch2-sp, 24 clusters, 24 ch2-sp, 26 clusters, 26 ch2-sp) sts]
Round 10: ch3, 2DC in the ch-sp, 3DC in each ch1-sp. ss to join, change to Yarn A.
Round 11: ch3 1DC in each st around. ss to join with Yarn H.
Other Crochet cardigan patterns
>>>Easy Textured short Sleeved Crochet Cardigan

Round 12: ch3 1DC in next st, ch1 * skp 1 st, 2DCcl, ch1. Repeat from * around. ss to join. Change to Yarn I, joining in the ch1-sp. [15 clusters,15 ch1-sp (18 clusters, 18 ch1-sp, 21 clusters, 21 ch1-sp, 24 clusters, 24 ch1-sp, 27 clusters, 27 ch1-sp, 30 clusters, 30 ch1-sp, 33 clusters, 33 ch1-sp, 36 clusters, 36 ch1-sp, 39 clusters, 39 ch1-sp) sts]
Round 13: 2SC in each ch1-sp around ss to join, change to Yarn A.
Round 14: ch3 1DC in each st around.
Round 15: ch3 DC in base of chain, skp 2 sts, * 3DC in next st, skp 2 sts. Repeat from * around. ss to join changing to Yarn C.
Repeat rows 4-15 once more (Avocado – Blue)
Repeat rows 4-11 once more (finishing on the Blue after the coral)
To make up.
Sew in the ends on the sleeves.
With RS facing inwards on the body pieces, sew the sleeves into the jumper (RS facing).
Use your ends to sew the remaining side seams.
Neckline. Using Yarn A, sew/ crochet together the shoulders of the jumper leaving a gap of 20cm in the middle for the neck opening. Fasten off, weave in ends.
Join Yarn A, and work 1 row of Ch3, FPDC, BPDC around the opening, ss to join. Fasten off, weave in ends.
Join me at Off The Hook For You to share your crochet!
Thanks for visiting – I’d love to stay connected with you so please sign up for my email list where a free PDF pattern is waiting for you (just so you can see what my PDF patterns are like).
Finished one of my crochet pattern makes? I’d love to see it and so would the world, so get sharing! You can find me in the following ways:
- Follow me on Pinterest
- Join my new Facebook group
- Share a picture on Instagram and tag me #offthehookforyou
- Share your projects on Ravelry
- Share your projects on LoveCrafts
Disclaimer
This post may contain affiliate links which I earn a small commission from if you choose to click and purchase anything from. You pay the same price, I get a very small amount for sending you their way. It helps me to make my crochet patterns free on the blog.


